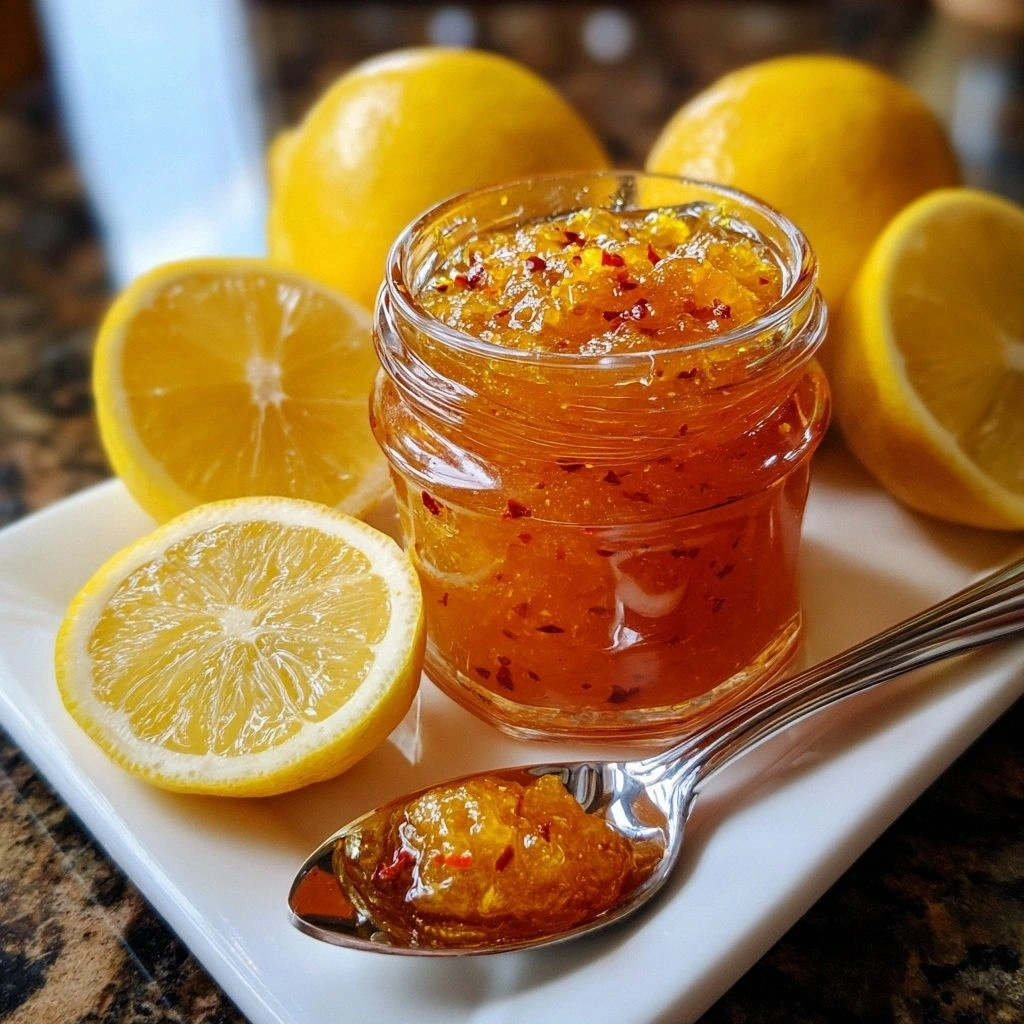
It started with a kitchen catastrophe that had me clutching a ruined batch of lemon jam, the jar leaking onto the counter like a sour sun. I was halfway through the recipe, the citrus had gone flat, and the pectin was clumping like a bad relationship. That night, I swore I would never again trust a lemon jam that tasted like a citrusless puddle. Fast forward to today, and I’m about to unveil the definitive version of Lemon–Ginger Chili Sunshine Ja, a jam that bursts with brightness, heat, and a glossy finish that will make your taste buds dance.
Imagine the first bite: a citrus wave that hits the tongue like a splash of sunshine, followed by a gentle kick of chili that lingers, and a subtle warmth from ginger that rounds it all out. The aroma is a citrusy perfume with a peppery undertone that invites you to keep digging. The texture is silky, not syrupy, with a slight jiggle that feels almost like a liquid candy. The sound of the spoon clinking against the jar is oddly satisfying, like a tiny celebration. And the feel of the jar itself—cool, smooth, and promising—makes you feel like you’re holding a treasure chest of flavor.
What sets this version apart is that every element is balanced to perfection: the acidity of freshly squeezed lemons, the natural sweetness of sugar, the firm set of pectin, the sharpness of chili flakes, and the earthy warmth of ginger. I dared to add chili flakes because most recipes shy away from heat, and that daring move creates a flavor profile that is both bold and harmonious. The result is a jam that coats your spoon like velvet and spreads like a silky river. I dare you to taste this and not go back for seconds. This is hands down the best version you'll ever make at home.
Picture yourself pulling this out of the oven, the whole kitchen smelling incredible, the jar gleaming in the light, and a spoonful of sunshine waiting to be savored. The anticipation is electric, the aroma intoxicating, and the taste a revelation. I’ll be honest—I ate half the batch before anyone else got to try it, and the rest of the jar is still a secret weapon in my pantry. This jam is not just a condiment; it’s a mood enhancer, a flavor explosion, and a conversation starter. Let me walk you through every single step—by the end, you’ll wonder how you ever made it any other way.
What Makes This Version Stand Out
- Flavor: The combination of lemon, ginger, and chili creates a layered taste that’s bright, spicy, and aromatic, unlike any other jam.
- Texture: The precise use of pectin guarantees a smooth, glossy consistency that melts in your mouth.
- Heat: A pinch of chili adds a subtle, lingering warmth that elevates the citrus profile without overpowering it.
- Freshness: Using freshly juiced lemons and grated ginger preserves the natural flavors that canned or frozen ingredients can’t match.
- Versatility: This jam works beautifully on toast, in desserts, as a glaze, or even as a savory topping for meats.
- Ease: The recipe is straightforward, requiring only a single pot and a few simple steps.
- Make‑ahead: Once set, it keeps wonderfully in the fridge or freezer, making it a perfect batch‑cooking project.
- Presentation: The glossy finish and vibrant color make it a showstopper for any table setting.
Alright, let's break down exactly what goes into this masterpiece…
Inside the Ingredient List
The Flavor Base
Fresh Lemons are the heart of this jam. They provide the essential acidity that brightens the overall profile and balances the sweetness. The juice is extracted from four cups of ripe lemons, while the zest is grated into the mixture to release aromatic oils. If you skip the zest, you’ll lose that punch of citrus aroma that makes the jam feel alive. For the best flavor, choose lemons that are slightly underripe; they’re less acidic and sweeter, which creates a smoother final product. If you can’t find fresh lemons, a high-quality bottled lemon juice can substitute, but you’ll lose the fresh zest’s subtle fragrance.
The Texture Crew
Granulated Sugar is the sweet counterbalance to the lemon’s tartness. It also plays a critical role in the jam’s preservation by lowering the water activity. Using two cups of sugar ensures a sweet, not syrupy, finish. If you prefer a lower sugar version, you can reduce the amount to 1.5 cups, but the jam may set a bit looser. The sugar’s crystalline structure helps the pectin form a gel, so don’t rush this step. It’s best to dissolve the sugar in the lemon juice before adding the pectin to create a smooth base.
The Unexpected Star
Fresh Ginger adds a warm, peppery note that cuts through the citrus tang. One tablespoon of finely grated ginger is enough to give the jam depth without overwhelming the lemon flavor. Ginger’s natural antioxidants also add a subtle health benefit. If you’re a fan of ginger’s heat, you can increase the amount to two tablespoons. However, be careful not to overdo it, or the jam will taste like a ginger tea. For a milder version, you can use ground ginger, but the fresh version offers a brighter aroma.
The Final Flourish
Red Chili Flakes bring a gentle heat that lingers on the palate. One teaspoon is the sweet spot, but you can adjust to taste. The chili adds a smoky depth that complements the lemon’s bright notes. If you’re sensitive to heat, you can reduce the flakes to half a teaspoon or omit them entirely. The chili’s color also gives the jam a warm, inviting hue. When combined with the lemon zest, the color becomes a natural, appetizing shade of amber.
Everything's prepped? Good. Let's get into the real action…
The Method — Step by Step
- Begin by zesting and juicing the lemons in a large, heat‑proof saucepan. As the citrus oils mingle, the kitchen fills with a bright, invigorating aroma that signals a promising start. Make sure to strain the juice to remove any pulp or seeds; you want a clean base. The zest should be finely grated to release maximum flavor without bitterness. This step is crucial because the zest’s oils carry the lemon’s bright character throughout the jam. If you skip it, the final product will feel flat.
- Add the granulated sugar to the lemon juice and stir until it dissolves completely. The sugar will start to caramelize slightly, giving the mixture a golden sheen. Keep the heat on medium and let the sugar melt into the juice, forming a syrupy base. If the sugar doesn’t dissolve, increase the heat slightly and stir gently. The goal is a smooth, even mixture that will support the pectin’s thickening action. When the sugar is fully dissolved, you’ll notice a subtle, sweet fragrance emerging.
- Introduce the freshly grated ginger to the saucepan. The ginger should release a warm, peppery aroma that contrasts nicely with the citrus. Stir the mixture gently, allowing the ginger’s flavor to infuse the liquid. This step is essential for depth; without ginger, the jam would taste one‑dimensional. The ginger’s heat is mild but persistent, so it’s a perfect complement to the chili flakes. Keep stirring to prevent any sticking at the bottom of the pan.
- Now it’s time for the chili flakes. Sprinkle them over the mixture and stir until they’re evenly distributed. The heat should start to rise, but it should not be overpowering. If you’re a heat lover, you can add a bit more chili; if you’re a cautious cook, keep it to one teaspoon. This step adds a subtle kick that elevates the jam’s overall profile. The chili’s color also gives the jam an inviting amber hue. Watch the mixture as it begins to bubble gently.
- Bring the mixture to a gentle boil while stirring constantly. The boiling point is the moment when the jam starts to thicken and set. Keep the heat moderate to avoid scorching. As the liquid boils, you’ll notice a thickening film forming on the surface. This is the early sign of the pectin’s action. Don’t let the mixture boil too hard; a rolling boil can cause the jam to overflow or burn. Maintain a steady simmer.
- While the mixture is boiling, dissolve the pectin packet in a small amount of water. The pectin should be fully hydrated before adding it to the pan. This step ensures a smooth, lump‑free jam. Once the pectin is dissolved, pour it into the saucepan in a steady stream, whisking continuously. The mixture should start to thicken rapidly, creating a glossy sheen. This is the moment of truth; the jam is coming together. Keep stirring to ensure even distribution of the pectin.
- Let the jam simmer for an additional 5–7 minutes after adding the pectin. This allows the flavors to meld and the jam to reach the desired consistency. The jam should be thick enough to coat the back of a spoon but still pourable. If it’s too thin, continue simmering for a few more minutes. If it’s too thick, add a splash of water to loosen it slightly. Taste the jam to confirm the balance of sweet, tart, and heat. This step ensures the final product is perfectly balanced.
- Test the jam’s set by placing a small amount on a chilled plate and letting it sit for a minute. The jam should hold its shape and not slide off. If it doesn’t set, you may need to simmer it a bit longer. This test is a quick way to ensure your jam is ready for canning. The ideal consistency is firm yet spreadable. Once satisfied, remove the pan from the heat to avoid overcooking.
- While the jam is still hot, pour it into sterilized jars, leaving about a ¼ inch of headspace at the top. This headspace allows the jam to expand slightly as it cools. Seal the jars immediately with clean lids. The jam will contract as it cools, creating a vacuum seal that preserves freshness. If you’re not planning to store the jam for long periods, you can also keep it in the refrigerator. This step ensures the jam stays fresh and safe.
- Let the jars cool to room temperature, then check the seals. The lids should not flex when pressed in the center; this indicates a proper seal. Store the sealed jars in a cool, dark place for up to a year. If the seal fails, refrigerate the jam immediately and use within a week. This step is critical for long‑term preservation. The sealed jars will keep the jam’s vibrant flavor intact. Enjoy your homemade jam as soon as it’s fully set.
- If you’re planning to use the jam in the next few days, you can keep the jars in the refrigerator. The cool temperature will slow down the jam’s natural fermentation, keeping it fresh for up to two weeks. Store the jars in an upright position to avoid spills. When ready to serve, give the jar a gentle shake to redistribute any settled sugar. This keeps the jam smooth and ready to spread.
- When you’re ready to serve, scoop a spoonful onto a slice of crusty bread. The jam will melt into the bread, creating a sweet‑tart, spicy drizzle that will awaken your senses. Pair it with a dollop of Greek yogurt for a creamy contrast, or drizzle it over grilled chicken for a savory twist. The possibilities are endless, and each bite will remind you why this jam is a culinary revelation. Enjoy the moment, and share the sunshine with friends and family.
- Remember to label your jars with the date of preparation. This practice helps you keep track of freshness and ensures you consume the jam at its peak. If you notice any off odors or mold, discard the jar immediately. The jam’s bright, citrusy aroma is a sign of freshness; any deviation is a red flag. Keep the jars in a cool, dark place to maintain quality. Your homemade jam will be a staple in your kitchen for months to come.
That's it — you did it. But hold on, I've got a few more tricks that'll take this to another level. These insider secrets will elevate your jam from good to unforgettable.
Insider Tricks for Flawless Results
The Temperature Rule Nobody Follows
Many cooks think that once the mixture boils, they can just let it sit. In reality, the temperature at which you bring the jam to a rolling boil is critical. Aim for a steady 104–107°C (220–225°F). This range ensures the pectin activates without scorching. If the temperature is too low, the jam will stay runny. If it’s too high, you’ll risk burning the sugar and altering the flavor. Use a candy thermometer for precision, especially if you’re aiming for a professional result.
Why Your Nose Knows Best
As the jam simmers, the aroma changes. When it starts to smell sweet and slightly caramelized, it’s a good sign that the sugar is dissolving correctly. If the scent is sour or overly acidic, you’re still missing the sweet balance. Trust your nose; it’s a reliable guide for judging readiness. A strong citrus scent paired with a faint ginger undertone means the jam is on track. If you’re uncertain, taste a small amount for confirmation.
The 5-Minute Rest That Changes Everything
After simmering, let the jam rest off the heat for five minutes before pouring into jars. This pause allows the pectin to fully set and the flavors to meld. Skipping this step can result in a slightly uneven texture. The rest period also lets the mixture cool just enough to avoid steam damage to the jar lids. A five‑minute rest is a small time investment that pays off in texture and taste. It’s a trick that many seasoned jam makers swear by.
The Clean Lids Secret
A common mistake is using lids that are not perfectly clean, which can cause poor sealing. Wipe the lids with a damp cloth before use to remove any dust or residue. This simple step ensures a tight seal and extends the jam’s shelf life. Even a tiny speck can compromise the vacuum seal. Many people overlook this, but it’s a quick fix that saves future headaches. Clean lids are the unsung heroes of jam preservation.
The Sweet Spot for Chili
The amount of chili flakes can drastically alter the jam’s profile. Too much chili can overpower the lemon, while too little will leave the jam bland. I recommend starting with one teaspoon and adjusting after tasting. If you prefer a spicier jam, add an extra pinch, but test after each addition. This incremental approach gives you control over the heat level. It’s a simple tweak that makes the jam uniquely yours.
The Final Squeeze
Just before pouring the jam into jars, give the mixture a final stir and a quick taste. This final check ensures that the flavors are balanced and the consistency is perfect. If the jam feels too thick, add a splash of water; if it’s too thin, simmer a bit longer. This last-minute adjustment can make the difference between a good jam and a great jam. Trust your palate; it’s the best judge of flavor.
Creative Twists and Variations
This recipe is a playground. Here are some of my favorite ways to switch things up:
Citrus Burst Twist
Swap half of the lemon juice for orange juice to add a sweet, floral note. The orange’s natural sweetness balances the heat from the chili. This variation is perfect for summer picnics. It also pairs beautifully with goat cheese on crackers. The color shift to a golden hue is visually appealing. Try it on toast for a brunch favorite.
Honeyed Heat Variation
Replace half of the sugar with raw honey for a richer, floral sweetness. Honey’s unique flavor profile complements the ginger’s warmth. This version is excellent for drizzling over grilled pork or chicken. The honey also adds a subtle caramel undertone. It’s a delightful twist for those who love a more natural sweetener. The texture remains silky and smooth.
Herb‑Infused Surprise
Add a handful of fresh thyme leaves during the simmering stage. The herb’s earthy aroma adds depth to the jam. This variation pairs wonderfully with roasted lamb or beef. The thyme also brings a subtle bitterness that balances the sweetness. It’s a great way to elevate a simple jam into a gourmet accompaniment. Serve it with a cheese board for a sophisticated touch.
Spicy Mango Edition
Incorporate diced ripe mango into the jam for a tropical twist. The mango’s sweetness pairs with the lemon’s tartness and the chili’s heat. This version is ideal for summer desserts or as a topping for ice cream. The mango adds a vibrant color and a juicy texture. It’s a fun, unexpected take on the classic recipe. Let your creativity run wild.
Cocoa‑Lemon Fusion
Stir in a tablespoon of unsweetened cocoa powder just before adding the pectin. The chocolate adds a deep, bittersweet note that contrasts with the citrus. This fusion is great for a decadent spread on croissants. The cocoa also thickens the jam slightly, giving it a richer mouthfeel. It’s a daring combination that pays off. Try it for a unique dessert experience.
Balsamic Lemon Glaze
Finish the jam with a splash of aged balsamic vinegar for a tangy, caramelized finish. The vinegar adds depth and complexity to the flavor profile. This glaze works wonderfully on roasted vegetables or as a drizzle over grilled salmon. The balsamic’s acidity balances the sweetness of the jam. It’s an elegant, restaurant‑style finish. Perfect for impressing guests.
Storing and Bringing It Back to Life
Fridge Storage
Store the sealed jars in the refrigerator for up to two weeks. Keep them upright to prevent spills. The cool temperature slows down natural fermentation, maintaining freshness. When ready to use, give the jar a gentle shake to redistribute any settled sugar. The jam will be smooth and ready to spread. This method preserves the vibrant flavor without compromising safety.
Freezer Friendly
For longer storage, transfer the jam into freezer‑safe containers, leaving a ¼ inch headspace. The jam can be frozen for up to six months. Thaw overnight in the refrigerator before use. The texture remains intact, and the flavor stays bright. Freezing is a convenient way to keep your jam on hand for future meals. Just remember to label the containers with the date.
Best Reheating Method
To reheat, place the jar in a bowl of warm water for 10–15 minutes. The water will gently warm the jam without scorching it. Add a tiny splash of water before reheating if the jam feels too thick. This steams back the jam to its original silky consistency. Once warmed, stir well to ensure even texture. The reheated jam will taste as fresh as the first day.