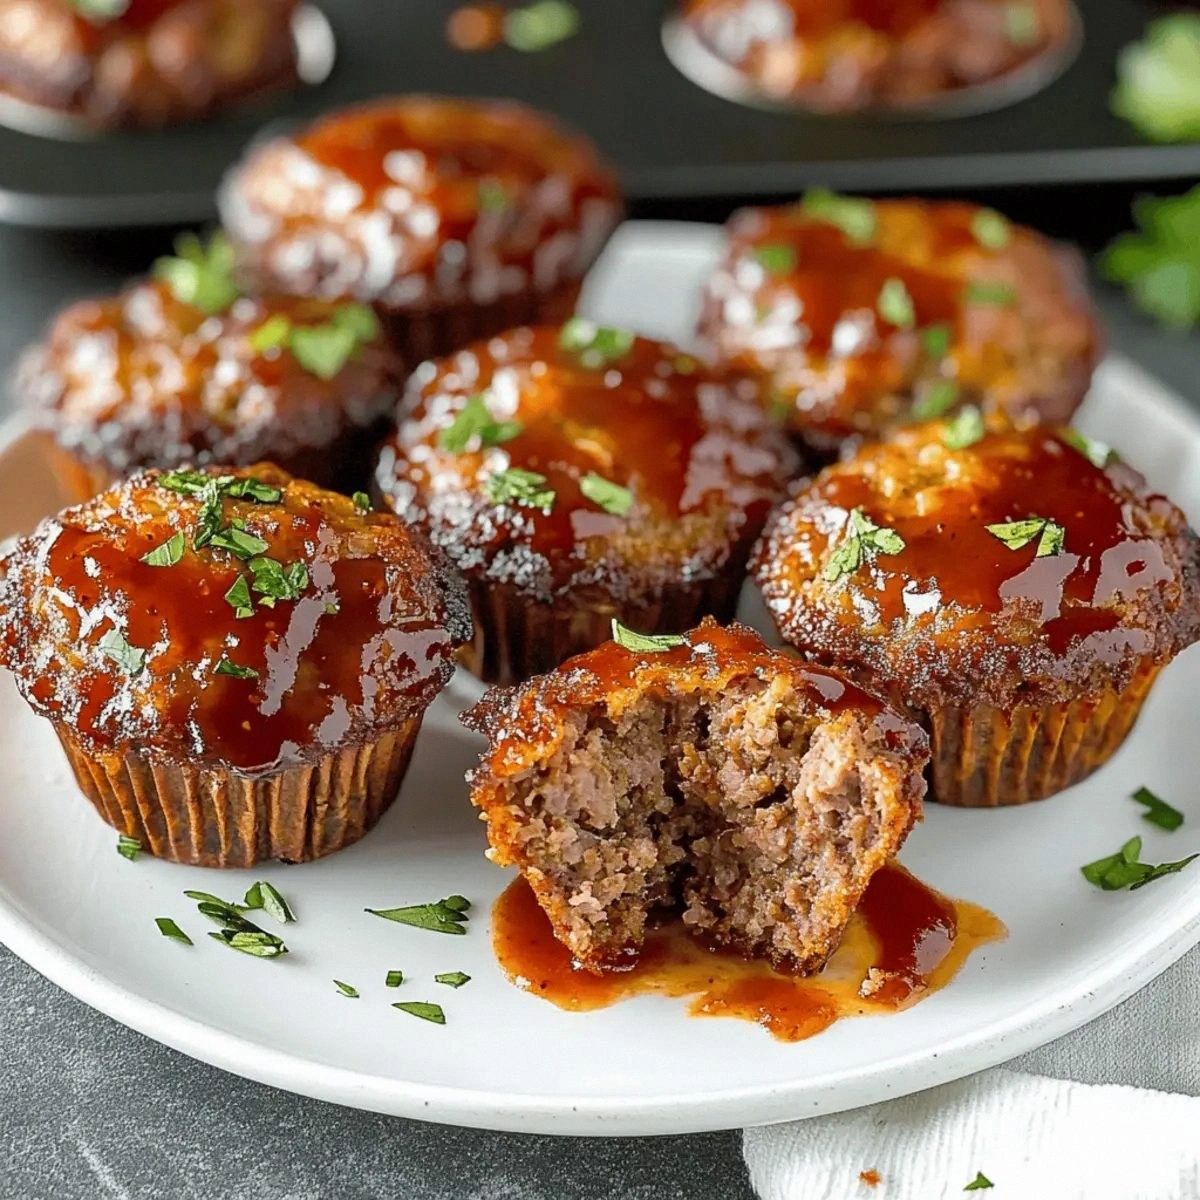
I'm standing in my kitchen at 7:30 PM on a Tuesday, staring at a mountain of ground beef and a muffin tin, wondering how my life has come to this. My kids are circling like hungry vultures, my partner's giving me that "what culinary experiment are you subjecting us to now" look, and I'm pretty sure the dog just filed a formal complaint about dinner delays. But here's the thing — what started as a desperate attempt to make meatloaf less boring has become my family's most requested meal. These mini meatloaf muffins aren't just cute; they're a revelation wrapped in a cupcake-shaped package of pure comfort food genius.
The first time I made these, I was trying to solve three problems at once: get dinner on the table in under an hour, make meatloaf appealing to picky eaters, and create individual portions that wouldn't result in the usual "but I wanted the end piece" arguments. What emerged from my oven 45 minutes later was nothing short of magical — perfectly portioned meatloaf with crispy caramelized edges, a glossy ketchup glaze that would make a candy maker jealous, and the kind of tender interior that makes you close your eyes involuntarily when you take a bite.
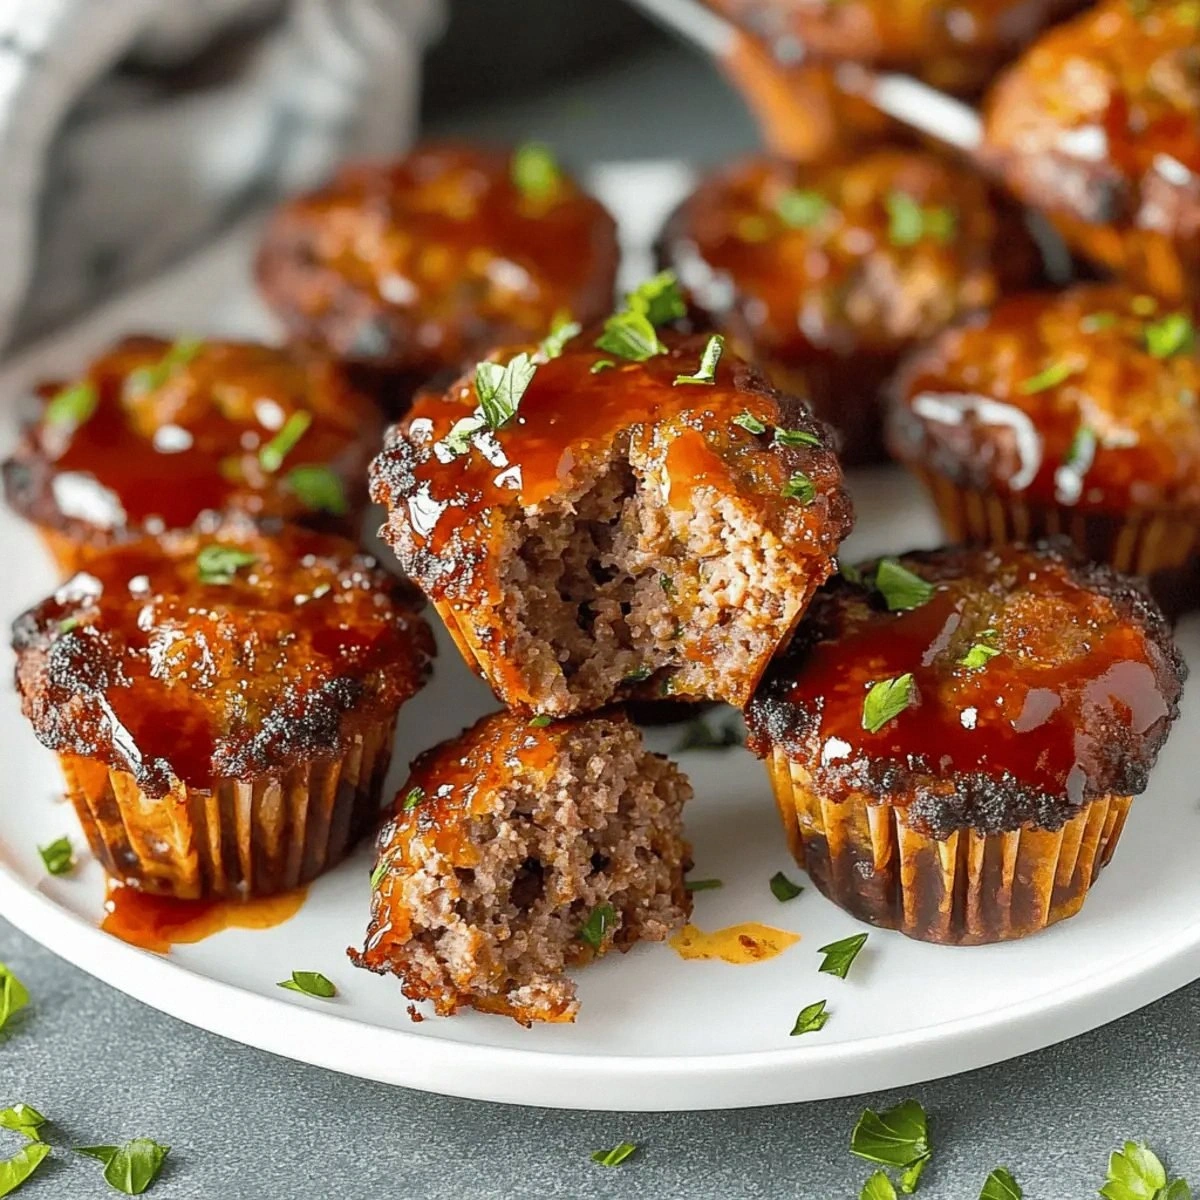
Picture this: You're pulling a tray of these beauties from the oven, and the whole kitchen fills with that intoxicating aroma of beef, onions, and spices that's been making humans weak in the knees since someone first thought to grind meat and season it. The ketchup topping has bubbled and slightly charred in spots, creating those little pockets of concentrated flavor that taste like someone bottled childhood comfort. Your family gathers around, suddenly very interested in helping set the table, and you know you've won without even trying.
But here's where it gets really good — these mini marvels are actually easier than traditional meatloaf. No worrying about whether the center is cooked through, no messy slicing, no dry edges or undercooked middles. Each muffin cooks evenly, gets those coveted crispy edges all around, and portions itself perfectly. I dare you to taste one and not go back for seconds, maybe even thirds. Let me walk you through every single step — by the end, you'll wonder how you ever made it any other way.
What Makes This Version Stand Out
Okay, ready for the game-changer? These aren't just regular meatloaf shrunk down to muffin size. I've spent months perfecting the ratio of ingredients, the mixing technique that keeps them tender, and the cooking method that creates maximum flavor in minimum time. While most recipes get this completely wrong by simply cramming regular meatloaf mix into a muffin tin, I've discovered the secrets that make these genuinely better than their full-sized cousin.
- Edge-to-Edge Crispy: Every single bite gets that coveted caramelized exterior that normally only the ends of a traditional loaf enjoy. The increased surface area means more Maillard reaction, more flavor development, and more of those addictive crispy bits that have everyone fighting over who gets the muffins from the edge of the tin.
- Speed Demon Dinner: These cook in half the time of regular meatloaf, going from raw ingredients to dinner table in under 45 minutes. The individual portions heat up faster, cook more evenly, and eliminate the dreaded "is the middle done yet?" anxiety that plagues every home cook who's ever sliced into a pink-centered meatloaf.
- Kid-Approved Portion Control: Children love anything in miniature form, and these hand-held portions make dinner feel like a treat rather than a chore. Plus, you can customize each muffin with different toppings or mix-ins, turning one dinner into personalized meals without any extra work.
- Meal-Prep Magic: Make a double batch on Sunday, and you've got lunches and quick dinners sorted for the week. They reheat beautifully in the microwave or air fryer, maintaining their texture better than traditional meatloaf slices that tend to dry out faster.
- Freezer-Friendly Champions: These freeze and thaw like a dream, maintaining their texture and flavor better than any other make-ahead meal I've tried. Wrap them individually, and you've got instant homemade comfort food ready faster than you can order takeout.
- Mix-In Masterpiece: The muffin format lets you add different ingredients to each cup — hide vegetables from picky eaters, add cheese to some but not others, or create flavor variations without making multiple full-sized loaves.
- Confidence Builder: If you've ever struggled with meatloaf that's too dry, too dense, or falls apart when you slice it, this recipe will restore your faith. The smaller size is more forgiving, and you'll nail it on your first try.
Alright, let's break down exactly what goes into this masterpiece...
Inside the Ingredient List
Great cooking starts with understanding your ingredients, and these mini meatloaf muffins are no exception. Every component plays a crucial role in creating the perfect texture, flavor, and appearance. Skip one, and you'll notice the difference — I learned this the hard way so you don't have to.
The Flavor Foundation
Ground beef forms the backbone of these muffins, and not just any ground beef will do. You need an 80/20 blend — that's 80% lean, 20% fat. Go leaner, and your muffins will be dry and crumbly, more like sad little hockey pucks than juicy meatloaf bites. Go fattier, and they'll shrink dramatically, swimming in a pool of grease that will have you questioning your life choices. The 80/20 ratio gives you enough fat for flavor and moisture, but not so much that you're eating a grease bomb.
Onion isn't just filler — it's your secret weapon for moisture and sweetness. I grate my onion on the largest holes of a box grater, which releases more juices than dicing and distributes the flavor throughout every bite. The onion essentially melts into the meat, leaving behind its essence without any crunchy bits that might offend sensitive palates. If you've got onion haters in your house, this grating technique will convert them.
The Texture Team
Breadcrumbs are the unsung heroes of great meatloaf, and here's where most recipes get it wrong. They don't just stretch the meat — they create a tender structure that prevents the proteins from binding together too tightly. Think of breadcrumbs as little sponges that absorb the meat juices during cooking, then release them back as you eat, keeping every bite moist. I prefer plain breadcrumbs over Italian-seasoned ones because I want to control the flavor profile completely.
The egg acts as the glue that holds everything together, but it does so much more. It adds richness, helps emulsify the fat, and creates that perfect sliceable texture that doesn't crumble when you bite into it. One large egg is exactly right for this amount of meat — more and your muffins become rubbery, less and they fall apart like a house of cards in a windstorm.
The Unexpected Star
Ketchup isn't just for topping — I mix some right into the meat mixture for acidity, sweetness, and that nostalgic flavor that says "meatloaf" louder than any other ingredient. The tomatoes' natural glutamates enhance the umami in the beef, creating a depth of flavor that would take hours to develop otherwise. Plus, the sugar in the ketchup helps with caramelization, giving you those beautiful mahogany edges.
The Seasoning Symphony
Seasonings are where you make this recipe your own, but I'm giving you my foolproof blend that's never failed me. Salt is non-negotiable — it enhances every other flavor and helps the proteins bind properly. I use kosher salt because its larger crystals distribute more evenly. Black pepper adds heat and complexity, while garlic powder gives you that savory depth without the harshness of fresh garlic that can overpower the beef.
A touch of Worcestershire sauce is my secret ingredient — it adds complexity, umami, and that certain something that makes people ask "what's in this?" without being able to pinpoint exactly what they're tasting. Just a teaspoon transforms the entire dish from good to restaurant-quality memorable.
Everything's prepped? Good. Let's get into the real action...
The Method — Step by Step
- Preheat your oven to 375°F (190°C). This temperature is the sweet spot — hot enough to create those coveted crispy edges quickly, but not so hot that the outside burns before the inside cooks through. Position your rack in the center of the oven for even heat distribution. While the oven heats, spray a 12-cup muffin tin with non-stick spray, making sure to get into every corner and crevice. These muffins will release beautifully if you prep the pan properly, but they'll stick like glue if you get lazy here.
- In a large bowl, gently break apart the ground beef with your fingertips, being careful not to overwork it. The key word here is "break," not "mash" — you want to maintain the loose texture of the meat. Think of it like handling a newborn puppy: firm enough that it doesn't escape, gentle enough that you don't hurt it. Overworking the meat develops the proteins and creates a dense, tough texture that no amount of ketchup can fix.
- Add the breadcrumbs, grated onion, egg, 1/4 cup of the ketchup, and all your seasonings to the bowl. Now comes the crucial part: mix with your hands until just combined. I mean it — stop the second everything is incorporated. The mixture should look slightly shaggy and hold together when you squeeze a handful, but it shouldn't be a smooth paste. If you've ever made meatballs that bounced off the plate, you know exactly what happens when you over-mix.
- Using a 1/3 cup measure or large cookie scoop, portion the mixture into the muffin cups, filling each about 3/4 full. Don't press down hard — let the mixture rest naturally in the cups. You should get exactly 10-12 muffins, depending on how generous your scoops are. If you end up with extra, you can make free-form mini loaves on a baking sheet, or better yet, make the muffins slightly larger by adding more to each cup.
- In a small bowl, mix the remaining 1/4 cup ketchup with a teaspoon of brown sugar. This isn't just for sweetness — the sugar helps the topping caramelize and creates that glossy, restaurant-quality finish. Brush this mixture over the top of each muffin, making sure to cover the entire surface. The topping will bubble and intensify in flavor as it bakes, creating a tangy-sweet counterpoint to the savory beef.
- Bake for 15 minutes, then remove the pan and add the ketchup topping. Return to the oven for another 10-15 minutes, until the internal temperature reaches 160°F (71°C). The muffins are done when the edges have pulled slightly away from the sides of the cups and the topping is bubbly and caramelized in spots. Let them rest for 5 minutes in the pan — this is crucial for them to set properly and release cleanly.
- Remove the muffins by running a thin knife or offset spatula around the edges, then lift them out. They should come out cleanly, revealing those gorgeous golden-brown sides that promise crispy edges and tender centers. Serve immediately, or let them cool completely for meal prep storage.
That's it — you did it. But hold on, I've got a few more tricks that'll take this to another level...
Insider Tricks for Flawless Results
The Temperature Rule Nobody Follows
I'm going to let you in on a secret that separates good cooks from great ones: temperature matters at every stage. Your ground beef should be cold from the fridge when you start mixing — cold fat is less likely to smear and create a greasy texture. But here's the twist: let your formed muffins sit at room temperature for 15 minutes before baking. This takes the chill off the center, ensuring they cook evenly without the outside drying out while you wait for the middle to catch up.
Why Your Nose Knows Best
Forget timers — your nose is the most sophisticated piece of kitchen equipment you own. When these muffins are nearly done, your kitchen will fill with an intoxicating aroma that's equal parts caramelized ketchup, savory beef, and toasty breadcrumbs. If you smell it before the timer goes off, check them — your oven might run hot, and these can go from perfect to overdone in the blink of an eye. Conversely, if your house isn't smelling amazing by the time your timer dings, give them a few more minutes.
The 5-Minute Rest That Changes Everything
I know it's tempting to dig in immediately — those glossy, perfectly portioned little meatloaves are calling your name. But resist! Those five minutes of resting time allow the juices to redistribute throughout the meat instead of running out onto the plate when you cut into them. It's the difference between a dry, crumbly muffin and one that's juicy and cohesive. Use this time to set the table, toss a quick salad, or just bask in the admiration of your dinner companions.
The Mixing Method That Prevents Dense Muffins
Here's where most people go wrong: they treat meatloaf like bread dough, kneading and mixing until it's homogeneous. Stop! Think of it like making biscuits or pie crust — the less you handle it, the more tender the result. Use your fingertips to gently lift and fold the ingredients together, stopping as soon as you don't see any dry breadcrumbs. The mixture should look slightly marbled with different colors and textures, not like uniform pink putty.
Creative Twists and Variations
This recipe is a playground. Here are some of my favorite ways to switch things up:
The Italian Job
Replace the ketchup with marinara sauce, add a teaspoon each of dried oregano and basil, and mix in some grated Parmesan cheese. Top each muffin with a small cube of mozzarella in the last 5 minutes of baking for a pizza-meatloaf hybrid that's absolutely irresistible. Kids go crazy for these, and adults appreciate the sophisticated flavors.
The Breakfast Club
Add a tablespoon of maple syrup to the meat mixture, use breakfast sausage instead of half the ground beef, and serve these alongside scrambled eggs and hash browns. The sweet-savory combination is perfect for brunch, and they'll keep you full until dinner. Pro tip: make mini versions using a mini-muffin tin for an adorable breakfast buffet.
The Veggie Smuggler
Finely grate carrots and zucchini (squeeze out the excess moisture) and mix them right into the meat. The vegetables add moisture, nutrients, and a subtle sweetness that kids never suspect. I've been making these for my vegetable-averse nephew for years, and he still doesn't know he's eating his veggies. The key is grating them super fine so they disappear into the texture.
The Fancy Pants Version
Use ground lamb instead of beef, add minced garlic, fresh rosemary, and a touch of cinnamon. Top with a glaze made from red currant jelly and balsamic vinegar. These elegant little morsels are perfect for cocktail parties or when you want to impress dinner guests with something familiar yet elevated.
The Heat Seeker's Dream
Add a minced chipotle pepper in adobo sauce to the meat mixture, use pepper jack cheese as a center surprise, and spike the ketchup topping with sriracha. These pack just enough heat to wake up your taste buds without overwhelming the comfort food factor. Serve with cooling sour cream on the side for the perfect balance.
The Thanksgiving Remix
Use ground turkey instead of beef, add sage and thyme, mix in some dried cranberries, and serve with cranberry sauce on the side. These taste like Thanksgiving dinner in every bite, perfect for when you want those holiday flavors without the hours of cooking. They're especially good cold the next day, sliced onto sandwiches with leftover cranberry sauce.
Storing and Bringing It Back to Life
Fridge Storage
These mini meatloaf muffins are meal-prep champions. Store them in an airtight container in the refrigerator for up to 4 days. I like to separate layers with parchment paper to prevent them from sticking together. The key is letting them cool completely before storing — trapping warm muffins in a container creates condensation that leads to soggy bottoms, and nobody wants that.
Freezer Friendly
These freeze beautifully for up to 3 months. Wrap each cooled muffin individually in plastic wrap, then place them in a freezer bag. This double-wrapping prevents freezer burn and lets you grab just what you need. To thaw, transfer to the refrigerator overnight, or defrost in the microwave on 30% power. They'll taste almost as good as fresh, which is saying something for frozen meatloaf.
Best Reheating Method
The microwave works in a pinch, but for best results, reheat in a 300°F oven for 10-12 minutes. Add a tiny splash of water to the pan and cover with foil — this creates steam that brings them back to juicy perfection. If you're reheating from frozen, add 5-10 minutes to the time. The air fryer is another excellent option: 5 minutes at 350°F gives you crispy edges that rival the original baking.