I still remember the night I almost burned my kitchen down chasing a “quick brownie fix.” I had a bag of stale chocolate chips, a jar of almond milk, and a dream of a creamy, fudgy treat that would make my friends swoon. The oven door was ajar, the timer was set to 10 minutes, and I was already halfway through mixing the batter. The result? A soggy mess that tasted like it had been through a blender and back. That disaster was the spark that lit the fire for the recipe I’m about to share.
Picture this: a bowl of thick, silky batter that smells like vanilla and dark chocolate, the kind that lingers in your kitchen like a sweet perfume. The sound of the whisk gliding through the mixture is almost hypnotic, a steady rhythm that tells you you’re on the right track. When you finally scoop it into a pan, the batter sizzles on contact, releasing a caramelized aroma that makes your mouth water. The texture is a paradox—soft on the inside, with a crisp edge that snaps like a fresh cookie crust. The flavor is a layered symphony: the richness of chocolate, the subtle tang of Greek yogurt, and a hint of maple syrup that sweetens without overpowering.
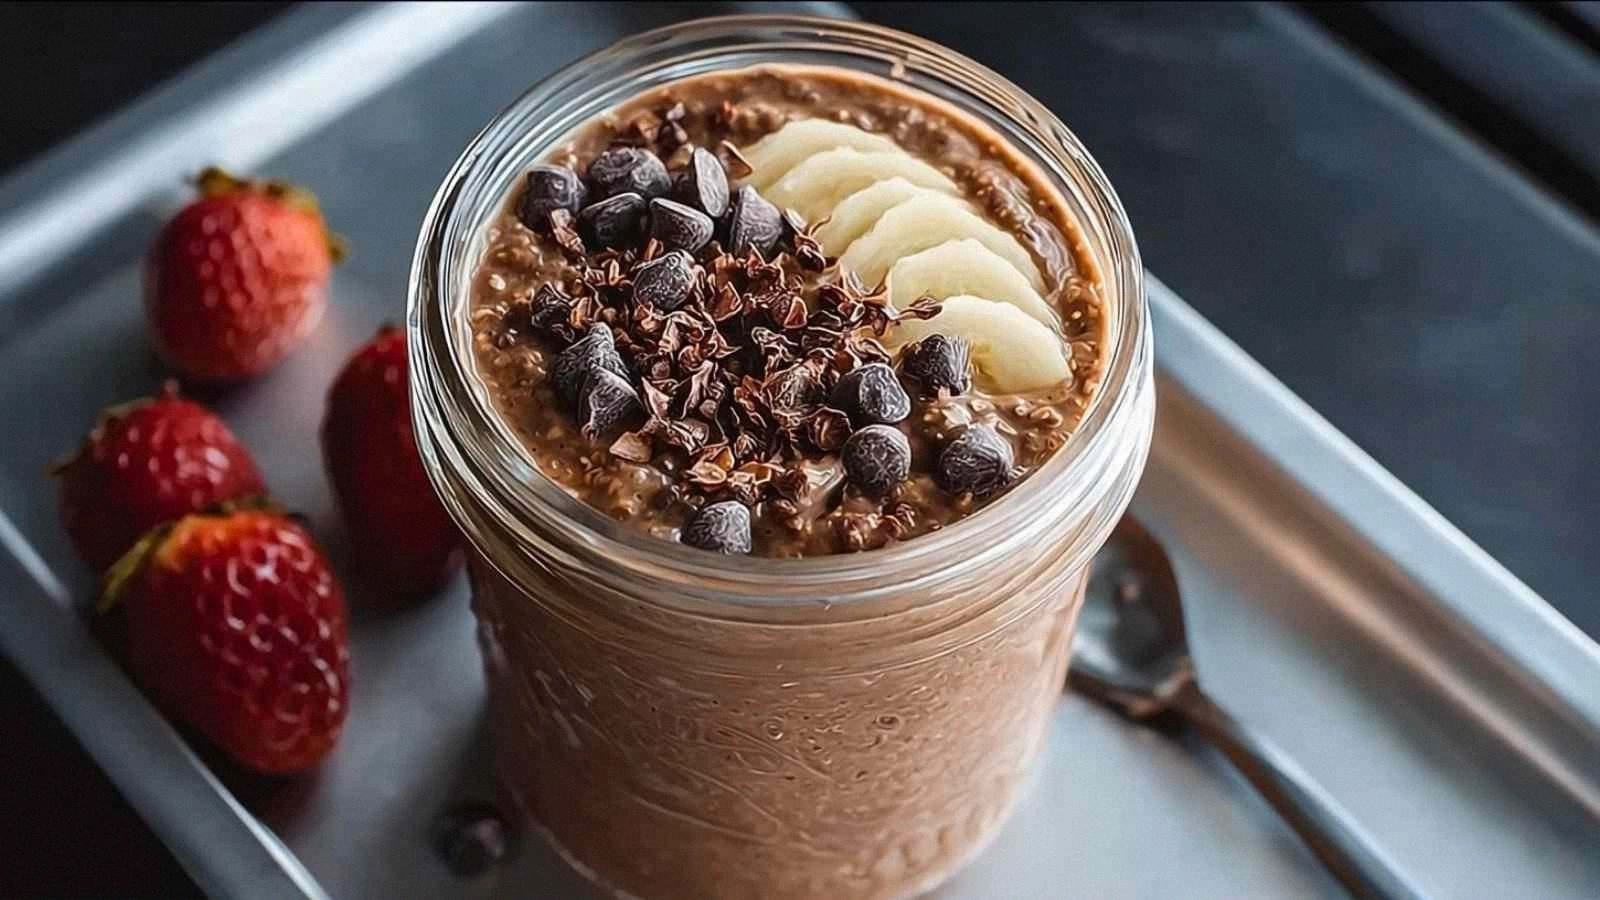
What makes this version stand out is not just the combination of ingredients, but the method that turns ordinary oats into a decadent, protein-packed brownie batter. It’s the perfect blend of convenience and indulgence, a recipe that you can prep in minutes and enjoy the next day. The batter sits overnight, allowing the oats to absorb the liquid and the flavors to meld, resulting in a dessert that’s both comforting and surprisingly light. I dare you to taste this and not go back for seconds.
If you’ve ever struggled with a brownie that’s either too dry or too gooey, you’re not alone—and I’ve got the fix. This is hands down the best version you’ll ever make at home. Picture yourself pulling this out of the oven, the whole kitchen smelling incredible, and your friends lining up for a bite. Let me walk you through every single step—by the end, you’ll wonder how you ever made it any other way.
What Makes This Version Stand Out
- Flavor: The blend of chocolate protein powder, cocoa, and maple syrup creates a depth that’s richer than traditional brownies but still balanced. The Greek yogurt adds a subtle tang that lifts the chocolate’s intensity without making it sour.
- Texture: Overnight soaking turns rolled oats into a velvety base that holds together like a brownie, yet remains light enough to bite through without feeling heavy.
- Convenience: Prep in 15 minutes, bake in 30, and you’re ready for a sweet treat the next day. No need for preheated pans or complicated steps.
- Protein Power: 60 g of chocolate protein powder bumps the protein content to a level that makes this dessert a post‑workout snack as well as a sweet indulgence.
- All‑Day Flexibility: The batter can be refrigerated, frozen, or reheated, making it ideal for meal prep or a last‑minute dessert.
- Kid‑Friendly: The mix of oats, nuts, and chocolate chips is safe for kids, and the recipe can be adjusted for allergies by swapping ingredients.
- Zero Waste: Use up leftover oats and almond milk from other recipes—this batter is the ultimate way to repurpose pantry staples.
- Social Buzz: When you serve these, the crowd reaction is always “Wow, this is like a brownie but better.” It’s the conversation starter of any gathering.
Alright, let’s break down exactly what goes into this masterpiece…
Inside the Ingredient List
The Flavor Base
At the heart of this batter is a trio of chocolatey elements: unsweetened cocoa powder, chocolate protein powder, and maple syrup (or honey). The cocoa provides the deep, bitter undertones that anchor the chocolate flavor. The protein powder, when combined with the cocoa, creates a rich, velvety mouthfeel that mimics the fudginess of a classic brownie. The maple syrup sweetens the mixture naturally, giving it a caramelized finish that’s far superior to refined sugar.
If you’re vegan or dairy‑free, maple syrup is the best option. For a more intense sweetness, substitute honey, but remember it’s slightly sweeter, so you might reduce the amount by a tablespoon. Skipping any of these components will thin the flavor profile and reduce the overall richness.
The Texture Crew
Rolled oats are the secret weapon here. They absorb liquid quickly, turning into a soft, almost pudding-like consistency that holds the batter together. When soaked overnight, the oats swell and release their starches, which act as a natural binder. This eliminates the need for flour or eggs, making the recipe gluten‑free and easy to digest.
Greek yogurt adds moisture and a slight tang that balances the chocolate. It also contributes protein, raising the overall nutritional value. If you’re allergic to dairy, a dairy‑free yogurt works fine—just make sure it’s plain and unsweetened.
The Unexpected Star
Peanut butter (or almond butter) is the unsung hero that brings depth and a creamy texture. It coats the oats like velvet, giving the batter a luxurious mouthfeel. The nut butter also adds healthy fats, which help keep the brownies moist for days. If you’re allergic to nuts, you can substitute with a tablespoon of oat or sunflower seed butter.
Mini chocolate chips and chopped walnuts are the finishing touch. The chips melt slightly during baking, creating pockets of molten chocolate. The walnuts add a crunchy contrast that breaks up the softness, providing a multi‑sensory experience.
The Final Flourish
Vanilla extract, salt, and a pinch of cinnamon (optional) tie the whole batter together. Vanilla enhances the chocolate’s sweetness, while salt heightens every flavor. Cinnamon adds a subtle warmth that pairs wonderfully with the maple syrup.
If you’re watching calories, reduce the maple syrup by a tablespoon and increase the Greek yogurt slightly to maintain moisture. For a richer dessert, double the peanut butter and add an extra tablespoon of cocoa powder.
Everything’s prepped? Good. Let’s get into the real action…
The Method — Step by Step
- First, combine the rolled oats, unsweetened almond milk, and Greek yogurt in a large mixing bowl. Whisk until the mixture is smooth and the oats are fully submerged. This step is crucial because any clumps will carry over into the batter and create uneven texture. I always use a hand mixer for a few seconds; it’s faster than whisking by hand.
- Add the chocolate protein powder and unsweetened cocoa powder to the oat mixture. Stir until fully incorporated, making sure the powders dissolve completely. The batter should feel thick but pourable. If it’s too thick, add a splash of almond milk to reach the right consistency.
- Stir in the maple syrup (or honey), vanilla extract, and salt. The syrup should coat the back of a spoon, indicating that the batter is sweet enough. At this point, you’ll notice a rich, chocolatey scent that makes you want to keep adding more.
- Fold in the peanut butter or almond butter until evenly distributed. The nut butter should be fully blended into the batter, creating a silky consistency. This step is the secret to that luscious, buttery mouthfeel that sets these brownies apart.
- Finally, fold in the mini chocolate chips and chopped walnuts. The chips should be evenly dispersed, and the walnuts should be roughly the same size to ensure uniform crunch. The batter should look like a glossy, chocolatey mousse.
- Pour the batter into a lined 8x8-inch baking pan or a silicone mold. Smooth the top with a spatula to create an even surface. The batter should be about 1 inch thick, which is ideal for a fudgy center and a slightly crisp edge.
- Bake in a preheated oven at 350°F (175°C) for 25-30 minutes. The brownies are done when the edges are set but the center still looks slightly wobbly. If you insert a toothpick, it should come out with a few moist crumbs, not wet batter.
- Let the brownies cool in the pan for 10 minutes before transferring them to a wire rack. This rest period allows the flavors to settle and the edges to firm up. While cooling, you’ll hear the batter settling—like a gentle sigh of satisfaction.
- Once cooled, cut into squares and serve. The first bite will be moist, chocolatey, and packed with nutty undertones. The texture will shift from gooey to firm as you chew, creating a delightful contrast that keeps you coming back for more.
- If you’re planning ahead, cover the cooled brownies with parchment and store them in an airtight container in the fridge for up to a week. They stay fresh and maintain their fudgy texture. For longer storage, freeze them—just wrap tightly in foil and place in a freezer bag.
- When you’re ready to eat, let them sit at room temperature for 10 minutes or warm them in a microwave for 15-20 seconds. The heat will bring back the melt‑in‑your‑mouth quality you love.
That’s it— you did it. But hold on, I’ve got a few more tricks that’ll take this to another level…
Insider Tricks for Flawless Results
The Temperature Rule Nobody Follows
Many bakers think that a higher oven temperature means a quicker bake, but with this batter, consistency is key. Baking at 350°F (175°C) allows the oats to set slowly, preventing the brownies from drying out. If you’re in a hurry, bump the temperature to 375°F (190°C) but watch the edges closely; they can brown faster, risking a burnt taste.
Why Your Nose Knows Best
During the final 5 minutes of baking, keep your nose near the oven. The aroma will intensify, indicating that the batter is perfectly browned. If the smell is too sweet, reduce the maple syrup next time. Your nose is the best judge of doneness.
The 5‑Minute Rest That Changes Everything
After removing the brownies from the oven, let them rest for exactly 5 minutes before slicing. This brief pause allows the batter to set, preventing a runny center that can ruin the texture. I’ve seen people cut straight away, and the result is a mess of chocolatey goo that sticks to the knife.
Use a Silicone Mold for Easy Release
If you’re using a silicone mold instead of a pan, the brownies will release with no sticking. The non‑stick surface means you can skip the parchment entirely. This also gives you a cleaner look and a smoother finish.
Add a Splash of Water Before Reheating
When reheating in the microwave, add a teaspoon of water to the container. The steam keeps the brownies moist and prevents them from becoming rubbery. This trick is especially useful if you’re reheating multiple squares at once.
Creative Twists and Variations
This recipe is a playground. Here are some of my favorite ways to switch things up:
Cocoa‑Crunch Delight
Swap the mini chocolate chips for cacao nibs and add a tablespoon of coconut flakes. The nibs give a crunchy bite, while the coconut adds a subtle tropical flavor that pairs well with the chocolate base.
Spiced Cinnamon Swirl
Add 1 teaspoon of ground cinnamon and ½ teaspoon of ground ginger to the batter. This gives a warm, spicy undertone that’s perfect for fall and winter. The spices also enhance the chocolate’s depth.
Almond Butter Swirl
Replace the peanut butter with almond butter and fold in a tablespoon of almond flour. The almond flavor will dominate, giving a nutty, buttery profile that’s both sophisticated and comforting.
Berry‑Burst Variation
Fold in ½ cup of fresh blueberries or raspberries before baking. The berries burst in the center, creating pockets of sweet juice that contrast the fudgy brownie. It’s a refreshing twist that works well for summer.
Salted Caramel Twist
Swirl in 2 tablespoons of salted caramel sauce before baking. The caramel adds a buttery sweetness and the sea salt brings a savory edge that makes each bite complex and unforgettable.
Vegan Chocolate Explosion
Use coconut milk instead of almond milk, oat yogurt instead of Greek yogurt, and a vegan protein powder. Add a teaspoon of flaxseed meal mixed with 3 tablespoons of water as an egg substitute. The result is a completely plant‑based brownie that still delivers on texture and flavor.
Storing and Bringing It Back to Life
Fridge Storage
Place the cooled brownies in an airtight container and refrigerate for up to 5 days. The chill will firm the texture slightly, making them easier to slice. Let them sit at room temperature for 10 minutes before serving to bring back the fudgy center.
Freezer Friendly
Wrap each brownie square individually in parchment paper and then in foil. Store in a freezer bag for up to 3 months. When ready to eat, thaw overnight in the fridge, then warm in the microwave for 15–20 seconds.
Best Reheating Method
The microwave is the quickest, but for a more authentic experience, place a brownie on a parchment‑lined tray and heat in a 250°F oven for 5 minutes. The heat will restore the chocolate’s glossy sheen and the texture will feel just like fresh.
Add a tiny splash of water before reheating—it steams back to perfection, keeping the brownie moist and preventing it from drying out.