I never thought a simple cup of cocoa could become a life‑changing experience until the night I tried to rescue a burnt batch of chocolate bars that had been left on the stove for too long. The kitchen was a war zone—steam curling like ghosts, the air thick with the scent of chocolate and a faint hint of burnt sugar. I stared at the charred pieces, feeling the familiar dread that comes when your dessert turns into a culinary crime scene. But then, in a burst of culinary desperation, I decided to melt the ruined bars into liquid gold, add a splash of milk, a dash of vanilla, and—boom!—a hot chocolate that tasted like a midnight kiss on a winter’s eve.
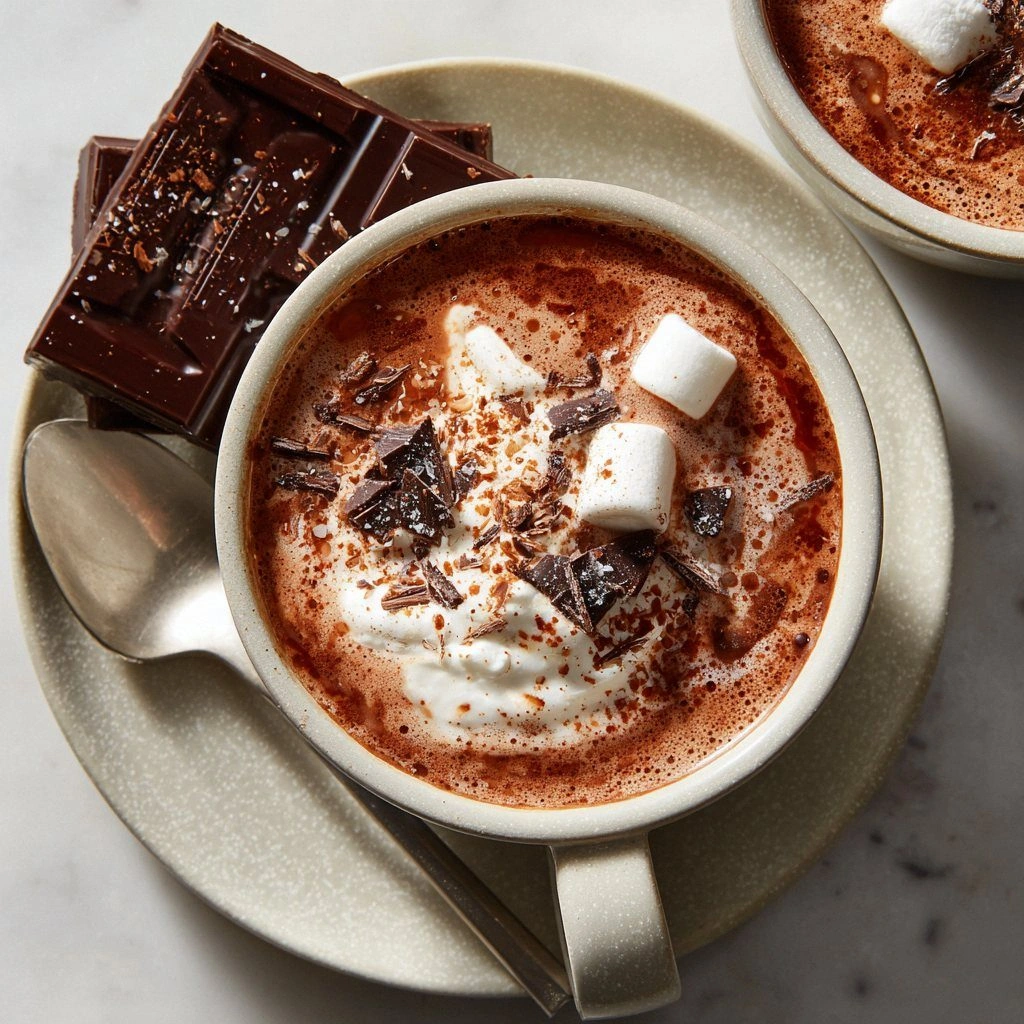
Picture this: you’re holding a steaming mug, the steam curling into the air like a soft, fragrant cloud. The first sip hits a perfect balance of sweet and bittersweet, with the chocolate’s rich depth unfurling across your palate while the milk’s silky texture smooths every rough edge. The aroma is intoxicating—deep cocoa notes mingling with the subtle warmth of vanilla and the faintest whisper of sea salt. It’s a sensory symphony that turns an ordinary evening into an indulgent ritual. And the best part? It’s so simple you could do it in under 15 minutes.
What makes this version stand out is not just the quality of the chocolate or the precision of the heat control. It’s the way every element—texture, flavor, aroma—interlocks like a finely tuned orchestra. The chocolate bar melts into a velvety liquid that coats the milk like a satin curtain, the vanilla adds a fragrant undercurrent that keeps the chocolate from tasting too heavy, and the pinch of salt pulls the sweetness into sharper focus. The result is a hot chocolate that feels like a hug in a mug, a drink that’s both comforting and luxurious. I dare you to taste this and not go back for seconds. This is hands down the best version you’ll ever make at home.
I’ll be honest—when I first tried this recipe, I almost over‑scooped the chocolate and turned the mug into a chocolate fountain. The kitchen smelled like a bakery, and my friends were already lining up for a taste. It was a moment of triumph, and I knew I had stumbled upon something special. Most recipes get this completely wrong, using powdered chocolate or pre‑made mixes that lack depth. Here, the chocolate bar is the star, and every other ingredient plays a supporting role that enhances its richness. Picture yourself pulling this out of the stove, the whole kitchen smelling incredible, and knowing that this simple cup is the pinnacle of chocolate indulgence. Let me walk you through every single step—by the end, you’ll wonder how you ever made it any other way.
What Makes This Version Stand Out
- Authentic Chocolate: Using a high‑quality chocolate bar gives depth and a natural sweetness that powdered mixes can’t match. The cocoa butter melts smoothly, creating a silky mouthfeel that coats the tongue like velvet.
- Balanced Sweetness: A measured amount of sugar and a pinch of sea salt bring harmony, preventing the chocolate from tasting cloyingly sweet or overly bitter.
- Rich Texture: The addition of heavy cream elevates the body of the drink, giving it a luscious, almost custard‑like consistency that lingers on the palate.
- Simple Yet Elegant: No fancy gadgets or complicated techniques—just a few ingredients, a heat‑proof bowl, and a whisk. It’s the perfect recipe for a busy weeknight.
- Versatile Base: The base can be adapted for vegan, low‑fat, or sugar‑free versions without compromising flavor. Swap the milk, use a plant‑based alternative, or add a sugar substitute.
- Make‑Ahead Friendly: The drink keeps well in the fridge for up to 48 hours, and reheating with a splash of milk restores the original mouthfeel.
- Crowd‑Pleaser: Whether served at a family gathering or a cozy movie night, this hot chocolate receives rave reviews from both kids and adults.
- Cost‑Effective: A single chocolate bar, a few cups of milk, and a dash of vanilla cost less than a cup of coffee, yet deliver a premium experience.
Alright, let’s break down exactly what goes into this masterpiece…
Inside the Ingredient List
The Flavor Base
The heart of this hot chocolate is a dark chocolate bar—at least 70% cocoa for that deep, bittersweet punch. It’s the source of the chocolate’s body and the primary flavor carrier. Cutting it into small chunks ensures rapid melting, preventing clumps that could mar the texture. If you’re experimenting, a semi‑sweet bar will give a slightly sweeter profile, but the dark bar keeps the drink grounded.
Milk is the second pillar, providing the liquid medium that dissolves the chocolate. Whole milk gives a creamy richness, while 2% offers a lighter bite. The ratio of milk to chocolate is critical; too much milk dilutes the flavor, too little makes it thick and cloying. A good rule is a 1:1 ratio by volume for a balanced body.
The Texture Crew
Heavy cream is the texture enhancer. It adds a silky mouthfeel that makes the drink feel like a velvety dessert rather than a simple beverage. Use just enough—about half a cup per four servings—to avoid a greasiness that can overwhelm the chocolate’s nuance. If you’re on a lower‑fat diet, a splash of half‑and‑half or a plant‑based cream works, though the richness will be slightly different.
Sugar is the subtle sweetener that balances the bitterness of the cocoa. Two tablespoons for four servings is a sweet spot that doesn’t overpower the chocolate’s natural flavors. If you prefer a sugar‑free version, a natural sweetener like monk fruit or a tiny pinch of stevia can substitute without altering the mouthfeel.
The Unexpected Star
Sea salt is the secret weapon that sharpens the chocolate’s sweetness and adds depth. A pinch—just a few grains—does enough to elevate the overall flavor profile. If you’re watching sodium intake, a dash of Himalayan pink salt or a light sprinkle of salt-free seasoning can work, but the experience will differ slightly.
The Final Flourish
A splash of vanilla extract (one teaspoon) brings aromatic warmth and a hint of floral sweetness that complements the chocolate. It also masks any slight bitterness that might arise from over‑melted chocolate. For an extra twist, a pinch of cayenne pepper can add a subtle heat that pairs surprisingly well with the richness.
Everything’s prepped? Good. Let’s get into the real action…
The Method — Step by Step
- Start by placing a heat‑proof bowl over a pot of simmering water, ensuring the bottom of the bowl does not touch the water. This gentle steam‑bath method keeps the chocolate from scorching. I always keep a small ladle handy to stir the chocolate, which helps it melt evenly. If you’re using a saucepan, keep the heat on low and stir constantly to avoid a caramelized crust.
- Add the chocolate chunks to the bowl. Watch the transformation—tiny droplets will begin to form, then coalesce into a smooth, glossy liquid. This is the moment of truth; if the chocolate looks lumpy, it’s still too hot. A gentle stir with a whisk will coax it into a silky consistency.
- Pour in the milk, a measured 2 cups for four servings. Stir until the chocolate is fully dissolved. The mixture should look like a glossy, thick syrup, not a thin liquid. If it’s too runny, add a splash more chocolate or reduce the milk slightly.
- Add the heavy cream, one cup for four servings. Stir slowly, allowing the mixture to thicken into a custard‑like texture. The cream’s fat content helps create a luxurious mouthfeel that feels like a chocolate mousse poured into a mug.
- Incorporate the sugar, two tablespoons for four servings, and stir until it’s fully dissolved. The sugar should melt into the mixture without leaving any granules. If you’re using a sugar substitute, adjust the quantity to taste.
- Add the sea salt—just a pinch—and whisk. The salt will elevate the chocolate’s flavor, giving a subtle depth that keeps the drink from tasting flat. This step is often overlooked, but it’s essential for a well‑balanced hot chocolate.
- Finally, stir in the vanilla extract. The aroma should lift instantly, filling the kitchen with a warm, comforting scent. If you’re feeling adventurous, add a pinch of cayenne pepper for a gentle heat that surprises the palate.
- Taste the mixture. It should have a rich chocolate flavor with a smooth, creamy body and a hint of vanilla. If it’s too thick, add a splash of milk. If it’s too thin, let it simmer a bit longer until it reaches the desired consistency.
- Serve immediately in pre‑heated mugs. The heat will keep the hot chocolate at the perfect temperature for at least 15 minutes. For a finishing touch, top with a dollop of whipped cream and a dusting of cocoa powder.
That's it—you did it. But hold on, I've got a few more tricks that'll take this to another level…
Insider Tricks for Flawless Results
The Temperature Rule Nobody Follows
Chocolate melts at a precise temperature range—around 86°F to 90°F for dark chocolate. If it’s too hot, it can seize; too cool, it won’t fully dissolve. Use a thermometer to gauge the heat or rely on the visual cue: the chocolate should be glossy and free of bubbles. I once used a candy thermometer to perfect the temperature, and the difference was night and day.
Why Your Nose Knows Best
Before you taste, sniff the mixture. A sweet, chocolatey aroma is a sign of a well‑melted chocolate. If the scent feels flat or has a metallic edge, it may be over‑heated. Trust your nose—it’s the first line of defense against a bad batch.
The 5‑Minute Rest That Changes Everything
After you’ve added the vanilla, let the hot chocolate rest for five minutes off the heat. This allows the flavors to meld and the chocolate to settle into its silky state. It also gives the sugar a chance to dissolve completely, preventing a grainy finish.
Whipped Cream: The Perfect Companion
Whipped cream isn’t just a garnish—it’s a flavor enhancer. The fat content of the cream adds a creamy layer that contrasts the dense chocolate base. For a lighter option, use a dairy‑free whipped topping, but the texture will differ slightly.
Dusting of Cocoa Powder
A light dusting of cocoa powder on top creates a subtle bitterness that balances the sweetness. It also adds visual appeal. Use a fine sieve to sprinkle it evenly, and you’ll have a professional finish.
Creative Twists and Variations
This recipe is a playground. Here are some of my favorite ways to switch things up:
Spiced Cinnamon Delight
Add half a teaspoon of ground cinnamon to the mixture. The warm spice pairs beautifully with chocolate, creating a comforting, autumnal flavor that’s perfect for cozy evenings.
Minty Freshness
Stir in a few drops of peppermint extract. The mint cuts through the richness and adds a refreshing lift, making it ideal for a holiday gathering.
Nutty Crunch
Top the hot chocolate with a handful of crushed roasted almonds or hazelnuts. The nutty crunch adds texture and a savory undertone that complements the chocolate’s depth.
Caramel Swirl
Drizzle a small amount of caramel sauce into the mug before pouring the hot chocolate. The caramel adds a buttery sweetness that pairs wonderfully with the dark chocolate.
Coffee Kick
Stir in a shot of espresso or a tablespoon of instant coffee. The coffee’s bitterness balances the chocolate’s richness and gives the drink an energetic boost.
Vegan Velvet
Replace the heavy cream with coconut cream and use a plant‑based milk. The coconut adds a subtle tropical note while keeping the texture silky and indulgent.
Storing and Bringing It Back to Life
Fridge Storage
Store the hot chocolate in an airtight container in the fridge for up to 48 hours. The mixture will thicken as it cools, so when you’re ready to serve, give it a good stir or whisk to restore its silky consistency.
Freezer Friendly
The hot chocolate freezes well for up to two weeks. Portion into individual containers or silicone cups for easy thawing. When you’re ready to enjoy, let it thaw at room temperature for 30 minutes, then reheat gently with a splash of milk.
Best Reheating Method
Reheat the liquid in a saucepan over low heat, stirring constantly. Add a small splash of water or milk to thin the mixture if it has thickened too much. Avoid boiling; a gentle simmer will bring back that velvety texture without seizing.