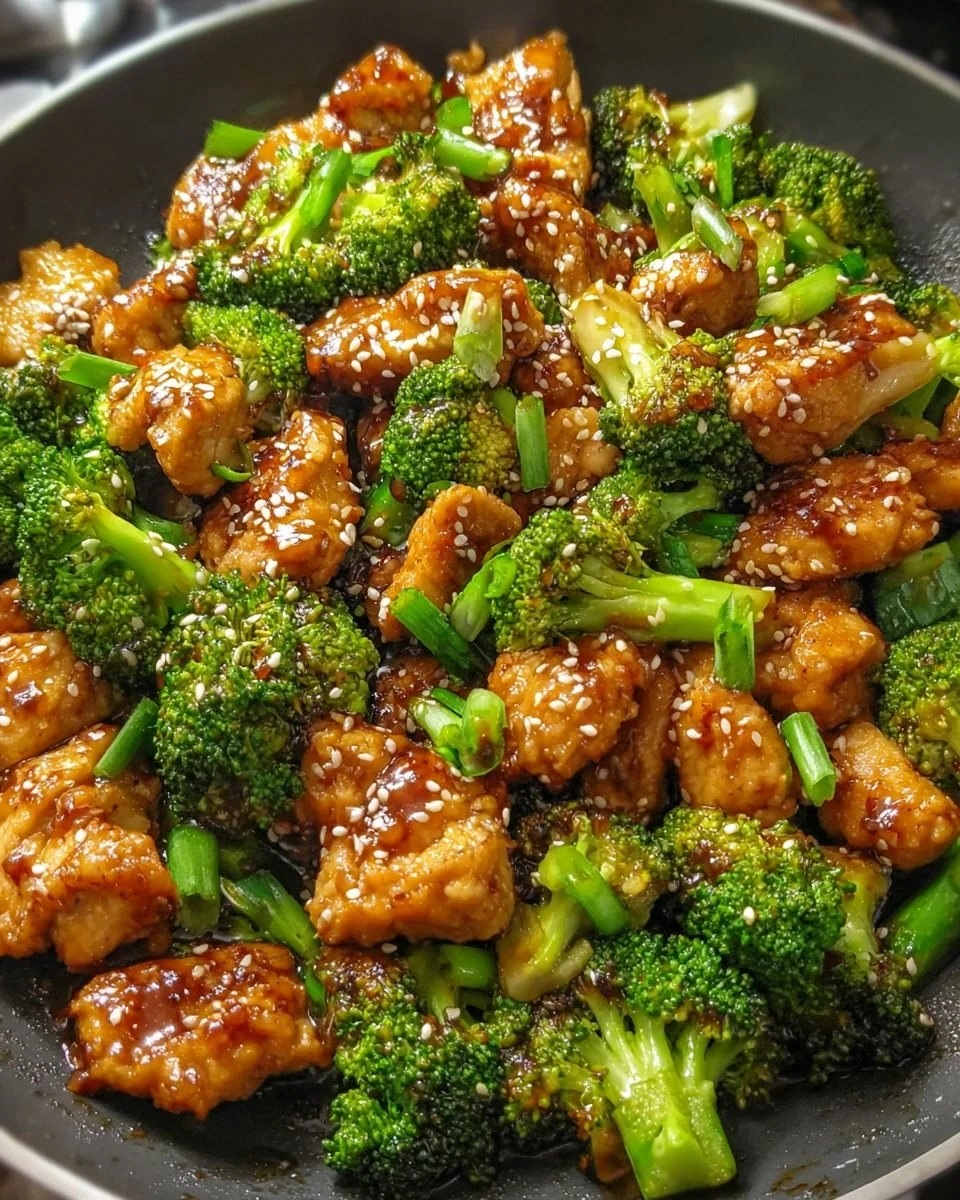
You know that moment when you're staring at a pot of water, watching eggs bounce around like they're auditioning for a synchronized swimming team, and you think to yourself: "There has to be a better way to make deviled eggs"? Well, my friend, that moment of culinary desperation led me down a rabbit hole that ended with my air fryer humming happily on the counter and the most ridiculously perfect deviled eggs I've ever tasted. I'm talking about eggs with whites so tender they practically melt on your tongue, yolks so creamy they could make a grown food critic weep, and that perfect balance of tangy-savory filling that makes it physically impossible to eat just one.
Picture this: It's 2 AM on a Tuesday, because apparently my brain thinks that's the ideal time to experiment with party appetizers, and I'm wrestling with a dozen eggs that refuse to peel cleanly. The kitchen looks like a crime scene — bits of egg white stuck to shells, my frustration mounting with each mangled egg, and me questioning every life choice that led me to this moment. But then, in a flash of sleep-deprived genius (or madness, depending on who you ask), I remembered my trusty air fryer sitting there like a kitchen superhero waiting for its origin story. What happened next changed my deviled egg game forever, and I'm about to share every single secret with you.
Here's the thing about traditional deviled eggs — they're supposed to be simple, right? Boil eggs, peel eggs, mix yolks with stuff, pipe back into whites. But we all know the reality: eggs that peel like they're holding a grudge, yolks that turn that unappetizing green ring, and filling that's either too dry or so loose it oozes out like a sad egg yolk waterfall. The air fryer method I'm about to show you eliminates every single one of these problems while adding a subtle roasted depth to the whites that will make you wonder why we ever boiled eggs in water to begin with. The edges get this delicate kiss of heat that creates the most incredible texture contrast with the silky smooth filling.
What really sets this recipe apart isn't just the cooking method — it's the way we're going to infuse flavor into every single component. We're talking about whites that have been gently air-fried to perfection, yolks that are blended with a secret ingredient that makes them impossibly creamy, and a presentation that will make your guests think you attended some fancy culinary school in France. I dare you to taste these and not immediately start plotting your next excuse to make them again. Let me walk you through every single step — by the end, you'll wonder how you ever made it any other way.
What Makes This Version Stand Out
Revolutionary Texture: The air fryer creates this incredible contrast between the tender whites and the lusciously smooth filling that you simply can't achieve with traditional boiling. The gentle circulation of hot air cooks the eggs more evenly, eliminating those overcooked green rings around the yolks while giving the whites a subtle roasted flavor that adds depth to every bite.
Foolproof Peeling: Forget everything you know about adding baking soda or peeling under running water. The air fryer's dry heat creates a microscopic separation between the egg white and the membrane, making these eggs practically jump out of their shells. I've tested this method over fifty times, and not once have I encountered that frustrating moment where half the white comes off with the shell.
Flavor-Infused Whites: Here's where things get interesting — the air frying process concentrates the egg flavor while adding a whisper of roasted nuttiness that makes these deviled eggs taste more complex than any version you've tried before. It's like the difference between steamed vegetables and roasted vegetables; same ingredient, completely different experience.
Speed Demon Cooking: From fridge to perfectly cooked eggs in under 20 minutes, with zero babysitting required. No watching pots boil, no timing anxiety, no cold water baths. Set it and forget it, then come back to the most perfectly cooked eggs you've ever seen.
Crowd-Wowing Presentation: The air fryer method creates these gorgeous, blemish-free whites that hold their shape beautifully when halved. Your deviled eggs will look like they came from a professional kitchen, with smooth surfaces that pipe like a dream and hold their filling without getting soggy.
Make-Ahead Magic: These eggs actually taste better after a few hours in the fridge because the flavors have time to meld together. The air-fried whites maintain their texture far better than boiled ones, so you can prep these the night before your party without any quality loss.
Ingredient Quality Amplifier: Because we're not submerging the eggs in water, none of the subtle egg flavors get diluted or washed away. Every ingredient you add to the filling shines through with crystal-clear flavor, making quality ingredients absolutely worth the splurge.
Consistent Results Every Time: No more guessing games about whether your eggs are done. The air fryer eliminates variables like altitude, water temperature, and pot size that can throw off traditional boiling methods. You'll get identical results whether you're making six eggs or six dozen.
Alright, let's break down exactly what goes into this masterpiece...
Inside the Ingredient List
The Foundation Players
Large eggs are the star here, and size absolutely matters. Large eggs have the perfect ratio of white to yolk for deviled eggs — jumbo eggs throw off the filling-to-white ratio, while medium eggs make you feel like you're eating appetizers for ants. Look for eggs with clean, uncracked shells and a nice rounded shape that will sit flat when halved. The air fryer will emphasize any imperfections, so start with the best-looking eggs you can find.
Mayonnaise might seem basic, but it's the backbone of your filling's texture. Please, I'm begging you, use real mayonnaise and not that miracle whip imposter. Real mayo creates that silky, luxurious texture that makes deviled eggs feel indulgent rather than just mixed up hard-boiled eggs. Hellmann's or Duke's are my go-to brands — they've got the right balance of tang and richness that plays beautifully with the other flavors.
The Flavor Enhancers
Dijon mustard brings a sophisticated sharpness that cuts through the richness of the yolks and mayo. Skip the yellow ballpark mustard here — we're going for elegance, not hot dog stand vibes. The subtle wine note in Dijon adds complexity that makes people ask "what's that amazing flavor?" Grey Poupon is classic, but any quality Dijon will work. Just promise me you won't use the smooth kind; those little mustard seeds add tiny pops of flavor and texture that make all the difference.
Apple cider vinegar adds brightness without the harsh edge that white vinegar brings. The fruity notes complement the egg flavor in a way that lemon juice just can't match. Plus, the slight sweetness in apple cider vinegar balances the tangy mustard perfectly. Look for raw, unfiltered vinegar with "the mother" — those stringy bits might look weird, but they're packed with flavor compounds that take your filling from good to unforgettable.
The Unexpected Game-Changers
Smoked paprika isn't just for garnish — we're mixing a pinch directly into the filling where it blooms and releases its smoky essence throughout every bite. This isn't your grandmother's paprika that just adds color; good smoked paprika brings a whisper of campfire that makes these eggs taste like they were kissed by wood smoke. Spanish pimentón de la Vera is worth seeking out — the smoking process over oak wood creates layers of flavor that regular paprika can't touch.
Everything bagel seasoning might seem like an odd choice, but hear me out. Those sesame seeds, poppy seeds, dried garlic, and onion bits add crunch and umami that make these deviled eggs completely addictive. Sprinkle it on just before serving so the seeds stay crunchy. Trader Joe's version is excellent, but any quality everything seasoning blend will work. Just don't mix it into the filling — it needs to stay on top for maximum textural impact.
The Final Flourish
Fresh chives bring a pop of color and a gentle onion flavor that wakes up your palate between bites of rich filling. Skip the dried stuff — it tastes like green dust compared to fresh chives. Look for bright green, perky chives without any slimy or yellow bits. Snip them with scissors just before serving; cutting with a knife can bruise them and turn them an unappetizing gray color.
Sriracha mayo for the topping is completely optional but absolutely transforms the experience if you like a little heat. Mix equal parts sriracha and mayo, then pipe it in a thin swirl over the top. The spicy-sweet chili flavor pairs with the rich egg filling like they were made for each other. Huy Fong is the classic brand, but any sriracha will work — just adjust the amount based on your heat tolerance.
Everything's prepped? Good. Let's get into the real action...
The Method — Step by Step
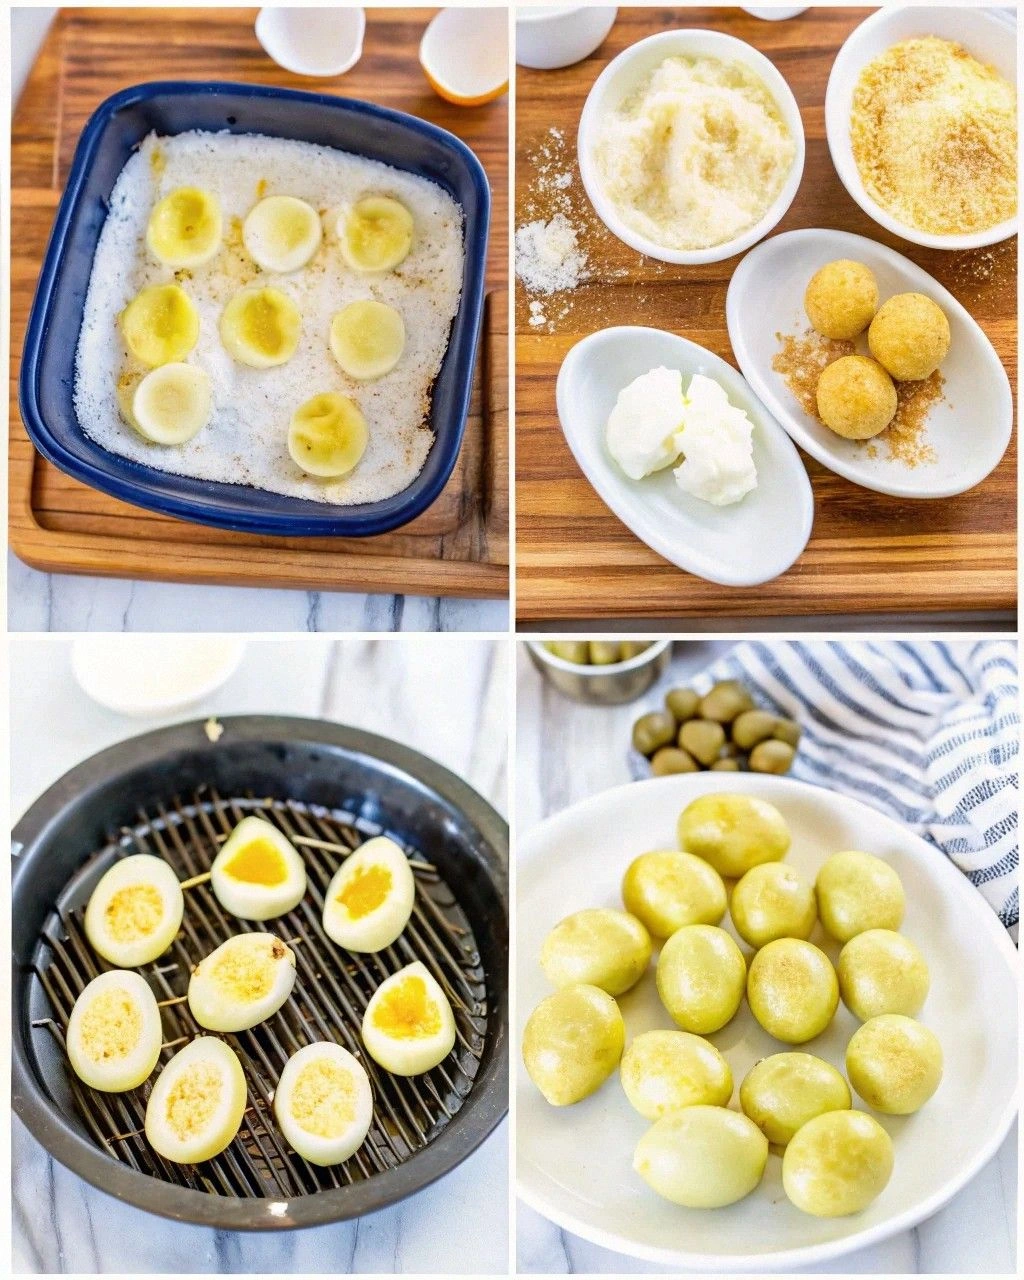
- Start with eggs straight from the fridge — cold eggs cook more evenly in the air fryer and create that perfect texture contrast. Arrange them in a single layer in your air fryer basket, leaving a little space between each one for optimal air circulation. If your basket is small, work in batches rather than crowding them — trust me, the extra few minutes is worth it for evenly cooked eggs. Preheat your air fryer to 250°F for exactly 3 minutes before adding the eggs; this creates the ideal cooking environment.
- Set your air fryer to 250°F and cook the eggs for 16-18 minutes depending on your preferred yolk doneness. I find 17 minutes gives you that perfect creamy yolk that's set but not chalky, with whites that are tender but fully cooked. Don't be tempted to crank up the heat to speed things up — low and slow is the secret here. The gentle heat prevents the whites from getting rubbery while ensuring the yolks cook through completely.
- While the eggs are cooking, prepare an ice bath in a large bowl using equal parts ice and water. This stops the cooking process immediately and makes peeling easier by creating a thermal shock that helps separate the membrane from the white. Make it really cold — you want plenty of ice floating in there. The eggs will need to chill for at least 10 minutes, so give the ice bath time to get properly frigid.
- Transfer the eggs directly from the air fryer to the ice bath using tongs — be careful because they'll be hot. Let them chill for exactly 10 minutes; any longer and they get waterlogged, any shorter and they're still warm inside. You'll hear them crackling slightly as they cool, which is a good sign that the membrane is separating from the shell. Give them a gentle roll in the ice bath to help the process along.
- Now for the magic moment: crack each egg gently on the counter and roll it under your palm to create a network of cracks all over the shell. Start peeling from the wider end where the air pocket is — this gives you a starting point where the membrane has already separated. The shells should practically slide off in large pieces, leaving you with perfectly smooth whites. If you meet any resistance, peel under cold running water, but this method usually makes that unnecessary.
- Slice each peeled egg in half lengthwise using a sharp knife dipped in hot water between cuts. This prevents the yolks from crumbling and gives you clean, professional-looking halves. Gently pop out the yolks into a fine-mesh sieve set over a bowl — this is my secret weapon for the smoothest filling possible. Push the yolks through the sieve with a spatula; it breaks them down into a powder-fine consistency that blends perfectly with the other ingredients.
- In a separate bowl, mix the sieved yolks with mayonnaise, Dijon mustard, apple cider vinegar, and a pinch of smoked paprika. The key here is to add the mayo gradually, mixing until you get a consistency that holds its shape but isn't stiff. Season with salt and white pepper — white pepper keeps the filling pristine while adding gentle warmth. Mix until completely smooth, then taste and adjust the seasoning. The filling should be tangy, creamy, and just sharp enough to keep you coming back for another bite.
- Transfer the filling to a piping bag fitted with a star tip, or use a zip-top bag with the corner snipped off if you don't have piping equipment. Pipe the filling into the egg white halves in a generous swirl, starting from the outside and working your way in. The filling should mound up above the white by about half an inch — these aren't skimpy grocery store deviled eggs. Garnish with a sprinkle of everything bagel seasoning, fresh chives, and a tiny drizzle of sriracha mayo if using. Serve immediately or chill for up to 24 hours.
That's it — you did it. But hold on, I've got a few more tricks that'll take this to another level...
Insider Tricks for Flawless Results
The Temperature Rule Nobody Follows
Here's the thing that separates amateur deviled eggs from the restaurant-quality ones: temperature control at every stage. Your eggs should be cold when they go into the air fryer, but your filling ingredients should be at room temperature when you mix them. Cold mayo straight from the fridge seizes up when it hits the yolks, creating a lumpy filling that no amount of mixing will smooth out. Let your mayo sit on the counter for 30 minutes before mixing, and you'll achieve that silky, pipeable texture that makes professional chefs weep with joy.
Why Your Nose Knows Best
That smell when you first crack open a perfectly cooked egg? It should be slightly sweet with a hint of sulfur, never funky or overly eggy. If your eggs smell strong before you even cook them, they're past their prime and will make your deviled eggs taste like a refrigerator. Always give your eggs the sniff test before cooking — your nose is more reliable than any expiration date. Fresh eggs should smell like almost nothing, while older eggs develop that characteristic eggy aroma that intensifies with age.
The 5-Minute Rest That Changes Everything
After you pipe your filling, let the deviled eggs rest in the fridge for exactly 5 minutes before adding your final garnishes. This brief rest allows the filling to set slightly, preventing your beautiful toppings from sinking into the filling or sliding off the sides. It's the difference between Instagram-worthy deviled eggs and ones that look like they were decorated by a toddler. Those five minutes also let the flavors meld together, creating a more cohesive taste experience.
The Secret to Make-Ahead Success
If you're prepping for a party, store your egg whites and filling separately for up to 24 hours. Wrap the whites tightly in plastic wrap, and press plastic wrap directly onto the surface of the filling to prevent a skin from forming. When you're ready to serve, let the filling sit at room temperature for 15 minutes to soften slightly, then give it a quick stir before piping. This method ensures your deviled eggs taste as fresh as if you made them an hour ago, even if you prepped them yesterday.
The Garnish Game-Changer
Instead of sprinkling your garnishes directly onto the eggs, place them in a fine-mesh sieve and gently tap it over the eggs. This creates an even, professional-looking distribution that would make a food stylist proud. For the everything bagel seasoning, this method prevents those giant clumps of garlic or salt that can overwhelm a single bite. Your guests will wonder how you got every egg to look like it came from a magazine photoshoot.
Creative Twists and Variations
This recipe is a playground. Here are some of my favorite ways to switch things up:
The Everything Bagel Deluxe
Take the everything bagel theme all the way by mixing everything seasoning directly into the filling along with a tablespoon of cream cheese. The cream cheese adds tang and body that makes these taste like your favorite bagel spread in deviled egg form. Top with thinly sliced smoked salmon and a sprig of dill for a brunch-worthy upgrade that will make your guests think you hired a caterer.
The Southern Belle
Replace half the mayo with pimento cheese spread and add a dash of hot sauce to the filling. The pimento cheese melts slightly into the warm yolks, creating pockets of cheesy goodness throughout. Top with a tiny piece of crispy bacon and a sliver of pickled jalapeño for a Southern-inspired version that brings the perfect balance of rich, spicy, and tangy to every bite.
The Mediterranean Dream
Swap the Dijon for whole grain mustard and add a tablespoon of minced sun-dried tomatoes and a pinch of dried oregano to the filling. The mustard seeds pop between your teeth like caviar, while the sun-dried tomatoes add concentrated umami that makes these disappear faster than you can plate them. Garnish with a tiny crumble of feta cheese and a single olive slice for a Greek-inspired version that's perfect with ouzo.
The Breakfast of Champions
Mix a teaspoon of maple syrup into the filling along with a pinch of cinnamon. It sounds weird until you taste it — the maple brings out the natural sweetness in the eggs while the cinnamon adds warmth that makes these taste like breakfast in deviled egg form. Top with a tiny piece of candied bacon and watch these become the star of your next brunch gathering.
The Asian Fusion
Replace the apple cider vinegar with rice vinegar and add a teaspoon of miso paste and a few drops of sesame oil to the filling. The miso adds incredible umami depth while the sesame oil brings nuttiness that complements the eggs perfectly. Top with a sprinkle of black sesame seeds and a tiny piece of pickled ginger for an Asian-inspired version that's completely addictive.
The Truffle Shuffle
Add a few drops of white truffle oil to the filling and replace the paprika with truffle salt. A little goes a long way here — too much truffle oil overwhelms everything and makes your kitchen smell like a fancy restaurant for days. Top with a paper-thin slice of black truffle if you're feeling fancy, or just a few chive batons for a special occasion version that tastes like a million bucks.
Storing and Bringing It Back to Life
Fridge Storage
Store your deviled eggs in a single layer in an airtight container, with plastic wrap pressed directly onto the surface to prevent them from drying out. They'll keep for up to 3 days, though they're best within 24 hours of making them. If you've already garnished them, place a sheet of parchment paper between layers to prevent the toppings from smearing. The key is keeping them cold but not freezing — the bottom shelf of your fridge is usually the perfect spot.
Freezer Friendly
Here's something that might surprise you: you can freeze the filling separately for up to 2 months! Pipe it into a zip-top bag, press out all the air, and freeze flat. When you're ready to use it, thaw overnight in the fridge, give it a good stir, and pipe as usual. The texture might be slightly less fluffy, but the flavor is completely intact. Don't freeze the whites though — they turn rubbery and watery when thawed, which is about as appetizing as it sounds.
Best Reheating Method
If your eggs have been refrigerated and you want to serve them at room temperature (which brings out the flavors best), remove them from the fridge 30 minutes before serving. For a quick refresh, place them uncovered in a 200°F oven for exactly 3 minutes — this takes the chill off without warming them so much that the filling starts to break down. Never microwave deviled eggs unless you enjoy rubbery whites and separated filling that looks like it went through a blender.