Picture this: I’m halfway through a marathon movie night, the couch is a crater of popcorn, and suddenly I hear that unmistakable crunch of a snack that just won’t quit. I reach for the bag, only to find it empty, and the room goes silent—except for my stomach growling like a disgruntled bear. I dared a friend to a “snack showdown,” and we both swore we’d never settle for anything less than a snack that could rock a party, a study session, or a midnight craving all at once. That moment sparked a kitchen experiment that spiraled into the most addictive, sweet‑and‑salty concoction you’ll ever taste.
The kitchen turned into a battlefield of aromas: butter melting into a caramel‑gold pool, brown sugar sizzling like fireworks, and a hint of vanilla that whispered promises of decadence. The sound? A gentle hiss as the butter‑sugar mixture hit the pan, followed by the satisfying crackle of pretzels and nuts diving into that glossy glaze. My hands felt the warm, sticky coating cling to each piece of Chex, and the scent was a heady mix of toasted grain and toasted nuts that made my mouth water before the first bite even happened. The texture? Imagine a symphony where each instrument—crunchy cereal, salty pretzel, buttery toffee—plays its part without ever stepping on the others.
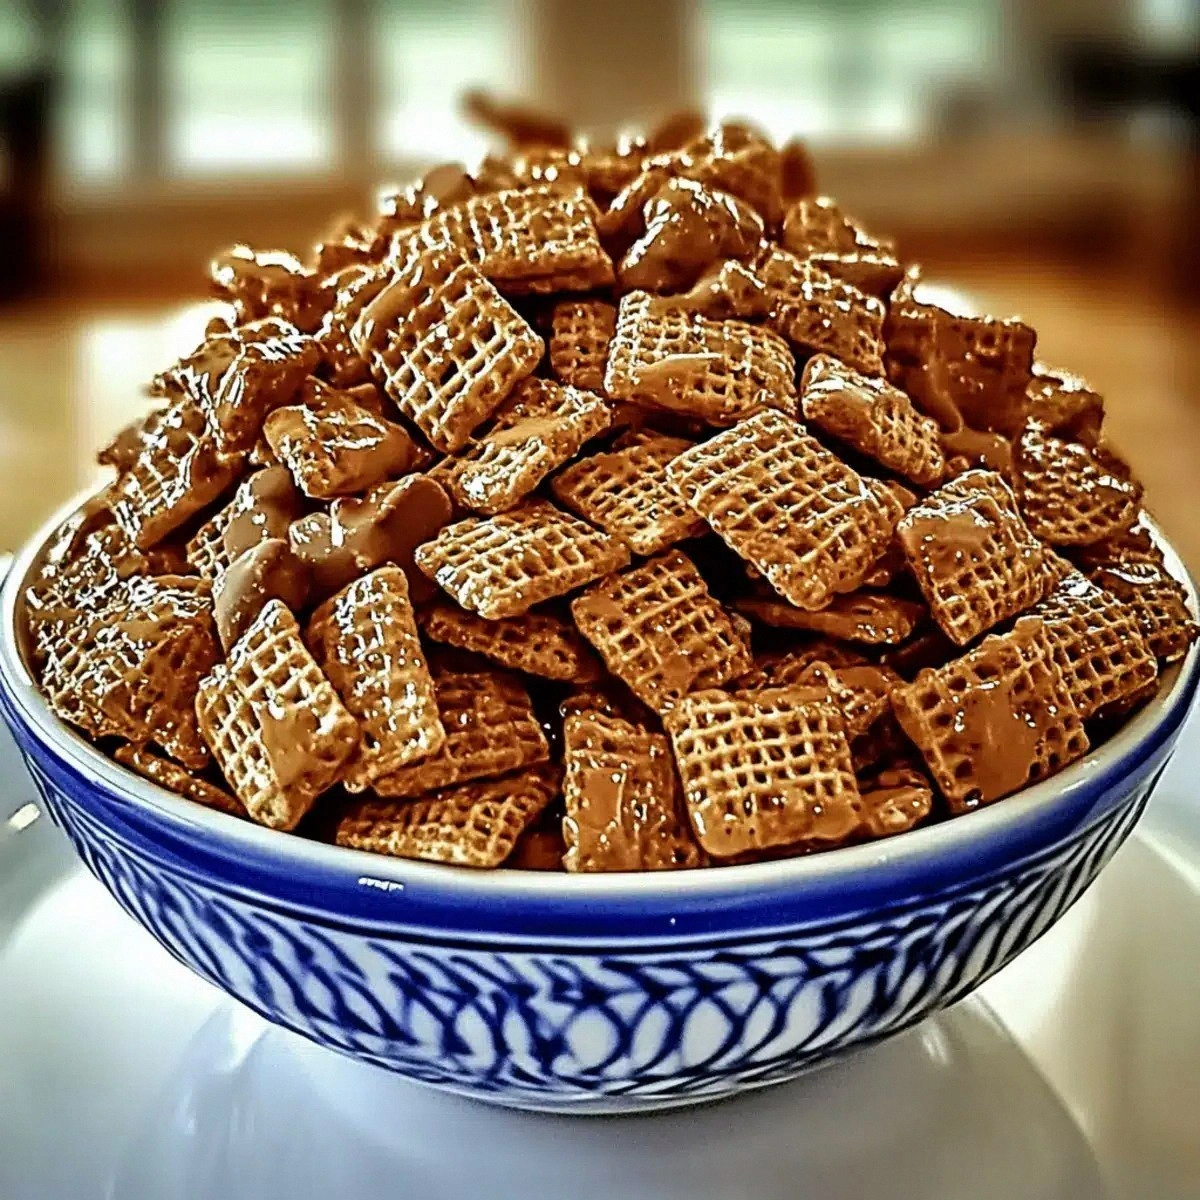
Most Chex Mix recipes either lean too sweet or get lost in a salty swamp, but this one hits the sweet spot—literally. I’ve tried the “classic” version from a box, the “gourmet” version with caramel drizzle, and even a “spicy” variant that left my tongue on fire. None of those compared to the balanced, buttery toffee glaze that clings to every morsel, the way a well‑timed high‑five lands perfectly. This version uses a simple butter‑brown‑sugar base, a splash of vanilla, and a pinch of salt to amplify flavor without overwhelming it. And the secret weapon? A quick toss of chocolate chips and dried fruit added at the very end, giving you bursts of melty richness and chewy surprise that most recipes completely overlook.
Now, I’m about to hand you the exact steps to create this snack masterpiece. I dare you to taste this and not go back for seconds—because once you’ve tried it, you’ll understand why I claim this is hands down the best version you’ll ever make at home. Let me walk you through every single step — by the end, you’ll wonder how you ever made it any other way.
What Makes This Version Stand Out
- Flavor Harmony: The buttery toffee glaze balances sweet and salty perfectly, creating a flavor profile that dances on the palate without one note dominating.
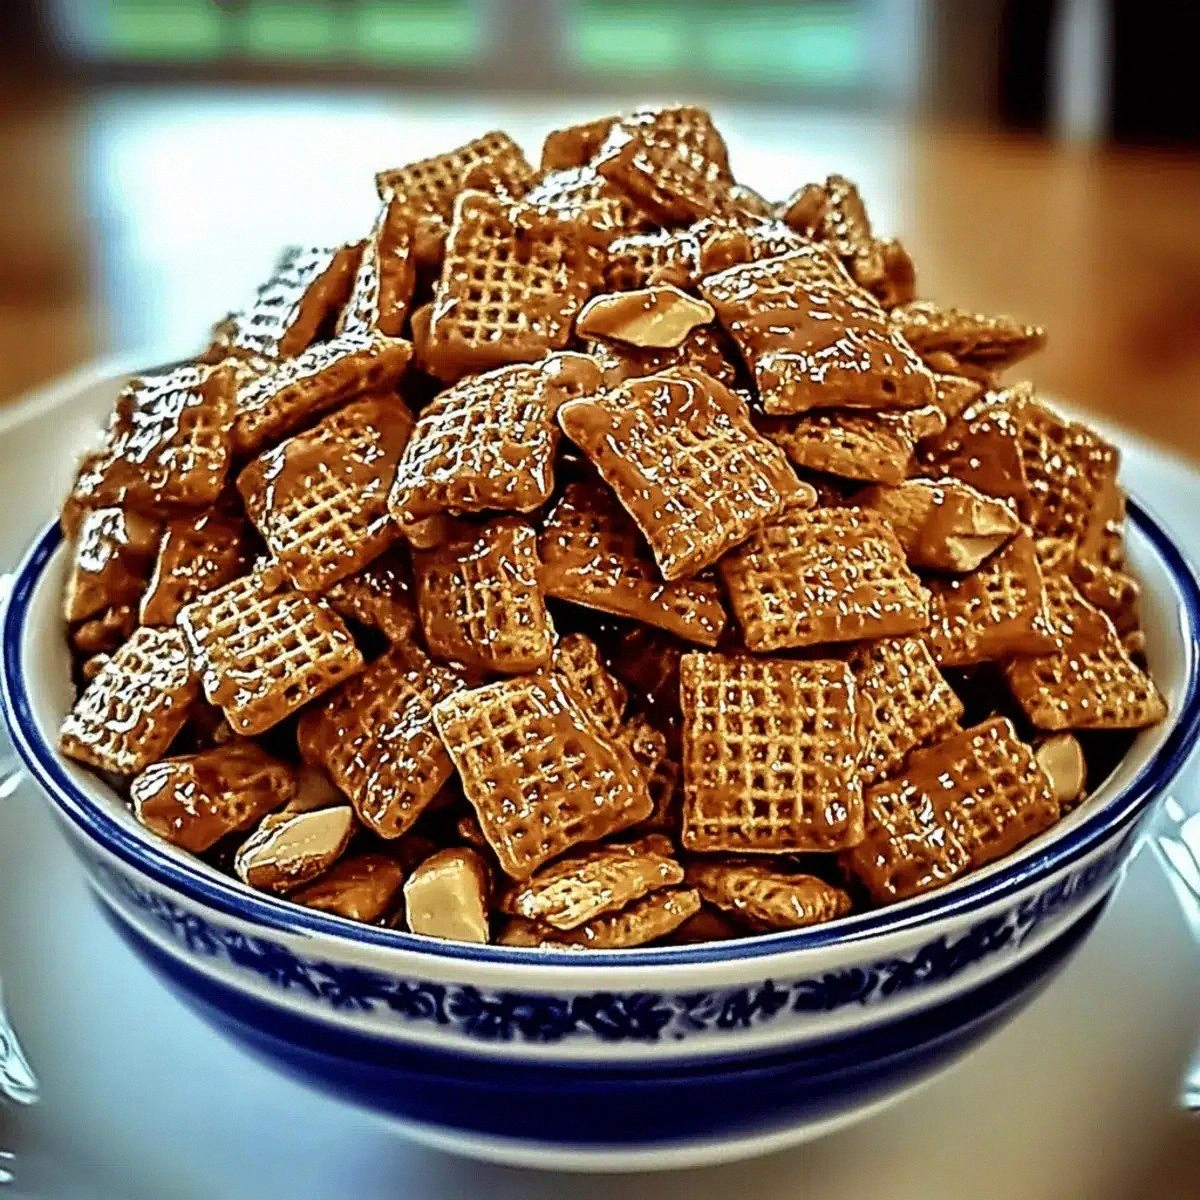
- Texture Symphony: Each bite delivers a triple‑layer crunch—light Chex, sturdy pretzels, and the occasional snap of nuts—followed by a melt‑in‑your‑mouth surprise from chocolate.
- Simplicity: Only nine pantry staples are needed, and the method uses one pan, one bowl, and a single oven, making it foolproof for even the most chaotic kitchens.
- Ingredient Quality: Using real unsalted butter and high‑quality brown sugar ensures a deep caramel flavor that artificial mixes simply can’t replicate.
- Crowd Reaction: This mix has become the unofficial “welcome snack” at my game nights; people line up, grab a handful, and instantly become fans.
- Make‑Ahead Potential: Once baked, it stores beautifully for up to two weeks, staying crisp and flavorful—perfect for stocking the pantry.
- Versatile Base: The core glaze is adaptable; you can swap nuts, add spices, or change the dried fruit to match any season or theme.
- Visual Appeal: The golden caramel coating gives each piece a glossy finish that looks as good as it tastes, making it Instagram‑ready without trying.
Inside the Ingredient List
The Flavor Base
Unsalted Butter (1 cup): This is the heart of the toffee, providing richness and a buttery canvas for the sugar to caramelize. Skipping butter for margarine will give a greasy finish and dull flavor. If you’re dairy‑free, try a high‑quality coconut oil, but expect a subtle coconut note.
Brown Sugar (1 cup): The molasses in brown sugar adds depth and a hint of smokiness that white sugar can’t match. Using light brown sugar yields a milder taste, while dark brown sugar intensifies the caramel notes. If you’re low‑on sugar, substitute with equal parts coconut sugar, though the texture will be slightly grainier.
Vanilla Extract (1 teaspoon): A splash of vanilla lifts the entire glaze, turning a simple caramel into a nuanced toffee. Real vanilla beans can be used for an even richer profile—just split a bean and scrape the seeds into the melt.
The Texture Crew
Chex Cereal (8 cups): The light, airy squares are the perfect vehicle for the glaze; they absorb just enough to become glossy without turning soggy. If you can’t find Chex, substitute with rice cereal or cornflakes, but expect a slightly different crunch.
Pretzels (2 cups): Their salty crunch creates the essential contrast to the sweet glaze. Broken pretzel sticks intermix with the cereal, ensuring each bite has that satisfying snap. For a twist, use honey‑dressed pretzels for an extra layer of sweetness.
Chopped Nuts (1 cup): Nuts add a buttery richness and a hearty bite. Almonds, pecans, or walnuts all work; just toast them lightly for extra flavor. Skipping nuts will make the mix feel lighter but lose that nutty depth.
The Unexpected Star
Chocolate Chips (1 cup): Added after baking, they melt just enough to create pockets of gooey chocolate that complement the toffee. Use dark chocolate for a bittersweet edge, or milk chocolate for a sweeter finish. If you’re allergic, try dairy‑free chocolate chips—just watch the melt point.
Dried Fruits (1 cup): The chewy dried fruit—think cranberries, apricots, or cherries—adds bursts of tartness that cut through the richness. They also contribute a chewy texture that contrasts the crisp cereal. Fresh fruit would become soggy, so stick with dried.
The Final Flourish
Salt (1 pinch): A tiny pinch amplifies every flavor, preventing the sweet glaze from becoming cloying. Sea salt crystals give a delicate crunch, while kosher salt dissolves completely. If you forget it, the mix will taste flat; add it at the very end of the glaze for maximum impact.
Everything's prepped? Good. Let's get into the real action...
The Method — Step by Step
Preheat your oven to 300°F (150°C). While the oven warms, line a large rimmed baking sheet with parchment paper; this prevents sticking and makes cleanup a breeze. I like to set the timer for 5 minutes just to remind myself that the real work is about to begin. The kitchen will start to fill with a faint buttery scent—trust me, that’s the first sign you’re on the right track.
In a heavy‑bottomed saucepan, melt the unsalted butter over medium‑low heat. Once melted, stir in the brown sugar, vanilla extract, and pinch of salt. Keep the mixture moving with a wooden spoon; you’ll hear a gentle sizzle as the sugar dissolves, and the color will shift to a deep amber. This is the moment of truth—if the mixture starts to smoke, lower the heat immediately; you don’t want burnt toffee.
Kitchen Hack: Add a splash of water (about 1 tbsp) if the glaze looks too thick; it will smooth out without diluting flavor.While the glaze simmers, combine the Chex cereal, pretzels, and chopped nuts in a massive mixing bowl. Toss them gently to distribute evenly—no need to over‑mix; you just want the pieces spread out so the glaze can coat each one later. If you’re feeling adventurous, sprinkle a pinch of smoked paprika for a subtle smoky undertone.
Once the butter‑sugar mixture reaches a steady boil and bubbles vigorously, remove it from the heat.
Let it sit for 30 seconds—this brief pause lets the temperature drop just enough to avoid scorching the cereal later.Watch Out: Do not let the mixture boil for more than 2 minutes; over‑cooking will turn the glaze bitter and hard.Immediately pour the hot glaze over the cereal‑nut‑pretzel mixture. Using a large spatula, fold the mixture gently but thoroughly, ensuring every piece is cloaked in that glossy caramel. You’ll notice the glaze thickening as it contacts the cool cereal, creating a light crust that will crisp in the oven. And now the fun part.
Kitchen Hack: Spread the coated mix onto the parchment in a single, even layer; this ensures uniform baking and prevents soggy spots.Slide the sheet into the preheated oven and bake for 25‑30 minutes, stirring every 10 minutes to promote even caramelization. You’ll hear a faint crackle as the glaze hardens—listen for that sound; it’s the auditory cue that your mix is reaching that perfect toasty stage. The edges will start pulling away from the parchment, and the aroma will become irresistibly sweet‑salty.
While the mix is still warm, quickly fold in the chocolate chips and dried fruit. The residual heat melts the chocolate just enough to create glossy pockets, while the dried fruit softens slightly, delivering a chewy contrast. This step is crucial—if you add them too early, the chocolate will burn; too late, and it won’t adhere.
Remove the tray from the oven and spread the mix out to cool completely on the parchment. As it cools, the glaze will set into a crisp, caramelized shell that snaps delightfully under your teeth. Resist the urge to dig in immediately; patience here rewards you with a perfectly crunchy texture.
That's it — you did it. But hold on, I've got a few more tricks that'll take this to another level...
Insider Tricks for Flawless Results
The Temperature Rule Nobody Follows
Most home cooks bake at 350°F, but dropping the heat to 300°F gives the glaze time to coat without scorching. This slower bake creates a uniform caramelization that’s crunchy on the outside yet tender inside. I once tried the hotter method and ended up with burnt edges and a bitter aftertaste—lesson learned.
Why Your Nose Knows Best
The moment the kitchen fills with that buttery‑toffee aroma is your cue to start checking the mix. If the scent is faint, give it another 5 minutes; if it’s strong and sweet, you’re likely at the perfect stage. Trusting your senses beats any timer.
The 5‑Minute Rest That Changes Everything
After baking, let the mix rest for exactly five minutes before adding chocolate and fruit. This short pause lets the glaze firm up just enough to hold the chocolate in place, preventing it from sliding off when you stir.
Preventing Sogginess
Spread the coated mix in a single layer on parchment; stacking pieces traps steam and makes them soggy. If you must use multiple trays, rotate them halfway through baking for even exposure.
Flavor Boost with a Pinch of Sea Salt
Finish the cooled mix with a light dusting of flaky sea salt. The tiny crystals create micro‑explosions of salty crunch that elevate the sweet caramel.
Creative Twists and Variations
This recipe is a playground. Here are some of my favorite ways to switch things up:
Spicy Chili Chocolate
Swap half of the chocolate chips for dark chocolate infused with chili flakes. Add a pinch of cayenne to the glaze for a subtle heat that lingers after the sweet finish. Perfect for those who love a kick.
Maple‑Pecan Delight
Replace brown sugar with pure maple syrup and swap the chopped nuts for toasted pecans. The maple adds a smoky sweetness, and pecans bring an earthy crunch that pairs beautifully with the caramel.
Tropical Escape
Use dried pineapple and mango pieces instead of dried fruit, and swap pretzels for toasted coconut flakes. Add a splash of rum extract to the glaze for an island vibe that transports you to a beachside hammock.
Nut‑Free Crunch
If you have a nut allergy, replace chopped nuts with roasted pumpkin seeds and sunflower seeds. The seeds provide a similar buttery bite without the allergens.
Double Chocolate Indulgence
Add an extra half cup of mini chocolate chips and drizzle melted white chocolate over the cooled mix. The dual chocolate layers create a decadent treat that feels like a dessert and a snack rolled into one.
Herbal Infusion
Steep a sprig of rosemary in the butter before adding sugar, then strain it out. The herb adds a piney note that complements the salty pretzels, turning the mix into an elegant appetizer for wine nights.
Storing and Bringing It Back to Life
Fridge Storage
Transfer the cooled mix into an airtight glass jar and store it in the refrigerator for up to two weeks. The cold environment keeps the chocolate from blooming and preserves the crispness of the cereal.
Freezer Friendly
For longer storage, portion the mix into zip‑top freezer bags, squeeze out excess air, and freeze for up to three months. When you’re ready to snack, let it thaw at room temperature for 15 minutes; the texture remains unchanged.
Best Reheating Method
To revive any lost crunch, spread the mix on a baking sheet, drizzle a tiny splash of water (about a teaspoon), and warm it in a 300°F oven for 5‑7 minutes. The steam re‑hydrates the glaze, and the heat restores that fresh‑out‑of‑the‑oven snap.