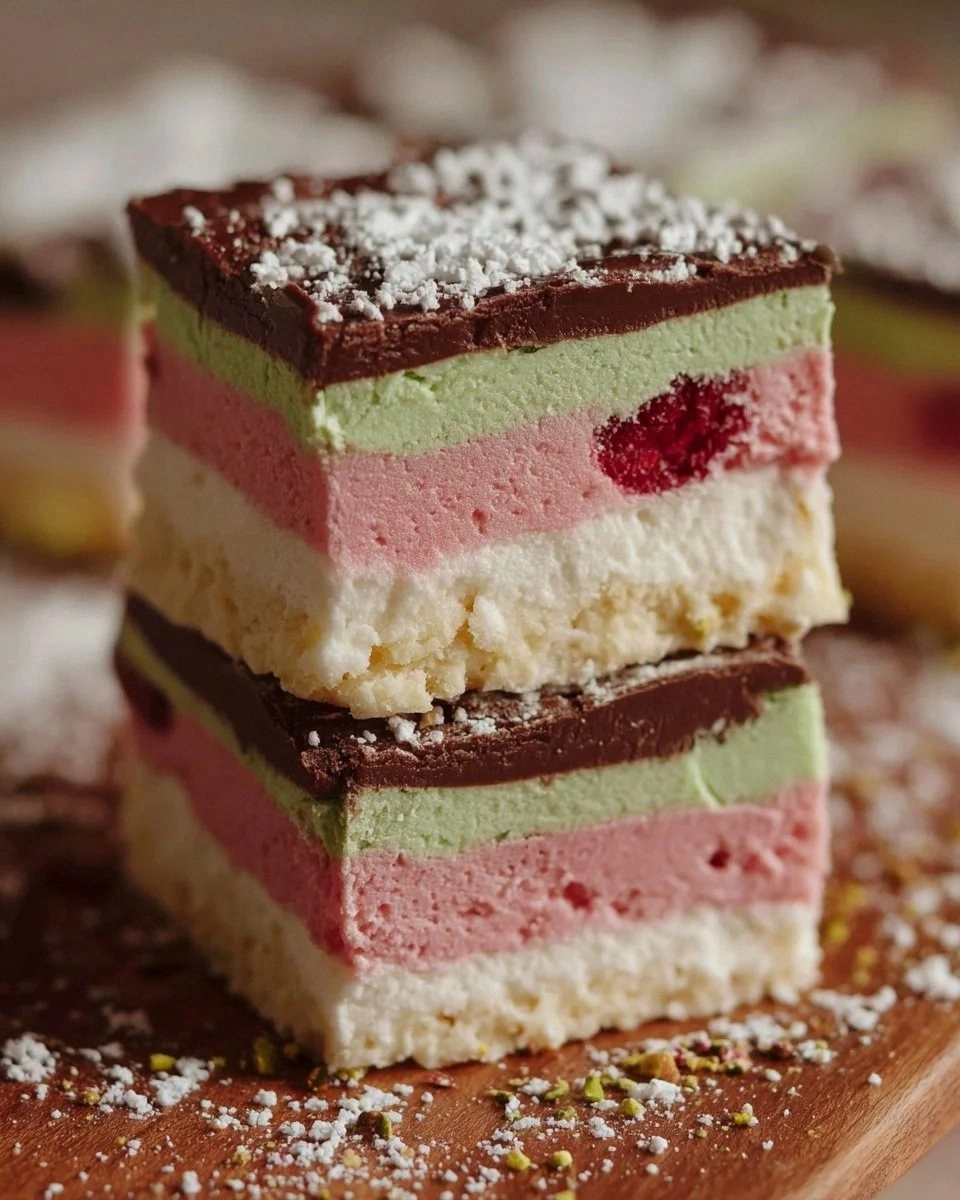
Picture this: I’m halfway through a frantic Saturday night, the kids are demanding dessert, and my freezer is looking as barren as a desert after a heatwave. I grabbed the last half‑pint of chocolate ice cream, a lonely pint of cherry, and a stubborn little tub of pistachio that I’d bought on a whim two weeks ago. The kitchen was a symphony of clanking pans, the timer buzzing like an impatient neighbor, and the faint hum of the freezer struggling to stay cool. I was on the brink of surrendering to a bag of store‑bought cookies when a flash of memory struck—an old Italian‑American bakery I’d visited as a kid, where the spumoni was layered like a work of art, each flavor distinct yet harmoniously intertwined. I thought, why not capture that magic in a bar that anyone can slice and share?
First, the scent. As soon as I melted the butter and mixed it with graham cracker crumbs, the kitchen filled with a buttery, toasted aroma that made my stomach do a little jig. Then the cocoa powder swooped in, turning the base into a rich, almost espresso‑dark canvas that promised depth. When I folded in the softened ice creams—chocolate, cherry, pistachio—the colors swirled like a painter’s palette, each hue holding its own promise of flavor. The moment I pressed the mixture into the pan and slid it into the freezer, the air turned crisp, and I could almost hear the ice creams whispering, “We’re about to become legendary.”
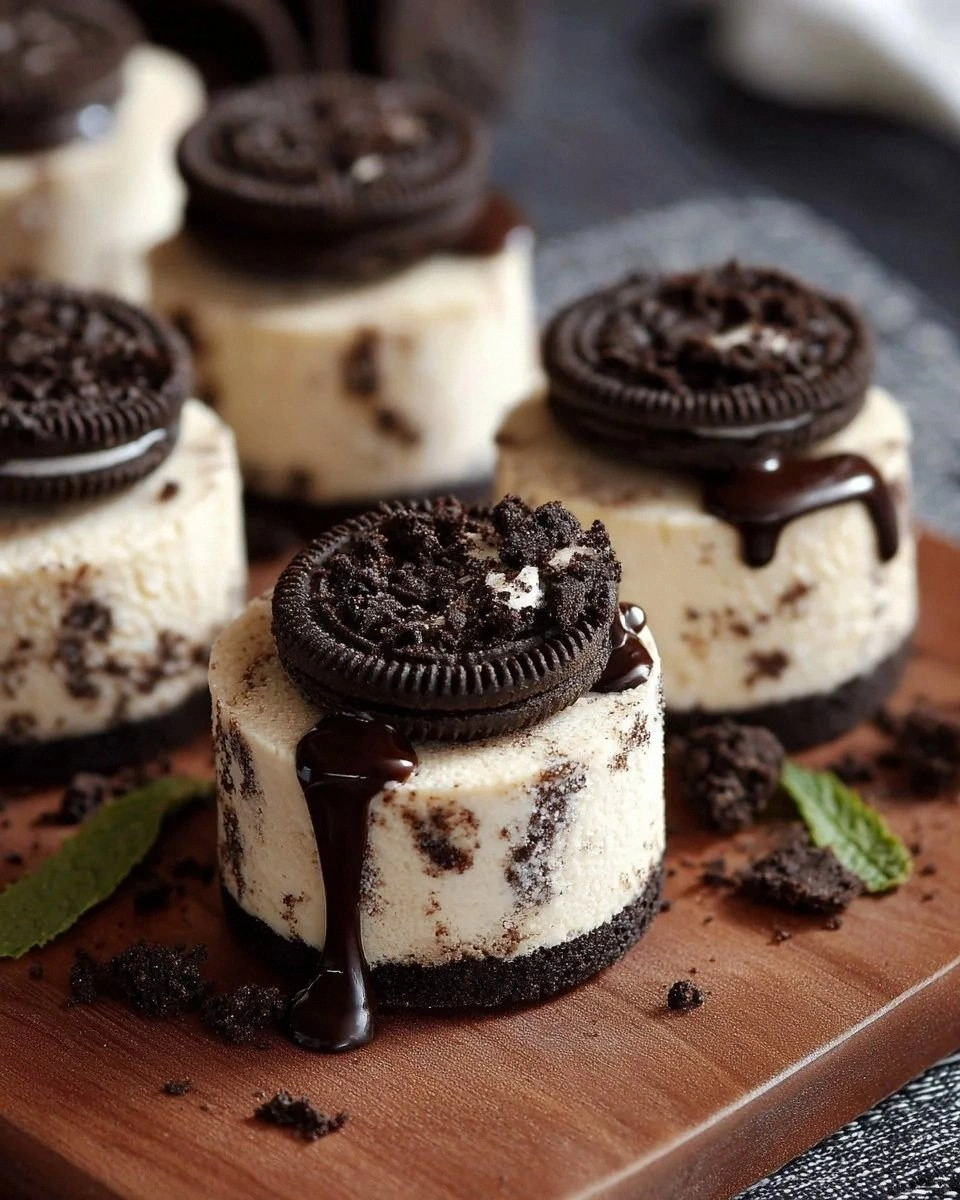
Most spumoni recipes I’ve tried either end up as a soggy mess or a flavorless slab that looks pretty but tastes like nothing. This version? It’s hands down the best version you’ll ever make at home. The secret lies in the balance of textures: a crisp, buttery crust that gives way to a silky, layered ice‑cream core, all crowned with a crunch of pistachios that crack like fireworks on your tongue. I dare you to taste this and not go back for seconds—your taste buds will file a formal complaint if you don’t.
And here’s the kicker: I’m using a simple technique of “soft‑set layering” that eliminates the need for a fancy ice‑cream maker or a blast freezer. The ice creams are softened just enough to spread, yet they retain enough structure to hold their shape when frozen solid. This is the game‑changer that turns an ordinary dessert into a show‑stopper without any culinary gymnastics. Let me walk you through every single step — by the end, you’ll wonder how you ever made it any other way.
What Makes This Version Stand Out
- Flavor Explosion: Each bite delivers a trio of distinct flavors—rich chocolate, bright cherry, and buttery pistachio—that dance together without stepping on each other's toes.
- Texture Symphony: The crunchy graham‑crust base contrasts perfectly with the creamy ice‑cream layers and the final pistachio crunch.
- Simplicity: No ice‑cream maker, no special equipment—just a freezer, a pan, and a whisk.
- Visual Wow Factor: When you cut into the bars, the swirled colors look like a marble cake, making it Instagram‑ready without any extra effort.
- Crowd‑Pleaser: Kids love the bright colors, adults appreciate the sophisticated flavor balance, and everyone is left asking for the recipe.
- Ingredient Quality: Using premium, full‑fat ice creams and fresh pistachios elevates the whole experience.
- Make‑Ahead Magic: The bars freeze beautifully, so you can prep them days in advance for parties or potlucks.
- Versatile Base: The graham‑cracker crust can be swapped for cookie crumbs or even a pretzel crumble for a salty twist.
Alright, let's break down exactly what goes into this masterpiece...
Inside the Ingredient List
The Flavor Base
The graham cracker crumbs are the unsung heroes of this bar. They provide a buttery, slightly sweet foundation that absorbs the melted butter, creating a crust that’s crisp on the edges yet tender underneath. Skipping them would leave you with a flimsy bar that falls apart like a wet paper towel. If you’re gluten‑free, swap them for gluten‑free graham crumbs or a blend of almond flour and oat flour for a nutty twist.
The Texture Crew
Unsweetened cocoa powder does more than add chocolate flavor; it deepens the color and adds a subtle bitterness that balances the sweetness of the ice creams. Without it, the base would be a one‑note vanilla that gets lost under the bold ice‑cream layers. For a different vibe, try espresso powder for a mocha‑like depth.
The Unexpected Star
Unsalted butter, melted, is the glue that binds the crumb mixture together. The butter’s richness ensures the crust holds its shape once chilled, while the lack of salt lets the sweet flavors shine. If you accidentally use salted butter, add a pinch less salt elsewhere in the recipe to keep the balance.
The Final Flourish
The trio of ice creams—chocolate, cherry, pistachio—are the heart of this dessert. Each brings its own texture: chocolate’s silkiness, cherry’s fruity brightness, pistachio’s buttery nuttiness. Using premium, full‑fat ice creams is non‑negotiable; low‑fat versions become icy and lose that melt‑in‑your‑mouth feel. If you can’t find pistachio, substitute with almond or hazelnut ice cream for a different nutty profile.
Everything's prepped? Good. Let's get into the real action...
The Method — Step by Step
Preheat your oven to 350°F (175°C). While the oven warms, line a 9‑by‑13‑inch baking pan with parchment paper, allowing the paper to overhang the sides for easy removal later. This step is crucial because a snug fit prevents the bars from sliding out and breaking.
Kitchen Hack: Toast the graham cracker crumbs in the oven for 5 minutes before mixing with butter. This intensifies the buttery flavor and adds a subtle crunch.In a large bowl, combine 1 cup graham cracker crumbs and 1/3 cup unsweetened cocoa powder. Stir until the cocoa is evenly distributed, giving the mixture a deep mahogany hue that looks as good as it tastes.
Pour 1/2 cup melted unsalted butter over the crumb‑cocoa blend. Using a spatula, press the mixture together until it resembles wet sand—moist but not soggy. Press this into the prepared pan, spreading it evenly to a thickness of about ½ inch. The edges should start pulling away from the parchment, a sign the crust is forming correctly.
Place the pan in the oven for 8‑10 minutes, just until the crust sets and the cocoa releases a faint, toasted perfume. Keep a close eye; you want a golden‑brown edge, not a burnt one. This short bake creates a sturdy base that won’t crumble when you slice later.
While the crust bakes, soften the three ice‑cream flavors. Transfer each pint into separate bowls and let them sit at room temperature for about 10 minutes, or use the kitchen hack from earlier. The goal is a spreadable consistency—think thick frosting, not liquid.
Once the crust is baked, remove it from the oven and let it cool on a wire rack for 5 minutes. Then, spread the chocolate ice cream over the entire surface, using a spatula to create an even layer about ¼ inch thick. This is the first flavor foundation.
Next, add the cherry ice cream. Drop spoonfuls across the chocolate layer, then use a clean knife or skewer to swirl the two together in a marble pattern. The swirls should be visible but not overly mixed; you want distinct ribbons of red and brown.
Watch Out: If the ice cream starts melting too much, pop the pan back in the freezer for a few minutes before continuing.Now for the pistachio layer. Drop it in the same way, then gently swirl it into the existing marble. The pistachio’s pale green adds a beautiful third hue, completing the classic spumoni look. At this stage, the bar should look like a colorful abstract painting.
Cover the pan tightly with plastic wrap, making sure the wrap touches the surface of the ice cream to prevent freezer burn. Transfer the entire pan to the freezer and let it set for at least 2 hours, though an overnight chill yields the firmest texture.
When you’re ready to serve, lift the bars out using the parchment overhang, place them on a cutting board, and sprinkle 1/4 cup chopped pistachios over the top. The pistachios add a delightful crunch and a visual sparkle that makes the bars look like a festive dessert.
Kitchen Hack: Use a hot, wet knife to cut clean squares—dip the blade in hot water, wipe dry, then slice. The heat prevents the ice cream from sticking.
That's it — you did it. But hold on, I've got a few more tricks that'll take this to another level...
Insider Tricks for Flawless Results
The Temperature Rule Nobody Follows
Never underestimate the power of a properly chilled pan. Before you pour the melted butter onto the crumbs, chill the mixing bowl for a few minutes. This keeps the butter from softening too much, ensuring a crispier crust. A friend once skipped this step and ended up with a soggy bottom that fell apart like a sandcastle at high tide.
Why Your Nose Knows Best
When the crust is in the oven, trust your sense of smell more than the timer. The moment you detect a faint, nutty aroma, it’s a sign the crust is ready. Over‑baking leads to a bitter edge that can overpower the delicate ice‑cream layers.
The 5‑Minute Rest That Changes Everything
After you pull the pan from the freezer, let it sit at room temperature for exactly five minutes before slicing. This short rest allows the outer layer to soften just enough for a clean cut while keeping the interior firm. Skipping this step often results in ragged edges and a messy presentation.
Layering with a Cold Spoon
Before you swirl the ice‑cream layers, chill the spoon or spatula in the freezer for a minute. A cold utensil glides through the ice cream without melting it, preserving those gorgeous marble swirls.
Garnish Timing
Sprinkle the chopped pistachios immediately after removing the plastic wrap, while the surface is still a bit soft. This ensures the nuts stick without sliding off. If you wait too long, they’ll bounce off like confetti at a parade.
Creative Twists and Variations
This recipe is a playground. Here are some of my favorite ways to switch things up:
Nutty Crunch Remix
Replace the pistachio ice cream with almond or hazelnut ice cream and sprinkle toasted almond slivers instead of pistachios. The result is a deeper nutty flavor that pairs beautifully with the chocolate base.
Berry Burst Edition
Swap the cherry ice cream for a mixed‑berry sorbet. The tartness of raspberry and blueberry adds a refreshing contrast, making the bars perfect for summer gatherings.
Mocha Madness
Stir a tablespoon of espresso powder into the chocolate ice cream before spreading. The coffee notes elevate the chocolate, creating a sophisticated adult‑only version.
White Chocolate Dream
Use white chocolate ice cream in place of the chocolate layer and add a drizzle of caramel over the top before freezing. The sweet‑and‑buttery profile is a crowd‑pleaser for those who shy away from dark chocolate.
Seasonal Spice
For a holiday twist, fold a pinch of ground cinnamon and nutmeg into the graham cracker crust and use spiced pumpkin ice cream as the third layer. The warm spices turn this into a festive treat.
Vegan Victory
Swap the butter for coconut oil, use dairy‑free chocolate, cherry, and pistachio ice creams, and choose a gluten‑free crumb base. The texture remains indulgent, and the flavors stay true.
Storing and Bringing It Back to Life
Fridge Storage
If you plan to serve the bars within 24 hours, keep the pan covered with plastic wrap and store it in the refrigerator. The bars will stay firm for up to two days, though the texture will be slightly softer than straight from the freezer.
Freezer Friendly
For longer storage, wrap the pan tightly in a double layer of aluminum foil after the initial plastic wrap. This prevents freezer burn and keeps the flavors intact for up to one month. When you’re ready to serve, move the pan to the fridge for 30 minutes to make slicing easier.
Best Reheating Method
To revive a slice that’s been in the fridge too long, place it on a microwave‑safe plate, sprinkle a tiny splash of water (about a teaspoon) over the top, and microwave on low for 10‑15 seconds. The steam restores the creamy texture without melting the whole bar.