Picture this: I was scrambling to salvage a burnt lasagna when my phone buzzed with a friend’s dare to create the ultimate quick lunch. I stared at the smoldering pan, my culinary confidence in tatters, and realized I needed a new hero. That’s when the idea of a savory tuna rice ball flickered like a neon sign in my mind. I imagined a bite‑size bite of comfort that could be made in minutes, no fancy gadgets required. The challenge was clear: deliver flavor, texture, and convenience in one rolling masterpiece.
From that moment, the craving for something that could satisfy a mid‑day slump became my obsession. I dreamed of a dish that would make my taste buds dance while my schedule stayed on track. The aroma of sesame oil sizzling and the promise of umami‑packed tuna had to be part of the story. I pictured the rice clinging together, the mayo coating like velvet, and the nori flakes giving that subtle oceanic whisper. The result would be a portable, protein‑rich snack that could double as a lunchbox hero.
First bite, the rice was a cloud of softness, yet the crunch from the nori edges gave a satisfying contrast. The mayo’s richness was balanced by the bright, briny tuna, creating a harmonious marriage of flavors. The vegetables added a fresh crunch that lifted the whole dish, preventing it from feeling too heavy. Every mouthful felt like a quick vacation to a seaside market, with the sesame oil’s nutty undertone tying everything together. The overall experience was a symphony of textures and tastes that made me question why I hadn’t tried this before.
I discovered that the secret lies in the rice’s moisture content; it must be just shy of sticky but still loose enough to roll. Using a small amount of sesame oil to coat the rice before mixing with tuna prevents it from drying out. The mayo acts as a binder, but it’s the nori flakes that give that coveted umami punch. Rolling the mixture into bite‑sized balls ensures even distribution of flavors and a perfect bite each time. The final step of lightly pan‑searing the balls gives a golden crust that seals in the juices.
Now, here’s the kicker: I added a splash of soy sauce and a pinch of crushed red pepper for a subtle kick that sets this version apart from the ordinary. Most people skip this step, but that little burst of umami and heat transforms the dish into a flavor explosion. I dare you to taste this and not go back for seconds. This is hands down the best version you'll ever make at home. The next paragraph will walk you through every single step — by the end, you'll wonder how you ever made it any other way.
Okay, ready for the game‑changer? Let’s dive into the ingredients, techniques, and tricks that make these tuna rice balls a culinary triumph. Trust me, the process is smoother than it looks, and the result is a dish that will become your go‑to lunch staple. If you've ever struggled with making sushi rice or rolling balls that hold together, you're not alone — and I've got the fix. Picture yourself pulling these out of the pan, the kitchen smelling incredible, and the anticipation of that first bite. Stay with me here — this is worth it.
What Makes This Version Stand Out
- Flavor: The tuna provides a savory base that’s enhanced by a touch of soy sauce and sesame oil. The mayo adds creaminess without overpowering the brine. Together they create a balanced profile that feels both comforting and exciting.
- Texture: The rice is moist yet firm enough to hold shape, while the nori flakes add a subtle crunch. The mixture’s consistency is buttery, thanks to the mayo, and the vegetables bring a fresh snap. This combination turns each bite into a multi‑sensory experience.
- Convenience: No knives, no cutting boards, no complicated equipment. All you need is a bowl, a spoon, and a little patience. The result is a dish that can be prepared in under 30 minutes.
- Nutritional Punch: Tuna supplies lean protein, omega‑3 fatty acids, and essential vitamins. The rice offers complex carbohydrates for sustained energy. The veggies contribute fiber and micronutrients, rounding out a balanced meal.
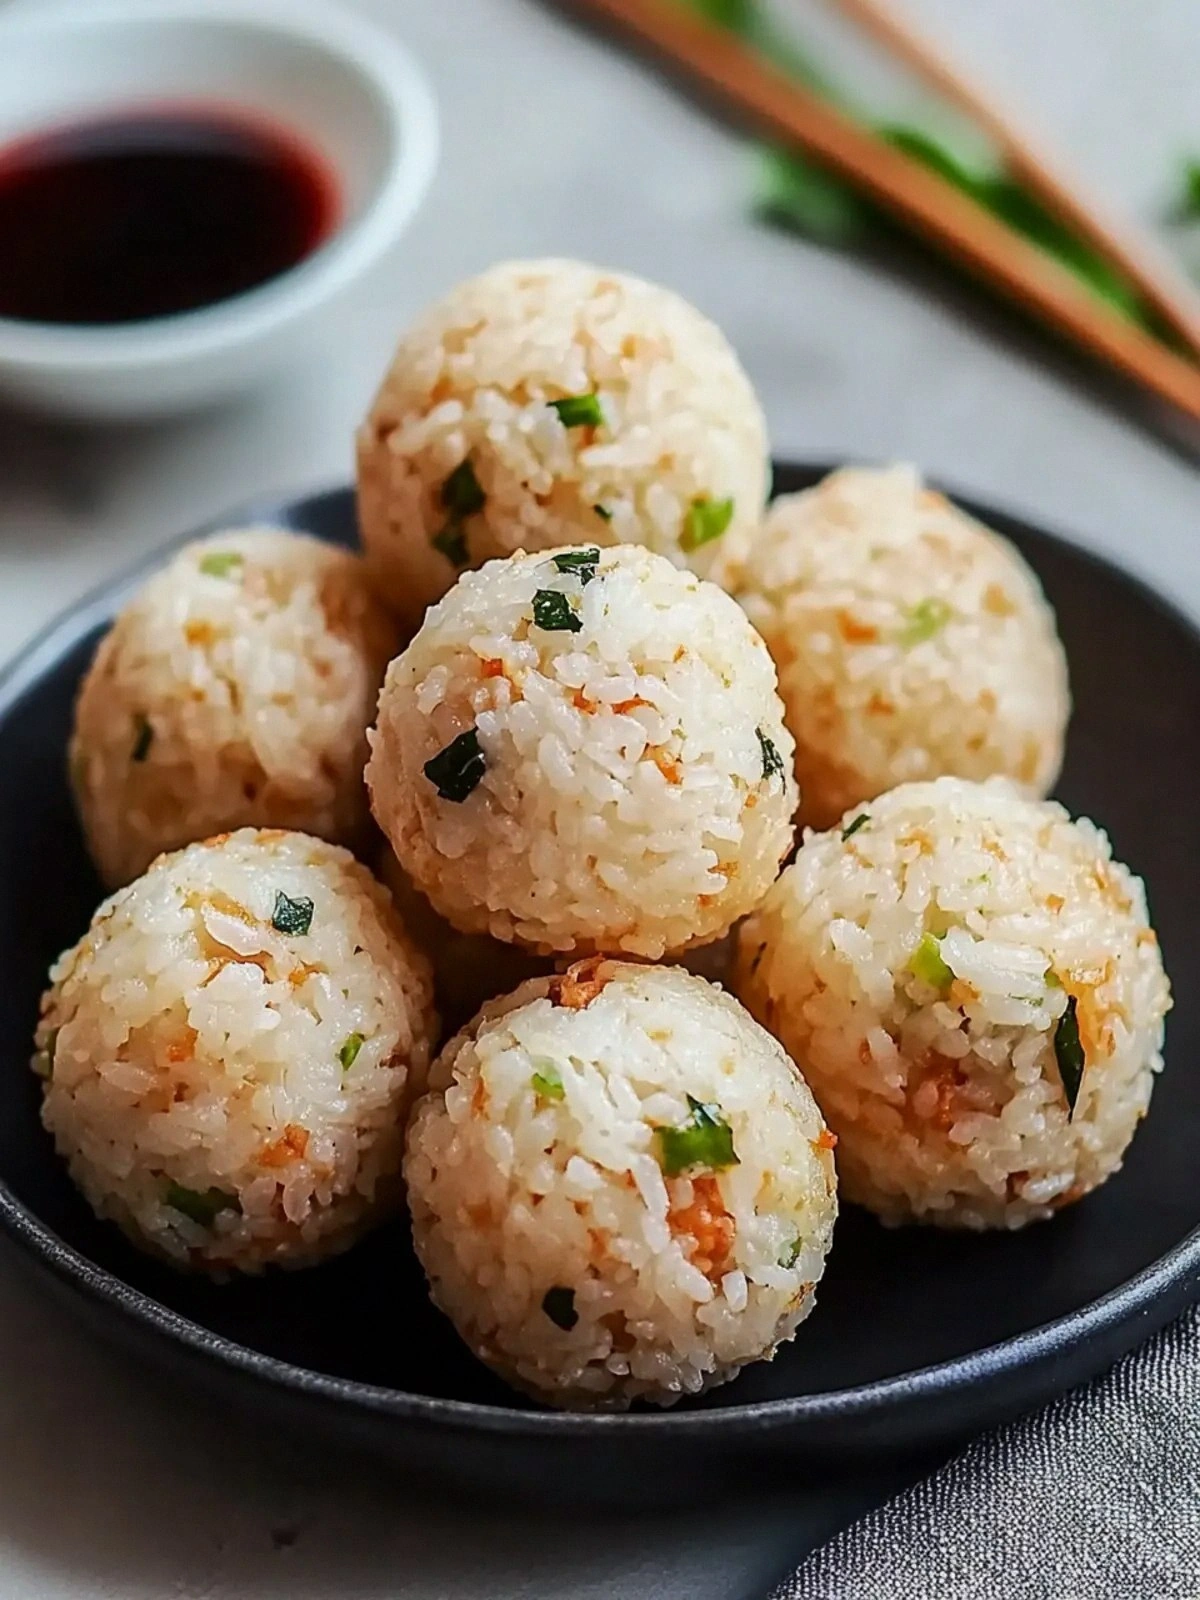
- Visual Appeal: The golden edges from pan‑searing contrast with the green flecks of vegetables and the dark specks of nori. The balls are uniform, making them look like tiny sushi jewels. Presentation is effortless yet impressive.
- Versatility: These balls can be served hot, at room temperature, or even cold. They pair with a simple dipping sauce or a splash of soy. You can wrap them in lettuce for a low‑carb option.
- Quick Prep: The rice is pre‑cooked, the tuna is canned, and the rest of the ingredients are ready to go. The entire prep takes less than 10 minutes. This is perfect for a busy weekday lunch.
- Make‑Ahead: Roll the balls a few hours before serving and keep them in the fridge. The flavors deepen over time, making them even more delicious. They’re ideal for meal prep or a picnic.
- Crowd‑Pleaser: Friends and family love the combination of familiar flavors in a new form. They’re a hit at potlucks and office lunches alike. Everyone can enjoy a bite without the fuss of sushi.
- Sustainability: Using canned tuna reduces waste and supports responsible fishing practices. The recipe uses minimal packaging and can be made with reusable containers. It’s a small but meaningful step toward eco‑friendly cooking.
Inside the Ingredient List
The Flavor Base
The canned tuna is the star of this dish, providing a clean, briny flavor that anchors every bite. The addition of soy sauce adds depth and a salty note that balances the mild tuna. A splash of sesame oil gives a nutty aroma that elevates the overall profile. Skipping the soy sauce would leave the mixture feeling flat and under‑seasoned.
The Texture Crew
Cooked sushi rice offers the perfect balance between stickiness and separation, allowing the balls to hold together without becoming mushy. The mayonnaise acts as a binder, creating a creamy interior that keeps the rice from falling apart. The finely chopped vegetables add a crisp bite that interrupts the softness. Without the mayo, the mixture would be too dry and difficult to shape.
The Unexpected Star
Nori flakes bring a subtle umami punch that is often missing from tuna‑based dishes. Their dark color provides a visual contrast that makes the balls pop on the plate. The flakes also impart a slightly smoky, sea‑salt flavor that enhances the tuna’s natural taste. If you prefer a milder version, reduce the amount of nori or use a light sprinkle.
The Final Flourish
Freshly chopped vegetables, such as cucumber or carrot, add crunch and a burst of color. They also contribute vitamins and fiber, turning a simple snack into a balanced meal. The vegetables help to keep the rice moist and prevent the mixture from drying out during cooking. Removing them would make the balls less vibrant and slightly less nutritious.
The Secret Touch
A pinch of crushed red pepper and a dash of lime juice add a bright, spicy kick that awakens the palate. The pepper’s heat cuts through the richness of the mayo, while the lime adds a citrusy brightness. These subtle additions turn an ordinary tuna ball into a memorable flavor experience. If you’re sensitive to spice, you can omit the pepper or use a milder variety.
Everything's prepped? Good. Let's get into the real action.
The Method — Step by Step
- Begin by rinsing the sushi rice until the water runs clear. This removes excess starch and prevents the mixture from becoming gummy. Let the rice drain for five minutes so it’s ready for mixing. The rice should be warm but not hot to the touch.
- In a large bowl, combine the cooked rice, sesame oil, and a pinch of salt. Toss gently to ensure the oil coats every grain. The oil not only adds flavor but also creates a barrier that keeps the rice from sticking to your hands.
- Kitchen Hack: If the rice feels too dry, sprinkle a tablespoon of water and mix again. This helps the grains stay moist without becoming soggy. The trick works best with pre‑cooked sushi rice.
- Add the canned tuna to the bowl, breaking it into small flakes with a fork. The tuna should be drained and patted dry to avoid excess liquid. Mixing the tuna early ensures even distribution throughout the rice.
- Kitchen Hack: For a richer flavor, replace half the mayo with Greek yogurt. The yogurt adds tang while keeping the mixture light. This swap also boosts protein content.
- Stir in the mayonnaise, nori flakes, and finely chopped vegetables until the mixture is cohesive. The mayo should bind everything together, creating a smooth texture. The vegetables add a fresh crunch that balances the creamy interior.
- Season the mixture with soy sauce, crushed red pepper, and a splash of lime juice. Taste as you go, adjusting the salt or acidity to your preference. The sauce should coat the rice like velvet, enhancing every bite.
- Cover the bowl with plastic wrap and refrigerate for 15 minutes to allow the flavors to meld. This step also firms up the rice, making it easier to roll.
- Watch Out: When rolling the balls, use a damp cloth or wet hands to prevent sticking. The mixture should be firm enough to hold shape but still pliable. If it’s too hard, let it rest a few more minutes.
- Using a small cookie scoop or your hands, shape the mixture into bite‑sized balls, about the size of a golf ball. Press gently to ensure the balls are compact. The goal is a uniform shape for even cooking.
- Heat a non‑stick skillet over medium heat and add a splash of sesame oil. Place the balls in the pan, leaving space between them. Cook for 2–3 minutes on each side until golden brown and slightly crispy.
- Transfer the cooked balls to a plate lined with paper towels to absorb excess oil. Serve immediately or let cool before storing. The crisp edges will soften slightly if left to rest, so enjoy them fresh for the best texture.
Insider Tricks for Flawless Results
The Temperature Rule Nobody Follows
Cooking the balls at the right heat is crucial for achieving that coveted golden crust. Too low, and they’ll stay pale; too high, and the interior will burn before the exterior is done. I keep the skillet at medium and use a thermometer to confirm it’s around 350°F. This simple adjustment eliminates the guesswork and guarantees consistency.
Why Your Nose Knows Best
Smell is an underrated cue in cooking. The first whiff of sesame oil sizzling signals that the pan is ready. A faint nutty aroma indicates the rice has absorbed enough oil. If the scent is weak, the mixture will taste bland.
The 5‑Minute Rest That Changes Everything
After mixing, let the rice rest for five minutes before rolling. This brief pause allows the grains to settle and absorb moisture. The result is a firmer mixture that holds its shape without crumbling. Skipping this step often leads to mushy balls.
The Secret to a Crispy Edge
A quick drizzle of sesame oil on the pan before adding the balls creates a non‑stick surface that promotes browning. Flip the balls only once to maintain an even crust. The edges should crackle slightly, indicating a crisp exterior.
The Veggie Boost
Using julienned carrots or bell peppers instead of cucumber adds natural sweetness and color. The extra crunch also keeps the texture varied. If you’re vegan, substitute the tuna with diced chickpeas for a similar protein punch.
The Final Touch
Sprinkling a pinch of toasted sesame seeds over the cooked balls gives a nutty aroma and a subtle crunch. It’s a simple addition that elevates the dish. I usually add the seeds right after pan‑searing for maximum flavor.
The Make‑Ahead Method
After rolling, let the balls cool completely before refrigerating. Store them in an airtight container to preserve freshness. Reheat in a skillet for a minute on each side; the crispness returns quickly. This technique makes the recipe perfect for meal prep.
Creative Twists and Variations
Spicy Sriracha Kick
Swap the crushed red pepper for a tablespoon of sriracha. The heat is more pronounced and the sauce adds a sweet undertone. This version is perfect for those who love a fiery bite. Serve with a side of cucumber slices to cool the palate.
Mediterranean Medley
Replace the tuna with chopped kalamata olives and feta cheese. Add a dash of oregano for a Greek flair. The olives give a briny depth, while the feta introduces creaminess. These balls pair beautifully with a lemon‑yogurt dip.
Asian Fusion Roll
Use a mixture of cooked quinoa and rice for a nutty texture. Add diced mango for a sweet contrast. Toss with a drizzle of hoisin sauce and a sprinkle of toasted sesame seeds. The result is a tropical, savory bite.
Low‑Carb Lettuce Wrap
Wrap each ball in a crisp romaine leaf instead of serving it on a plate. The lettuce adds crunch and a refreshing bite. Drizzle with a light soy‑ginger sauce for extra zing. This version is great for keto or low‑carb diets.
Vegan Tuna Alternative
Replace the tuna with a blend of mashed chickpeas, tahini, and lemon juice. This mixture mimics the texture of tuna while keeping it plant‑based. Add a pinch of smoked paprika for depth. The result is a hearty, protein‑rich ball.
Breakfast Power Pack
Add a beaten egg to the mixture before rolling. The egg binds the ingredients and adds protein. Cook the balls until the egg is set, then serve with a side of avocado. This variation turns the recipe into a quick, satisfying breakfast.
Dessert‑Inspired Sweet
Use sweetened coconut milk rice and replace tuna with shredded coconut. Mix in a teaspoon of honey and a pinch of cinnamon. Roll and bake at 350°F for 15 minutes. The result is a chewy, sweet bite that satisfies the sweet tooth.
Storing and Bringing It Back to Life
Fridge Storage
Store the uncooked balls in an airtight container in the refrigerator for up to 48 hours. Keep them on a paper towel to absorb excess moisture. When ready to serve, reheat in a skillet for a minute on each side. The rice will stay firm and the flavors will stay fresh.
Freezer Friendly
Place the balls on a parchment‑lined tray and freeze until solid. Once frozen, transfer them to a freezer bag for long‑term storage. They can be kept for up to two months. Reheat directly from the freezer in a skillet, adding a splash of water to keep them moist.
Best Reheating Method
The most effective way to revive these balls is to pan‑fry them over medium heat. The skillet’s heat restores the crisp crust while the interior stays creamy. If you’re in a hurry, microwave for 30 seconds and then finish in the pan for a minute. This combination keeps the texture perfect.