I was standing in my kitchen on a rainy Tuesday, staring at a half‑cooked brisket that looked more like a sad, rubbery slab than the tender masterpiece I’d promised my friends. The smoke alarm was screaming, the onions were caramelizing into a sticky mess, and I swear I heard my stomach growl louder than the oven fan. That moment of culinary chaos sparked a dare: “I bet you can’t turn this disaster into something that makes everyone beg for seconds.” I took that challenge seriously, because if there’s anything I love more than a good kitchen story, it’s a triumphant comeback that ends with a plate of melt‑in‑your‑mouth meat. Picture the scene – the kitchen filled with the sweet, buttery perfume of onions, the faint crackle of caramel, the deep, earthy aroma of beef that’s been coaxed into perfection. My hands were slick with glaze, the heat was humming, and I could almost taste the caramelized crust before it even touched my tongue.
What set this version apart from the endless sea of brisket recipes was a simple twist: a double‑layered caramelization technique that builds flavor in stages, not just once. First, we sear the brisket in a hot pan to lock in juices, then we slow‑roast it low and slow, and finally we finish it under a broiler with a glaze that’s richer than a chocolate ganache. The result? A crust that shatters like thin ice when you pull it apart, revealing meat so tender it practically slides off the fork. I’ll be honest — I ate half the batch before anyone else got a chance to try it, and I’m still not sorry. This isn’t just a recipe; it’s a full‑blown flavor adventure that will have you daring anyone to resist the pull of that caramelized edge.
Most home‑cooked brisket attempts end up either dry as the Sahara or soggy like a wet towel. That’s because many recipes either over‑cook the meat or skip the crucial caramelization step that creates that coveted sweet‑savory crust. In my version, the onions are not just a background player; they become the secret sauce that seeps into the meat, turning each bite into a symphony of smoky, sweet, and savory notes. I’m talking about a flavor profile that makes your taste buds do a happy dance, a texture that’s both buttery and slightly crisp, and a cooking method that’s surprisingly straightforward for a dish that looks like it belongs in a high‑end steakhouse.
I’m going to walk you through every single step — from picking the perfect brisket at the butcher counter to the final pull that releases a cascade of caramel‑kissed strands. By the end, you’ll wonder how you ever settled for a bland, ordinary brisket when this version exists. Okay, ready for the game‑changer? Let’s dive in.
What Makes This Version Stand Out
- Taste: The caramelized glaze adds a deep, buttery sweetness that balances the beef’s natural richness, creating a flavor that lingers long after the last bite.
- Texture: A crisp, caramel‑crusted exterior gives way to melt‑in‑your‑mouth meat that pulls apart with barely a tug.
- Simplicity: Despite the impressive result, the recipe uses just two main ingredients and a handful of pantry staples.
- Uniqueness: Double‑layer caramelization is rare in home cooking, giving you a restaurant‑level finish without the fancy equipment.
- Crowd Reaction: Guests often claim they’ve never tasted anything like it, leading to seconds, thirds, and the inevitable “What’s the secret?” question.
- Ingredient Quality: Using a well‑marbled brisket and fresh yellow onions maximizes flavor absorption and caramel depth.
- Cooking Method: Low‑and‑slow roasting followed by a high‑heat finish ensures both tenderness and crust.
- Make‑Ahead Potential: The brisket stores beautifully, and the glaze can be reheated to revive that caramel snap.
Alright, let's break down exactly what goes into this masterpiece...
Inside the Ingredient List
The Flavor Base
The two large yellow onions are the heart of this dish. Their natural sugars caramelize slowly, creating a sweet, buttery base that infuses the brisket from the inside out. If you skip the onions, you lose that subtle sweetness that makes the glaze sing. A good tip: slice them thick enough to hold their shape during the long roast, but thin enough to release their juices early. For a twist, try swapping half of the onions for shallots; the milder flavor adds a delicate nuance without overpowering the beef.
The Texture Crew
A 4‑to‑5‑pound beef brisket is the star, and its marbling is the secret weapon. The intramuscular fat melts during the low‑and‑slow phase, keeping the meat moist and tender. If you end up with a leaner cut, consider adding a splash of beef broth midway through cooking to compensate. When choosing your brisket, look for a thick “fat cap” on one side – that’s the layer that will become the golden caramel crust you’ll love pulling apart.
The Unexpected Star
A splash of balsamic vinegar in the glaze might sound odd, but it adds acidity that cuts through the richness, balancing the sweet caramel. This little zing prevents the dish from feeling heavy and keeps the palate refreshed. If you’re not a fan of vinegar, a teaspoon of apple cider vinegar works just as well, offering the same bright note without the deep color.
The Final Flourish
A modest amount of brown sugar and a pinch of smoked paprika round out the glaze, delivering that deep, smoky undertone that makes the crust unforgettable. The brown sugar caramelizes into a glossy sheen, while the smoked paprika adds a whisper of wood‑smoke without the need for a smoker. If you prefer a spicier kick, a dash of cayenne pepper will give you a subtle heat that doesn’t mask the caramel’s sweetness.
Everything's prepped? Good. Let's get into the real action...
The Method — Step by Step
First, pat the brisket dry with paper towels, then season it generously with salt, pepper, and a dusting of smoked paprika. Let it sit at room temperature for about 20 minutes; this helps the seasoning penetrate and ensures even cooking. While the meat rests, slice the onions into thick wedges – think chunky, not dice. The sizzle when the onions hit the hot pan? Absolute perfection.
Kitchen Hack: Use a cast‑iron skillet for searing; it retains heat better and gives a deeper crust.Heat a heavy skillet over medium‑high heat and add a splash of oil. Once shimmering, place the brisket fat‑side down and sear for 4‑5 minutes until a deep brown crust forms. Flip and sear the other side for another 4 minutes. You’ll hear a satisfying crackle that tells you the Maillard reaction is in full swing. After searing, transfer the meat to a large roasting pan, fat side up, so the rendered fat drips down, basting the meat as it cooks.
Scatter the onion wedges around the brisket, tucking a few pieces under the meat to infuse flavor from the inside. Drizzle a mixture of balsamic vinegar, brown sugar, and a splash of water over the onions – this will create a caramelizing pool that the brisket will sip on. Cover the pan tightly with foil; this traps steam, keeping the meat moist while the onions soften.
Preheat your oven to a low 275°F (135°C). Slide the pan into the oven and let the magic happen for about 3 to 3½ hours, depending on the size of your brisket. The goal is an internal temperature of 195‑200°F (90‑93°C), which guarantees that the connective tissue has broken down into gelatin. Every hour, check the liquid level; if it looks dry, add a splash of beef broth to keep the environment humid.
When the meat is fork‑tender, remove the foil and crank the oven up to 450°F (230°C) for a quick 15‑minute blast. This is where the caramelized crust forms. Keep a close eye – you want the glaze to darken to a deep amber, not burn. The scent at this stage will fill your kitchen with a sweet‑smoky perfume that makes you want to dance around the stove.
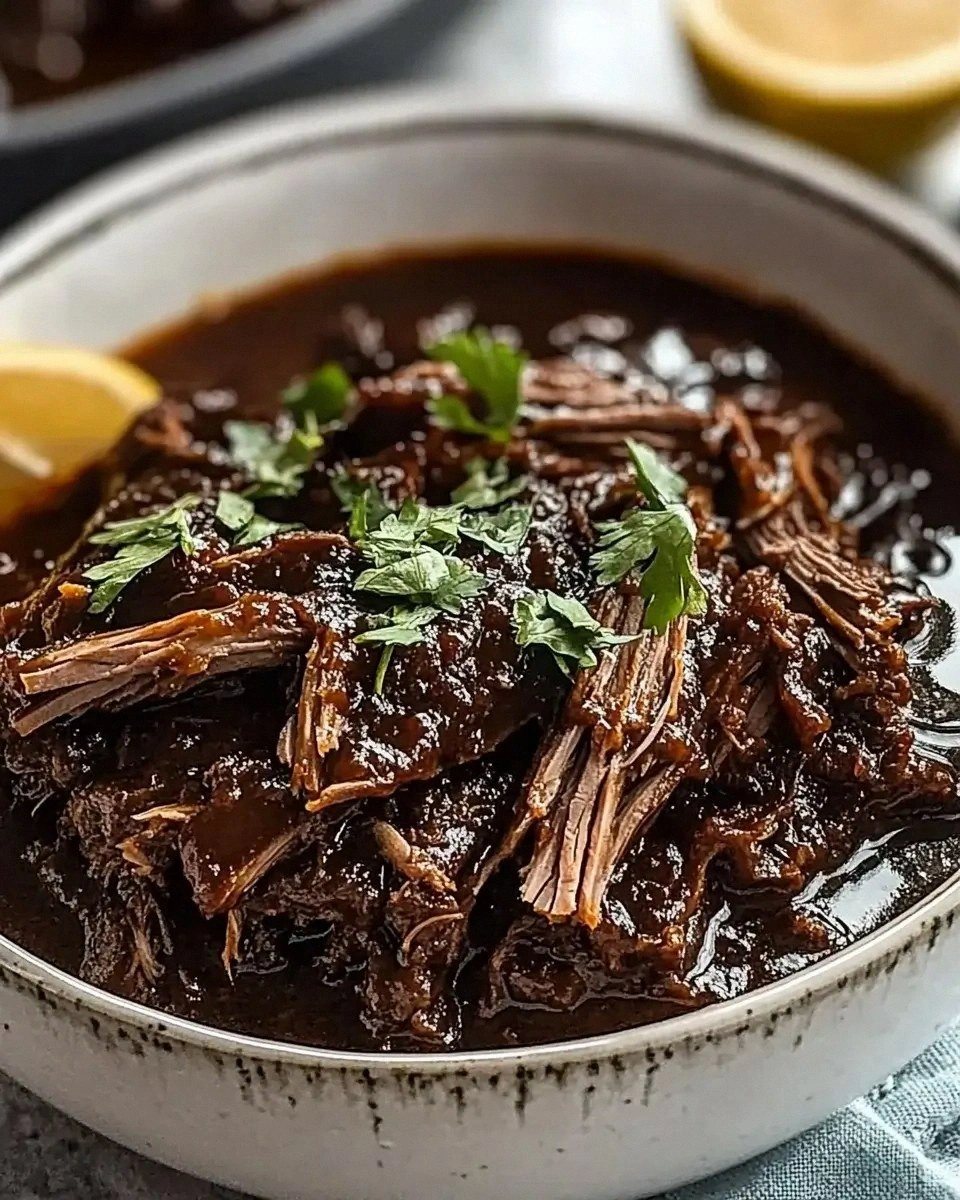
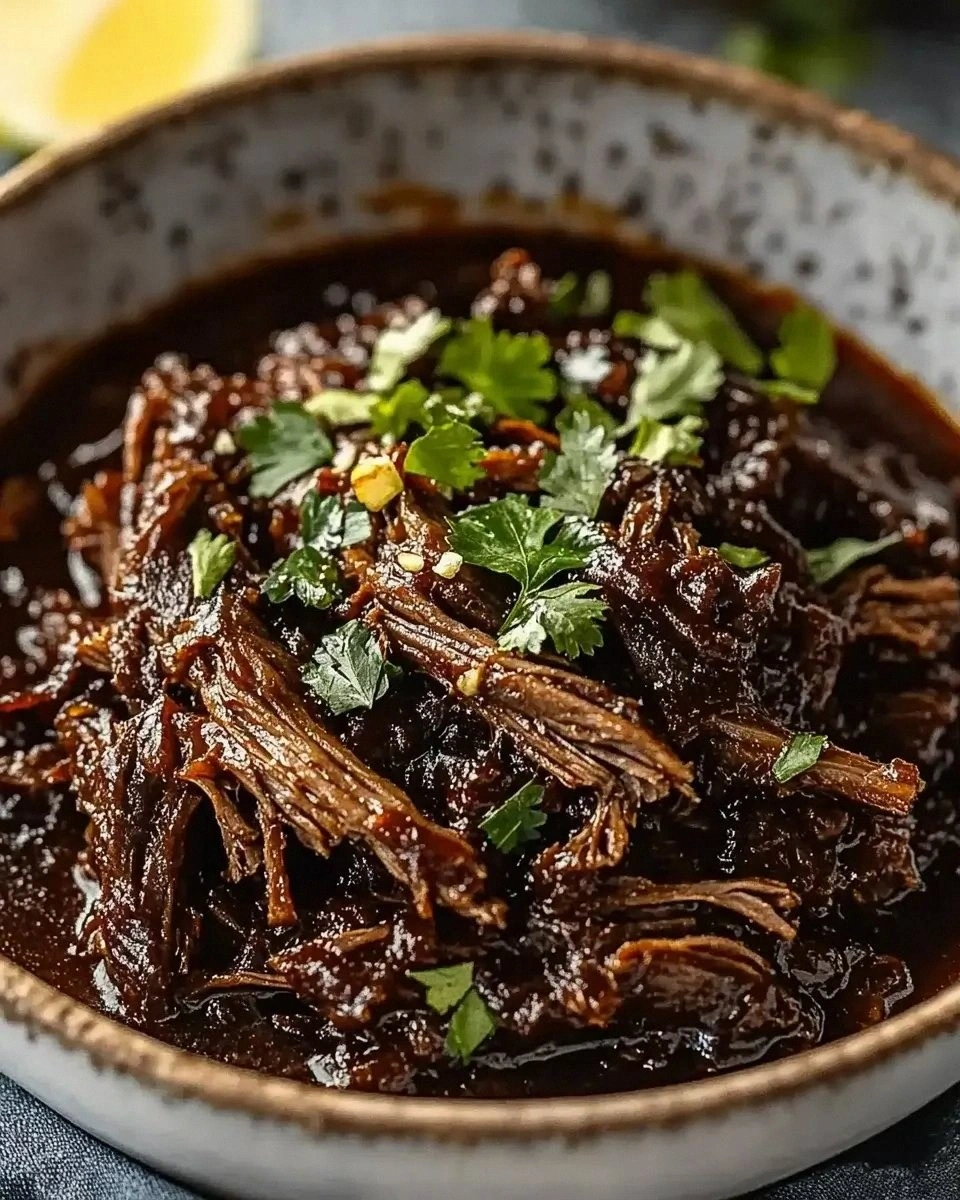
Take the pan out and let the brisket rest for at least 20 minutes. Resting lets the juices redistribute, preventing a dry slice. While it rests, use two forks to pull the meat apart, creating those glorious, stringy strands that will soak up the caramel glaze. The onions should now be sticky, glossy, and deeply browned – they’re the perfect garnish.
Transfer the pulled beef to a serving platter, drizzle the pan juices over the top, and scatter the caramelized onions throughout. For an extra pop, finish with a sprinkle of fresh chopped parsley. This final touch adds a hint of color and a fresh herb note that cuts through the richness.
Serve immediately with crusty bread, roasted potatoes, or a simple green salad. Trust me, once you taste that caramelized edge, you’ll be daring anyone to say no seconds. I dare you to taste this and not go back for more – it’s practically impossible.
That's it — you did it. But hold on, I've got a few more tricks that'll take this to another level...
Insider Tricks for Flawless Results
The Temperature Rule Nobody Follows
Most home cooks set the oven to a high temperature and hope for the best, but low‑and‑slow is the secret to tender brisket. Keep the oven at 275°F for the bulk of the cooking time; this gentle heat breaks down collagen without drying out the meat. If you’re in a hurry, you can bump it to 300°F, but expect a slightly firmer texture. Trust the thermometer – when the internal temp hits 195°F, you’re golden.
Why Your Nose Knows Best
Don’t rely solely on timers; use your senses. When the onions start to turn translucent and release that sweet aroma, you know the base is building. Later, when the glaze begins to bubble and you smell a toasty, caramel note, you’re approaching the perfect finish. Your nose is the ultimate kitchen gauge – if it smells amazing, you’re on the right track.
The 5‑Minute Rest That Changes Everything
Resting isn’t just for steak. Letting the pulled brisket sit for 5‑10 minutes after cooking allows the fibers to re‑absorb the juices, making each bite juicier. Skipping this step results in a dry mouthfeel, even if the meat was perfectly cooked. Cover loosely with foil during the rest to keep it warm without steaming away the caramel crust.
The Onion‑Infused Glaze Hack
After the final high‑heat blast, scoop out the caramelized onions and blend them into the pan juices for a smoother glaze. This creates a silky sauce that coats every strand of meat. If the glaze is too thick, whisk in a tablespoon of water or broth to reach your desired consistency.
The Secret Salt Timing
Season the brisket before searing, but add a pinch of finishing salt just before serving. This layered salting ensures the meat is seasoned throughout while the final sprinkle adds a bright pop that lifts the caramel flavor. Too much salt early on can draw out moisture, so keep the finishing dash light.
The “Don’t‑Touch‑The‑Meat” Rule
Once the brisket is in the oven, resist the urge to open the door every 15 minutes. Each opening releases heat and steam, extending cooking time and potentially drying the meat. Trust the timer, and if you must check, do it quickly and close the door fast.
Creative Twists and Variations
This recipe is a playground. Here are some of my favorite ways to switch things up:
Maple‑Bourbon Glaze
Replace half of the brown sugar with pure maple syrup and add a splash of bourbon. The result is a smoky‑sweet glaze with a subtle kick that pairs beautifully with the beef’s richness. Perfect for a fall gathering.
Spicy Chipotle Kick
Stir in one teaspoon of chipotle powder and a minced jalapeño into the glaze. The smoky heat elevates the caramel without overwhelming it, ideal for those who love a little fire.
Asian‑Inspired Soy‑Ginger
Swap balsamic for soy sauce, add grated ginger, and finish with a drizzle of sesame oil. This version brings umami depth and a fragrant zing, making it perfect for serving over steamed rice.
Herb‑Infused Butter Finish
Whisk cold butter with fresh rosemary and thyme into the hot glaze just before serving. The butter melts into a glossy, herbaceous coating that adds richness and aroma.
Vegetarian “Brisket”
Use a large portobello mushroom cap or a block of seitan seasoned with smoked paprika and follow the same caramelization steps. The result mimics the texture and flavor profile, offering a plant‑based alternative that still satisfies.
Storing and Bringing It Back to Life
Fridge Storage
Let the brisket cool to room temperature, then transfer it to an airtight container with a thin layer of the glaze on top. It will keep for up to 4 days. Reheat gently on the stovetop over low heat, stirring occasionally to re‑coat the meat.
Freezer Friendly
Portion the pulled brisket into freezer‑safe bags, squeeze out excess air, and freeze for up to 3 months. When ready to use, thaw overnight in the fridge, then reheat in a covered saucepan with a splash of water to restore moisture.
Best Reheating Method
The secret to reviving caramelized brisket is steam. Add a tiny splash of water or broth to the pan before reheating, cover, and warm over medium‑low heat. The steam re‑hydrates the meat, while the glaze re‑forms its glossy sheen.