I was in the middle of a chaotic Saturday night when my roommate dared me to create something that could stop a binge‑watch marathon in its tracks. I stared at a half‑empty jar of peanut butter, a lonely block of cream cheese, and a bag of chocolate chips that had been whispering for attention for weeks. The kitchen smelled like burnt popcorn from earlier attempts, and the only thing louder than the TV was my stomach growling like a freight train. I grabbed a mixing bowl, tossed in the basics, and what emerged was a bite‑size revelation that could make even the most disciplined dessert‑phobe squeal with delight.
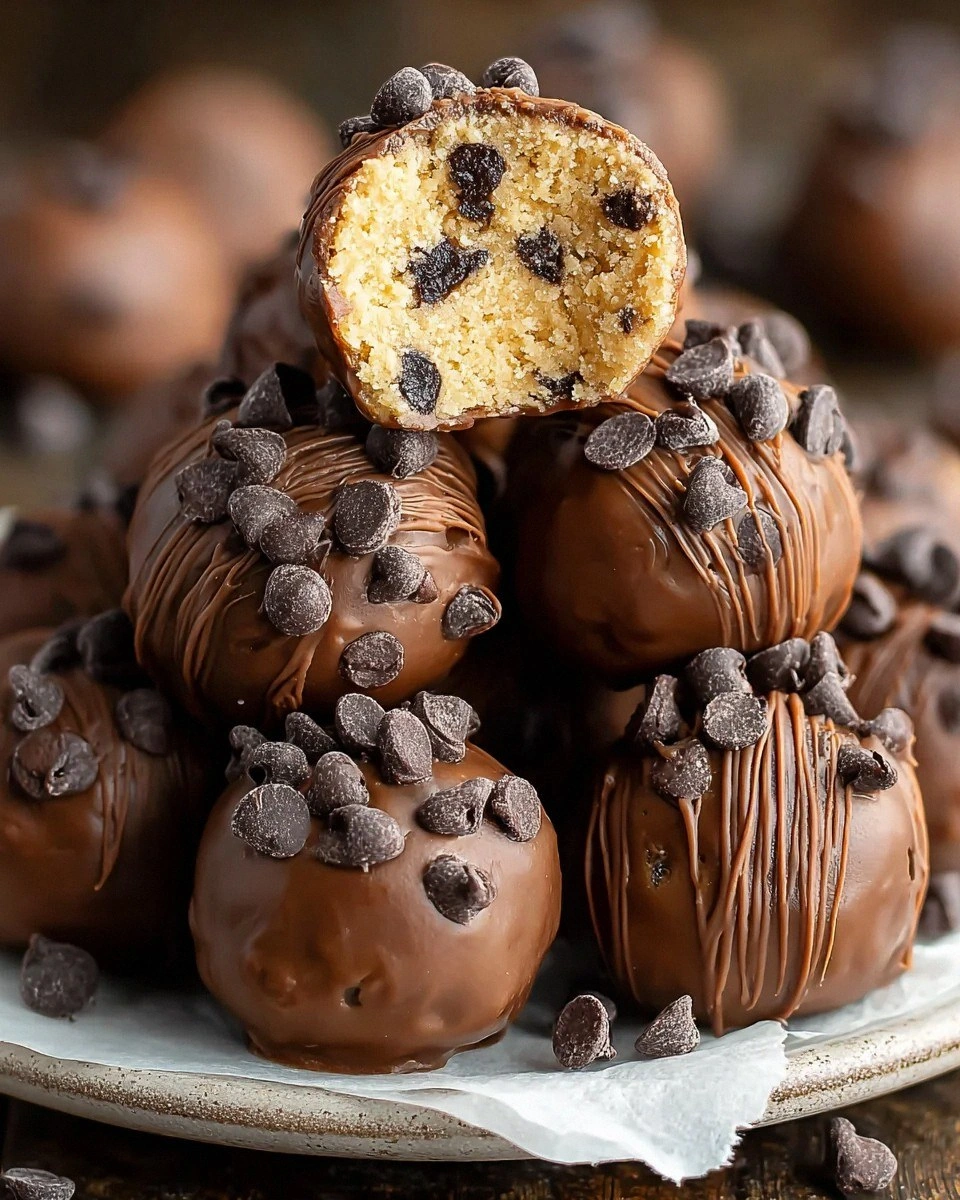
Picture this: a glossy, chocolate‑coated sphere that cracks open to reveal a creamy, peanut‑buttery heart that’s as smooth as silk and as rich as a midnight indulgence. The first bite releases a burst of salty‑sweet harmony that dances on your palate, while the outer shell gives a satisfying snap that feels like tiny fireworks in your mouth. You can almost hear the faint sigh of relief from your taste buds as they finally get the party they’ve been craving. The aroma? A warm, buttery perfume that mingles with toasted peanuts and a hint of vanilla, making the whole house feel like a high‑end bakery on a lazy Sunday.
What makes this version truly stand out is the balance between simplicity and decadence. Most no‑bake cheesecake ball recipes either over‑sweeten or end up dry and crumbly, but I’ve cracked the code with a precise ratio of peanut butter to cream cheese that creates a velvety core without any grainy aftertaste. The secret lies in a quick chill‑step that firms the mixture just enough for perfect rolling, and a double‑dip technique that guarantees an even chocolate coating every single time. I dare you to taste this and not go back for seconds – because once you’ve experienced the melt‑in‑your‑mouth texture, you’ll be hooked.
Let me walk you through every single step — by the end, you’ll wonder how you ever made it any other way. I’m about to spill the beans on a tiny trick involving a splash of hot water that makes the chocolate coating glossy like a polished gemstone, and a surprising dash of sea salt that elevates the flavor from good to unforgettable. So grab a spoon, roll up those sleeves, and get ready for the game‑changer that will become the star of every gathering, potluck, or midnight snack raid.
What Makes This Version Stand Out
- Texture: The interior stays buttery soft thanks to the perfect cream cheese‑peanut butter ratio, while the outer shell cracks like a delicate caramelized shell.
- Flavor: A subtle salty‑sweet balance that lets the natural nuttiness of peanut butter shine without being overpowered by sugar.
- Simplicity: No oven, no fancy equipment – just a bowl, a spatula, and a fridge, making it accessible for beginners and seasoned bakers alike.
- Uniqueness: The double‑dip method creates a glossy, professional‑grade finish that most home cooks never achieve.
- Crowd Reaction: Guests often claim they’ve never tasted anything like this, and the “wow” factor is immediate.
- Ingredient Quality: Using real peanut butter (no sugar‑laden spreads) and high‑fat cream cheese ensures a rich, authentic mouthfeel.
- Make‑Ahead Potential: They keep perfectly in the fridge for up to a week and freeze beautifully for future cravings.
- Cooking Method: The no‑bake approach locks in moisture, preventing the dreaded dry crumb that plagues many frozen desserts.
Inside the Ingredient List
The Flavor Base
Cream cheese is the backbone of any cheesecake‑style dessert, providing that luxurious, tangy richness that balances the sweet elements. I recommend using full‑fat, room‑temperature cream cheese; the higher fat content prevents a grainy texture once mixed with the peanut butter. If you skip the cream cheese, the mixture becomes crumbly and loses its signature melt‑in‑your‑mouth quality. A good swap is mascarpone, but expect a slightly milder tang.
Peanut butter brings the star power – the deep, roasted nutty flavor that makes these balls instantly recognizable. Choose a natural, unsweetened variety to keep the sugar level in check and let the natural oils do their magic. Salted peanut butter can work, but you’ll need to cut back on added sea salt later. If you’re allergic, almond butter or cashew butter can be a daring alternative, though the flavor profile shifts toward a sweeter, buttery note.
The Texture Crew
Graham cracker crumbs act as the structural glue, absorbing moisture and giving the balls a subtle crunch that contrasts the creamy interior. For a gluten‑free version, swap in finely crushed gluten‑free cookies or even almond flour; just be mindful of the texture change. The melted butter you fold in adds richness and helps the crumbs bind together, ensuring the mixture holds its shape when rolled.
Honey or light corn syrup is the sweetener of choice here because it stays liquid at fridge temperatures, preventing the mixture from hardening prematurely. It also contributes a gentle floral note that complements the peanut butter. If you prefer a deeper caramel flavor, swap honey for maple syrup, but reduce the amount by a tablespoon to avoid excess liquid.
The Unexpected Star
A pinch of sea salt might seem trivial, but it amplifies the nutty depth and cuts through the richness, making each bite feel balanced rather than cloying. This tiny crystal is the secret weapon that most recipes overlook. If you love a salty crunch, sprinkle a few flaky sea salt crystals on the chocolate coating just before it sets.
Vanilla extract is the silent hero, adding a warm, aromatic backdrop that ties the peanut butter and cream cheese together. A high‑quality pure vanilla will make a noticeable difference; avoid imitation extracts that taste flat. For an extra twist, try a splash of almond extract for a nutty echo.
The Final Flourish
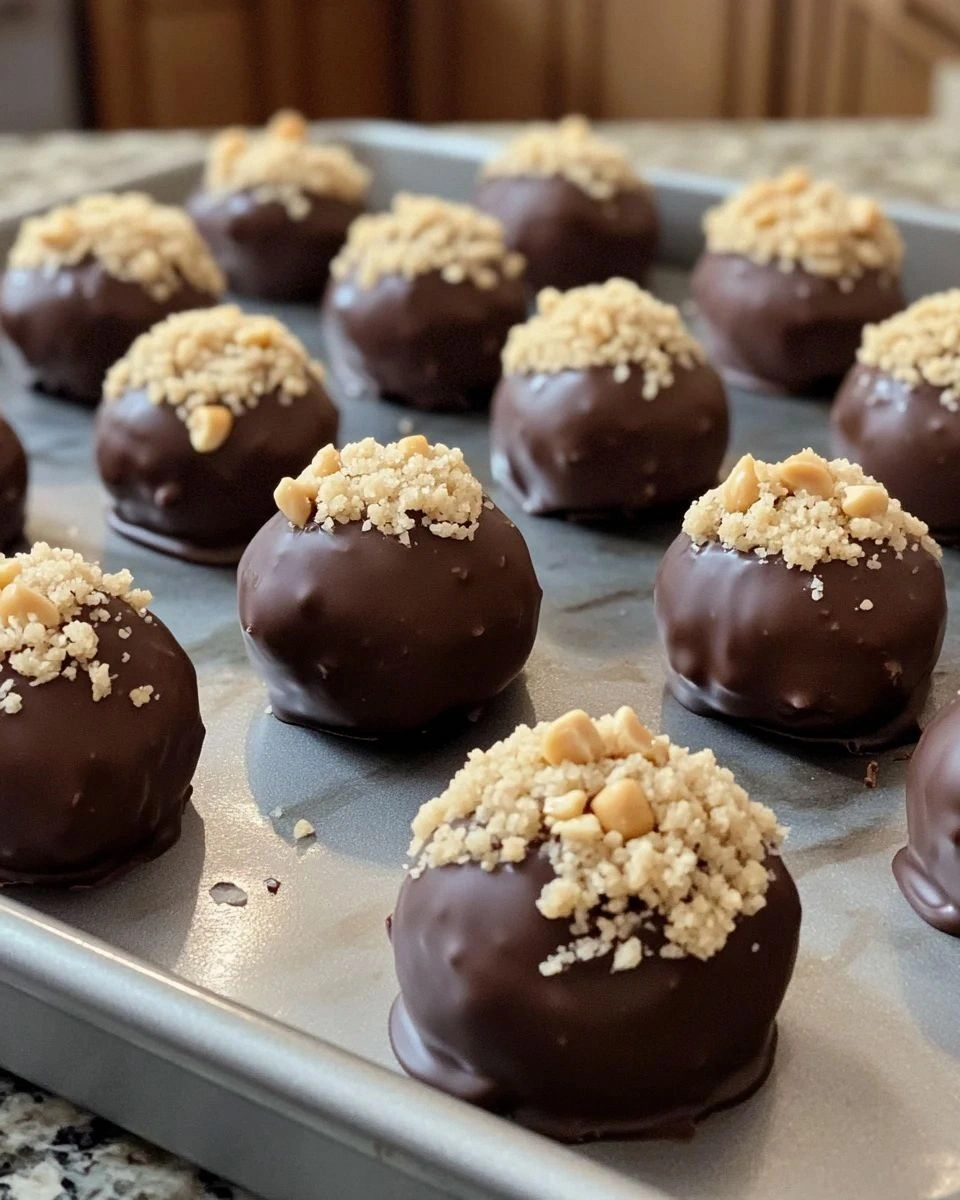
Semi‑sweet chocolate chips form the glossy outer shell that gives these balls their signature snap. Choose a chocolate with at least 55% cocoa for a balanced bitterness that doesn’t overwhelm the peanut butter core. If you prefer a darker profile, go for 70% cocoa; just remember to melt it gently to avoid scorching. The additional butter melted with the chocolate adds shine and a silk‑like mouthfeel.
Optional sprinkles or crushed peanuts add visual appeal and a textural surprise. They’re not essential, but they turn a simple dessert into a party‑ready centerpiece. If you’re watching carbs, skip them – the core is already decadently satisfying.
Everything's prepped? Good. Let's get into the real action...
The Method — Step by Step
- Gather and Soften. Start by letting the cream cheese sit at room temperature for about 15 minutes; this prevents lumps when you blend it with peanut butter. While it softens, line a large baking sheet with parchment paper – this will be your rolling station later. I like to set a timer because the kitchen timer is a subtle reminder that you’re about to embark on a flavor adventure. When the cream cheese is pliable, give it a quick stir to smooth out any remaining firmness.
- Blend the Core. In a large mixing bowl, combine the softened cream cheese, natural peanut butter, honey, vanilla extract, and a pinch of sea salt. Using a handheld mixer on low speed, beat until the mixture is silky and homogenous – you’re looking for a glossy texture that coats the back of a spoon. Scrape down the sides with a rubber spatula to ensure every corner is incorporated. At this stage, the aroma should already be intoxicating, hinting at the peanut‑butter richness to come.
- Incorporate the Crumbs. Sprinkle the graham cracker crumbs and melted butter over the creamy mixture. Fold gently with a spatula, turning the bowl over a few times until the crumbs are fully absorbed. The mixture will thicken, becoming pliable enough to hold its shape when pressed together. If it feels too dry, add a teaspoon of milk; if too wet, toss in a tablespoon more crumbs. This is the moment where the texture truly starts to feel like a dough you can roll.
- Chill for Structure. Transfer the dough onto the prepared parchment sheet, shape it into a flat rectangle about 1‑inch thick, and wrap tightly in plastic wrap. Place it in the refrigerator for at least 30 minutes – this step is crucial because a firm base makes rolling into balls effortless. While you wait, you can melt the chocolate; the anticipation builds, and the kitchen starts to smell like a chocolate factory. Remember, patience now saves you from a sticky mess later.
- Form the Balls. Remove the chilled dough from the fridge and cut it into even portions – a kitchen scale helps if you want uniform 20‑gram balls. Using your hands, roll each portion into a smooth sphere, pressing gently to avoid cracks. The texture should be firm yet yielding, like a well‑tempered chocolate truffle. Place each ball back on the parchment sheet; they’ll stay perfectly round as you work.
- Prepare the Chocolate Dip. In a heat‑proof bowl, combine the semi‑sweet chocolate chips and the extra butter. Melt them together using a double‑boiler method: set the bowl over a pot of simmering water, stirring constantly until smooth and glossy. Once melted, remove from heat and let it cool for about two minutes – it should be thick enough to coat but not so hot that it melts the interior.
- Double‑Dip for Perfection. Using a fork or a small dipping tool, submerge each ball into the chocolate, allowing excess to drip back into the bowl. Immediately roll the dipped ball back onto the parchment to set a thin first layer. Let the first coat set for 2‑3 minutes, then dip each ball a second time for that professional, glossy finish. This double‑dip creates a sturdy shell that won’t crack when you bite in.
- Set and Serve. Once all balls are coated, let them rest at room temperature for 5 minutes, then transfer the sheet to the refrigerator for another 15 minutes to fully set the chocolate. When you’re ready to serve, sprinkle a pinch of flaky sea salt or crushed peanuts on top for an extra pop of flavor and texture. The balls can be arranged on a platter, and the sight of their glossy surfaces will instantly draw a crowd. And now the fun part – dig in and watch the smiles appear.
That's it — you did it. But hold on, I've got a few more tricks that'll take this to another level...
Insider Tricks for Flawless Results
The Temperature Rule Nobody Follows
Never let the chocolate get above 115°F (46°C); overheating causes bloom, a white, powdery film that ruins the glossy finish. Keep a candy thermometer handy and remove the bowl from heat the moment the chocolate becomes a uniform liquid. If you notice steam rising, it’s a sign to take it off the burner immediately. This tiny temperature vigil ensures a mirror‑like coating that stays glossy even after refrigeration.
Why Your Nose Knows Best
Before you roll the balls, take a deep sniff of the chilled mixture – you should detect a faint buttery aroma with a nutty undertone. If the scent is muted, the mixture might be too cold, and you’ll need to let it sit a minute longer. Trusting your nose saves you from a bland final product, because flavor perception starts before the first bite.
The 5‑Minute Rest That Changes Everything
After forming the balls but before the first dip, let them rest uncovered for exactly five minutes. This brief air exposure creates a thin skin on the surface, which helps the chocolate adhere without sliding off. A friend once tried to skip this step and ended up with a soggy coating that melted within seconds – lesson learned.
Salt Finish for a Flavor Pop
A final sprinkle of flaky sea salt right after the second dip adds a crackle that awakens the palate. The salt crystals contrast the sweet chocolate, making each bite feel balanced and sophisticated. If you’re serving to kids, use a finer salt to keep the texture subtle.
Freezer‑Proof Packaging
When you want to store a batch for later, line a freezer‑safe container with parchment and place the balls in a single layer. Cover tightly with another parchment sheet before sealing the lid. This prevents the balls from sticking together and preserves the glossy finish for up to three months.
Creative Twists and Variations
This recipe is a playground. Here are some of my favorite ways to switch things up:
Chocolate‑Covered Espresso
Add a teaspoon of finely ground espresso powder to the chocolate melt for a subtle coffee kick that pairs beautifully with the peanut butter. Ideal for adult gatherings where you want a sophisticated twist.
Coconut Bliss
Mix shredded toasted coconut into the crumb base and roll the finished balls in additional coconut after the chocolate sets. The result is a tropical breeze that transports you to a beachside cabana.
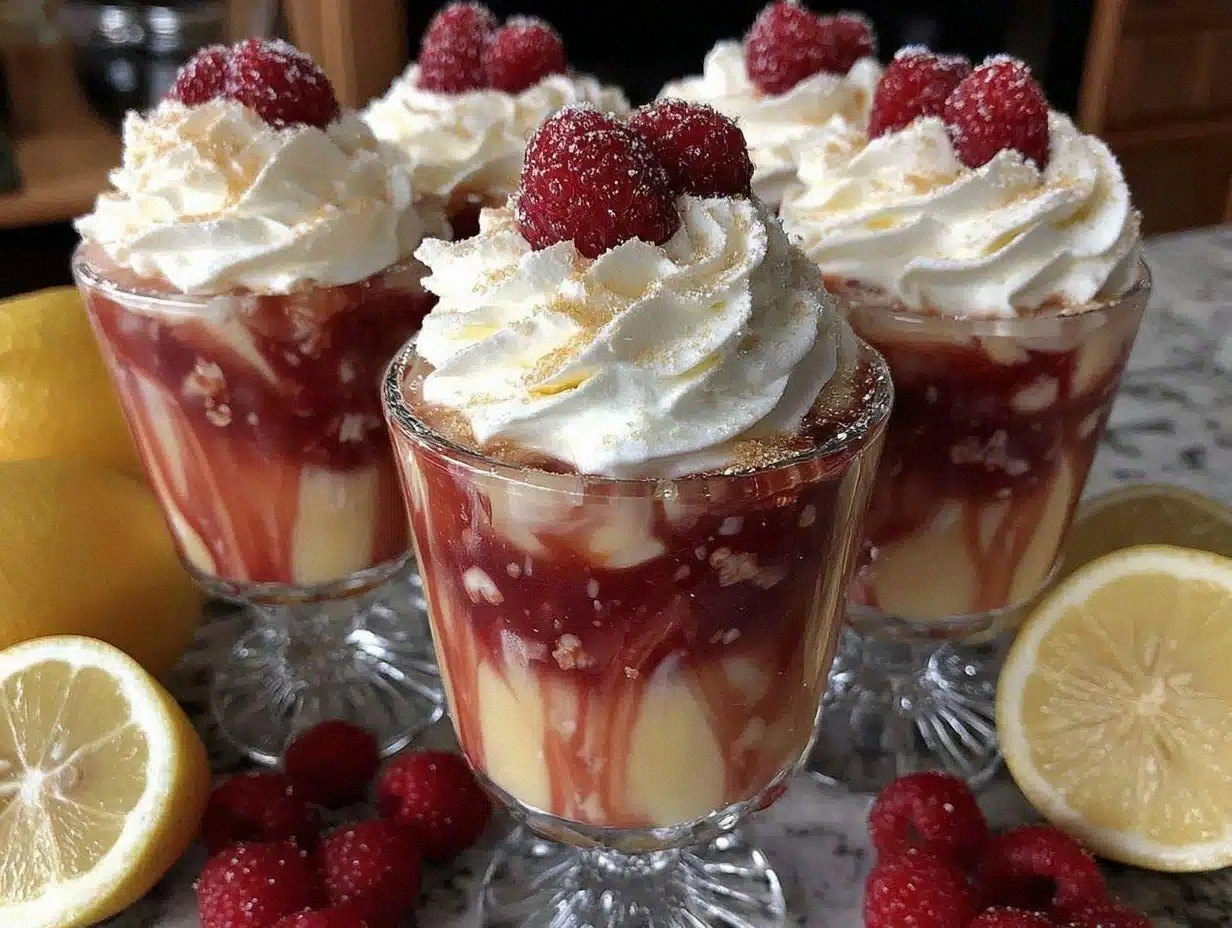
Berry Burst
Swirl a tablespoon of raspberry jam into the cream cheese mixture before chilling. The tart berries cut through the richness, creating a delightful sweet‑tart contrast that’s perfect for spring brunches.
Spicy Heat
Incorporate a pinch of cayenne pepper into the chocolate coating for a gentle heat that builds after each bite. This surprise element is a conversation starter at any party.
Nut‑Free Delight
Replace peanut butter with sunflower seed butter and use oat‑based cookies instead of graham crackers. The flavor shifts to a milder, earthy profile while keeping the same creamy texture, making it safe for nut‑allergic guests.
Storing and Bringing It Back to Life
Fridge Storage
Place the balls in an airtight container lined with parchment. They’ll stay fresh for up to 7 days, retaining their creamy interior and firm chocolate shell. Keep the container in the coldest part of the fridge to avoid condensation.
Freezer Friendly
For longer keeping, arrange the balls on a tray, freeze solid for 2 hours, then transfer to a zip‑top bag. They can be frozen for up to 3 months. When you’re ready to serve, let them thaw in the fridge for 30 minutes.
Best Reheating Method
If you prefer a warm, melty experience, microwave a single ball for 5‑7 seconds on low power. Add a tiny splash (about 1 tsp) of water to the bowl before microwaving; the steam revives the chocolate’s sheen and brings the interior back to a luscious, soft state.