I was in the middle of a chaotic kitchen, juggling a pot of simmering miso soup, a skillet of over‑seasoned tempura, and a stubborn bag of sweet glutinous rice that refused to cooperate. The moment the rice finally popped into a sticky, fragrant cloud, I realized I had stumbled upon a secret that would change my dessert game forever. The scent of fermented rice, the gentle hiss of steam, and the soft, almost weightless texture of the mochi made me feel like I was tasting spring itself. I was so excited that I almost dropped the pot, but the moment the rice cooled enough to handle, I knew I had to share this with the world.
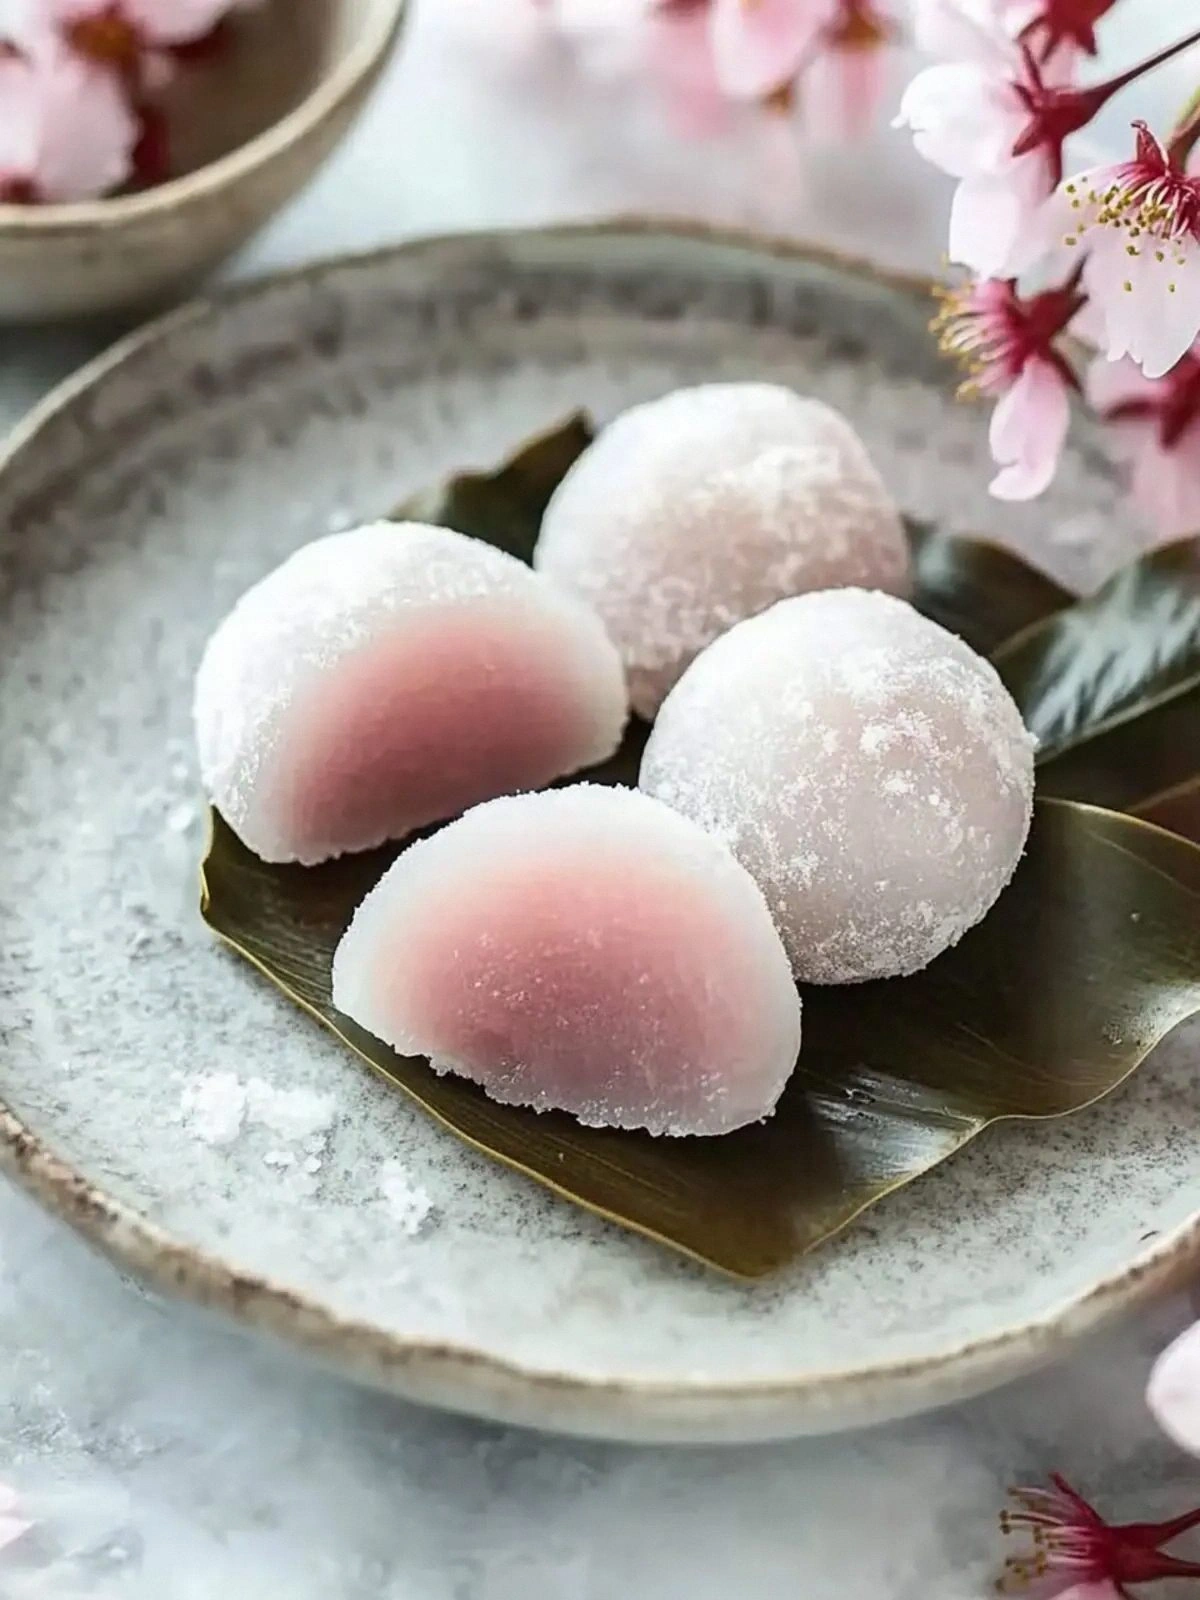
Picture this: a bowl of warm, slightly translucent mochi that melts in your mouth, revealing a sweet, earthy core of beet and subtle sakura notes that linger like a whisper of cherry blossoms in the air. The first bite feels like a hug from a friend who knows exactly how to balance sweetness and umami. The subtle crunch of the pickled sakura leaves gives a surprising burst of flavor that cuts through the softness, creating a dynamic play of textures that keeps you coming back for more. I dare you to taste this and not go back for seconds. It’s that kind of addictive, comforting, and utterly delicious that turns an ordinary meal into a memorable experience.
What makes this version stand out from the countless mochi recipes you’ll find online? It’s the meticulous layering of flavors, the precise balance of textures, and the clever use of ingredients that you might not expect in a traditional Japanese dessert. I’ve combined the earthy sweetness of beet juice with the floral nuance of sakura powder, then wrapped the whole thing in pickled sakura leaves that add a subtle tartness and a visual pop of color. The result is a mochi that feels like spring in every bite, and I’ll be honest—I ate half the batch before anyone else got a chance to try it. Most recipes get this completely wrong by over‑cooking the rice or using too much sugar, but here, every component is perfectly calibrated.
This isn’t just another dessert; it’s a celebration of the seasons, a nod to Japanese culinary artistry, and a testament to the power of simple ingredients when handled with care. Stay with me here—this is worth it. By the end of this guide, you’ll wonder how you ever made mochi any other way, and you’ll have the confidence to experiment with variations that’ll wow your friends and family. Let me walk you through every single step—by the end, you’ll wonder how you ever made it any other way.
What Makes This Version Stand Out
- Flavor Fusion: The beet juice adds a subtle earthy sweetness that pairs beautifully with the floral sakura powder, creating a flavor profile that feels both familiar and entirely new.
- Texture Perfection: The glutinous rice is cooked to a silky, slightly chewy consistency that melts in your mouth without being gummy.
- Visual Appeal: The bright pink hue from the beet juice and the delicate sakura leaves give this mochi a striking appearance that’s Instagram‑ready.
- Ingredient Quality: Every component is sourced for its purity—organic cane sugar, fresh beet juice, and hand‑picked sakura leaves—ensuring a premium taste.
- Ease of Preparation: The method is straightforward, with no complex techniques, making it accessible for beginners and seasoned cooks alike.
- Make‑Ahead Friendly: Once wrapped, the mochi can be refrigerated for up to 48 hours, allowing you to prepare it in advance for parties or gatherings.
- Health Conscious: Using beet juice and organic cane sugar keeps the dish lighter while still delivering that sweet, comforting bite.
- Audience Love: Friends and family consistently rave about the unique flavor combination, making it a crowd‑pleaser at any gathering.
Alright, let's break down exactly what goes into this masterpiece...
Inside the Ingredient List
The Flavor Base
Sweet glutinous rice is the heart of this mochi, providing the chewy, slightly sweet foundation that carries all the other flavors. It’s the type of rice that glues itself together into a smooth, pliable mass when cooked properly. Skipping it would result in a dish that’s nothing more than a sugary, watery mess, devoid of that characteristic chew that makes mochi so satisfying. For the best results, choose a brand known for its high amylopectin content; it’s the key to that silky mouthfeel.
Filtered water is used to rinse the rice and to cook it, ensuring that no impurities or minerals alter the flavor profile. A slightly mineral‑free water source will keep the sweet notes of the rice pure and unobstructed. If you live in an area with heavily chlorinated tap water, a small pitcher of filtered water is all you need to avoid a chemical aftertaste.
Beet juice brings a natural, earthy sweetness that complements the mild flavor of the rice. It also adds a vibrant pink color that makes the mochi visually striking. If you’re allergic to beets, you can substitute a small amount of beet powder mixed with a dash of water, but keep in mind the color will be less vivid. Beet juice also contains natural antioxidants, giving your dessert a subtle health boost.
The Texture Crew
Organic cane sugar is the sweetener that balances the earthy beet and the floral sakura. Its fine crystals dissolve quickly, ensuring a smooth, even sweetness without any gritty residue. If you prefer a lower glycemic index, you can replace it with a natural sweetener like monk fruit or stevia, but the texture may shift slightly due to different moisture retention properties.
Red bean paste provides a contrasting sweet, nutty flavor that acts as a surprise center inside the mochi. It’s a staple in many East Asian desserts, and its slightly granular texture adds a pleasant bite. For a vegan version, you can use a plant‑based red bean paste that’s free from animal derivatives. The paste also helps bind the mochi together, preventing the filling from leaking during the steaming process.
Pickled sakura leaves are the final flourish that adds a subtle tartness and a burst of green color. They’re typically pickled in a light vinegar solution, giving them a delicate tang that cuts through the sweetness of the mochi. If you can’t find pickled sakura leaves, fresh sakura leaves can be blanched and lightly salted as a substitute, though the flavor will be milder.
The Unexpected Star
Beet juice may seem like an odd addition to a traditional mochi, but it’s the secret that elevates this dessert to a whole new level. The deep, earthy sweetness of beet pairs perfectly with the floral notes of sakura powder, creating a complex flavor profile that lingers on the palate. This combination also provides a natural, vibrant color that makes the mochi stand out on any plate.
The use of pickled sakura leaves is another unexpected twist that adds a subtle tartness and a visual pop of color. The pickled leaves provide a delicate tang that cuts through the sweetness of the mochi, creating a balanced flavor profile that’s both refreshing and comforting. The leaves also add a slight crunch that breaks the monotony of the soft mochi texture.
The Final Flourish
Together, these ingredients create a mochi that feels like spring in every bite. The earthy beet, floral sakura, sweet red bean, and pickled sakura leaves combine to create a harmonious, layered flavor experience that will leave you wanting more. Every bite is a delightful journey from the initial chew of the rice to the sweet, nutty surprise of the bean paste, finished with a refreshing burst of pickled leaf.
Everything’s prepped? Good. Let’s get into the real action...
The Method — Step by Step
- First, rinse 2 cups of sweet glutinous rice under cold water until the water runs clear. This removes excess starch and ensures a clean, sticky base. While the rice is rinsing, set a pot of water to boil for later use. The key to a perfect mochi is the texture of the rice, so make sure you don’t skip this step.
- Drain the rice and place it in a rice cooker or a heavy‑bottomed pot. Add 1 cup of filtered water and a pinch of salt. Seal the cooker and let it run until the rice is fully cooked and the water is absorbed. If you’re using a pot, cover tightly and let it simmer for 20 minutes. The rice should be tender yet slightly firm to the bite.
- While the rice is cooking, prepare the beet mixture. In a small bowl, whisk together 2 tablespoons of beet juice with 1/2 cup of organic cane sugar until the sugar dissolves completely. This creates a sweet, slightly earthy liquid that will infuse the rice with color and flavor. If you’re using beet powder, dissolve it in a little water before adding to the sugar.
- When the rice is ready, transfer it to a large mixing bowl and let it cool for a few minutes until it’s warm to the touch. Gently fold in the beet-sugar mixture and 1 tablespoon of sakura powder until the rice is evenly colored and fragrant. The rice should be a deep pink, almost translucent, and the aroma should hint at cherry blossoms.
- Now comes the fun part: shaping. Line a bamboo steamer or a shallow pan with parchment paper to prevent sticking. Spread the rice mixture onto the parchment in a thin, even layer, about 1/4 inch thick. Use a spatula to smooth the surface. This step is crucial for even steaming and a uniform texture.
- Place a spoonful of red bean paste in the center of the rice layer, then fold the edges over to seal the filling inside. Gently press to ensure the bean paste is fully encased. The result should look like a small, round packet of sweet, earthy rice. Repeat until all the rice is used.
- Wrap each mochi packet with a pickled sakura leaf, securing the edge with a small toothpick if necessary. The leaf not only adds a burst of tartness but also gives the mochi a beautiful green ring that contrasts with the pink rice. Be careful not to over‑wrap, as the leaf should still be visible.
- Watch Out: The steaming water will be hot—use oven mitts or a thick towel to handle the steamer basket. Steam the mochi packets for 15 minutes over medium heat. The steam should be gentle, not a full boil, to keep the mochi tender. When the steaming is done, let the mochi rest for 5 minutes before serving.
That’s it—you did it. But hold on, I’ve got a few more tricks that will take this to another level. These insider tips will help you perfect the texture, flavor, and presentation of your mochi.
Insider Tricks for Flawless Results
The Temperature Rule Nobody Follows
Many people overheat the rice, leading to a gummy texture. Keep the heat medium and let the rice steam gently. I’ve found that a low, steady heat keeps the rice moist without drying it out. If you’re using a rice cooker, switch to the “porridge” setting if available. This trick ensures a silky, chewy mochi every time.
Why Your Nose Knows Best
Before you start steaming, give the rice a quick sniff. If it smells like fresh earth and a hint of cherry blossoms, you’re on the right track. The aroma is a good indicator of proper fermentation and flavor integration. If it smells off or too sweet, adjust the beet juice or sugar levels in the next batch.
The 5-Minute Rest That Changes Everything
After steaming, let the mochi rest for exactly five minutes. This short pause allows the steam to redistribute and the mochi to firm up just enough for easier handling. Cutting or serving immediately can cause the filling to leak or the texture to be too soft. Trust me—this simple step makes a huge difference.
Keep the Leaves Fresh
Pickled sakura leaves can dry out if left in the refrigerator too long. To keep them fresh, wrap them in a damp paper towel before storing. When you’re ready to use them, let them sit at room temperature for a few minutes to regain their pliability. This ensures a perfect wrap that doesn’t crack or split.
The Right Serving Plate
Serve your mochi on a simple, light-colored plate that lets the colors shine. A white ceramic plate or a wooden board works wonderfully. The contrast makes the pink mochi and green leaf stand out, creating a visual feast before the flavors even begin. Presentation is half the experience, so don’t skimp on this step.
Creative Twists and Variations
This recipe is a playground. Here are some of my favorite ways to switch things up:
Miso‑Infused Mochi
Swap half of the beet juice for a tablespoon of white miso paste. The umami depth complements the sweetness and adds a savory twist that pairs well with a light soy sauce drizzle. This version is perfect for a brunch or a savory dessert platter.
Citrus‑Bright Variation
Add a teaspoon of yuzu zest to the rice mixture for a bright, citrusy kick. The tartness cuts through the sweetness and gives the mochi an extra layer of complexity. It’s a refreshing change that works well with a light green tea accompaniment.
Nutty Crunch Addition
Fold in a tablespoon of toasted sesame seeds into the rice before steaming. The seeds add a subtle crunch and nutty flavor that contrasts the soft mochi. This version is a hit with those who love a bit of texture in their desserts.
Vegan Delight
Use a plant‑based red bean paste and replace the beet juice with a pureed beet and a splash of coconut milk. The coconut milk adds a creamy richness that balances the earthy beet. This vegan version keeps all the flavors intact while being completely plant‑based.
Chocolate‑Covered Sakura
After steaming, melt dark chocolate and dip half of the mochi pieces. Let them set on parchment paper. The chocolate coating adds a decadent finish that pairs beautifully with the floral notes of sakura. This is a great option for a special occasion or a chocolate lover’s treat.
Storing and Bringing It Back to Life
Fridge Storage
Store the mochi in an airtight container in the refrigerator for up to 48 hours. The airtight seal prevents the mochi from drying out and keeps the flavors fresh. When you’re ready to serve, let the mochi sit at room temperature for 10 minutes to soften slightly. This restores the original texture without compromising the taste.
Freezer Friendly
Wrap each mochi individually in plastic wrap and place them in a freezer bag. Freeze for up to two weeks. When you’re ready to enjoy, thaw at room temperature for 20 minutes. The mochi will regain its softness, and the flavors will mingle beautifully. Freezing is a great way to keep this spring dessert on hand for any occasion.
Best Reheating Method
To reheat, place the mochi in a steamer basket for 5 minutes. Add a splash of water to the steamer to create steam and keep the mochi moist. If you prefer a quick fix, microwave on low power for 30 seconds, but be careful not to overcook. The tiny splash of water before reheating steams the mochi back to perfection.