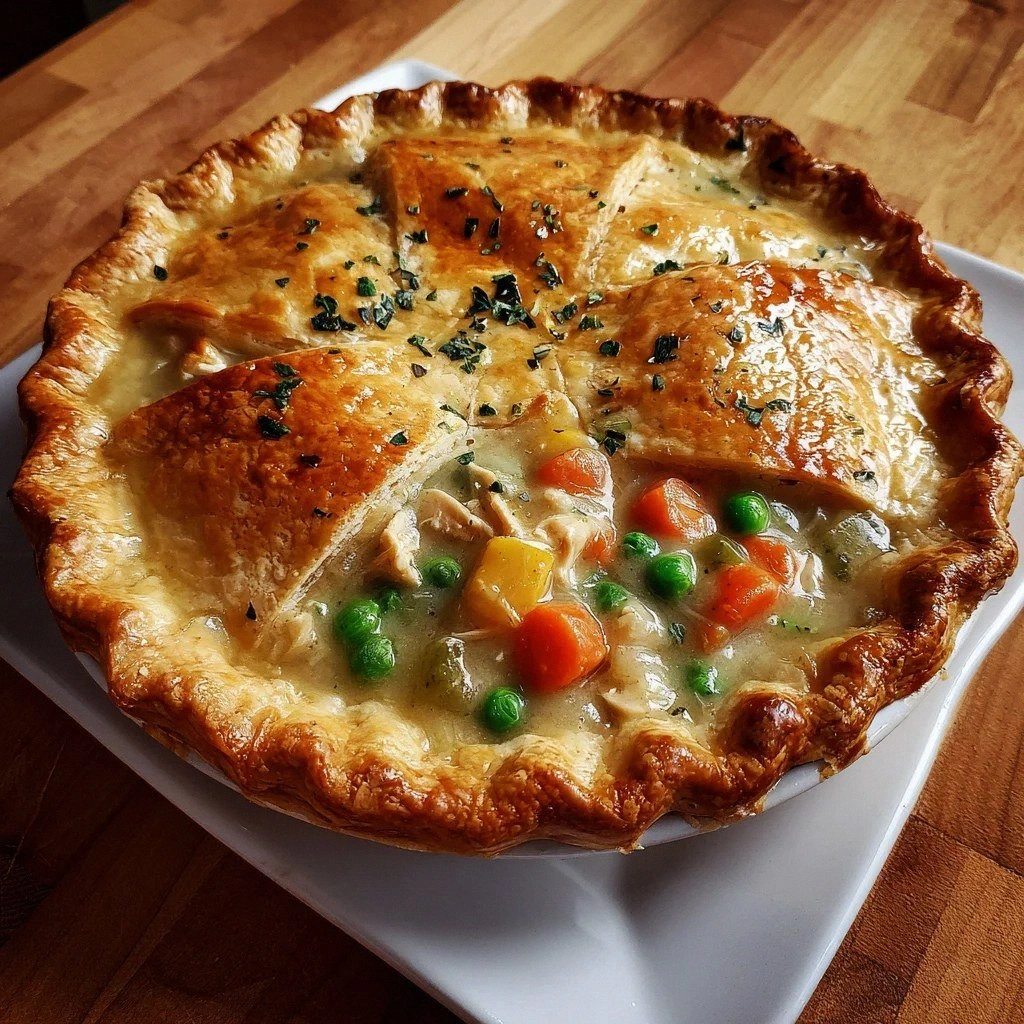
I’ll be honest — the first time I tried to make a chicken pot pie, I ended up with a soggy mess that looked more like a sad casserole than the golden‑crowned masterpiece I was dreaming of. I stared at that limp crust, feeling the weight of every kitchen‑fail meme I’d ever seen, and I swore I’d never touch a pie crust again. Then a friend dared me: “Make it the best pot pie you’ve ever had, or you’re buying dinner for a month.” I laughed, I accepted, and I dove headfirst into a weekend of butter, flour, and stubborn determination. The result? A crust so flaky it shatters like thin ice, a filling that coats every bite like velvet, and a flavor profile that makes you want to hug the oven.
Picture this: the kitchen is a symphony of sizzling butter, the sweet scent of carrots and celery dancing with the earthy perfume of thyme, and the comforting hum of the oven doing its thing. You hear the gentle pop of the crust as it lifts, the faint crackle of the top as it browns, and the occasional satisfied sigh from anyone lucky enough to be within sniffing distance. Your hands feel the cool weight of a perfectly chilled dough, the buttery slickness of a well‑whisked egg wash, and the warm, creamy embrace of a sauce that clings to each vegetable like a lover’s hold. And when you finally slice into that golden dome, the steam rises, carrying whispers of chicken broth, cream, and a hint of garlic that makes your taste buds do a little happy dance.
What makes this version stand out is not just the ingredients — it’s the little secrets that turn a good pot pie into a legendary one. Most recipes get the crust wrong, ending up either too tough or too soggy. I discovered that using buttermilk in the dough adds a tender crumb while keeping the crust buttery and crisp. The secret weapon? A dash of granulated sugar in the crust, just enough to coax a subtle caramelization without making it sweet. And the filling? I’m using a roux made from the same all‑purpose flour that builds a silky, luxurious sauce, then finishing it with heavy cream for that melt‑in‑your‑mouth richness. It’s a game‑changer, trust me.
I dare you to taste this and not go back for seconds. The combination of crisp, buttery crust and a creamy, herb‑infused filling will have you questioning every other pot pie you’ve ever had. Okay, ready for the game‑changer? I’m about to walk you through every single step — by the end, you’ll wonder how you ever made it any other way.
What Makes This Version Stand Out
- Flavor Explosion: The blend of fresh thyme, parsley, and a splash of heavy cream creates a depth that’s richer than any store‑bought version. Each bite delivers a harmonious balance of savory, buttery, and herbaceous notes that linger on the palate.
- Texture Triumph: The crust is flaky, buttery, and just the right amount of tender, while the filling is creamy yet studded with perfectly cooked vegetables that keep a pleasant bite.
- Simplicity Meets Sophistication: Despite the impressive results, the ingredient list is straightforward, and the steps are broken down so even a kitchen novice can nail it on the first try.
- Unique Ingredient Twist: A modest amount of granulated sugar in the crust encourages caramelized edges, giving the pie a subtle sweetness that elevates the overall flavor profile.
- Crowd‑Pleaser Factor: Whether it’s a family dinner, a potluck, or a cozy night in, this pie consistently earns rave reviews and empty plates.
- Ingredient Quality Matters: Using high‑quality unsalted butter and fresh herbs makes a measurable difference, turning an ordinary dish into a restaurant‑worthy centerpiece.
- One‑Pan Wonder: The entire process can be completed using just a skillet and a pie dish, minimizing cleanup and keeping the focus on flavor.
- Make‑Ahead Magic: The crust can be pre‑rolled and frozen, and the filling can be prepared a day ahead, making last‑minute assembly a breeze.
Inside the Ingredient List
The Flavor Base
Diced onion, sliced carrots, and sliced celery form the classic mirepoix, the aromatic foundation that gives the filling its unmistakable savory backbone. The onion provides sweetness once it caramelizes, the carrots add a natural, bright sweetness, and the celery contributes a subtle earthiness that balances the richness of the butter and cream. If you skip any of these, you’ll lose that layered depth that makes the filling sing. As a swap, you can use frozen mixed vegetables, but fresh always wins for texture.
The Texture Crew
Unsalted butter appears twice in this recipe: once cold for the crust and once melted for the filling. The cold butter creates flaky layers, while the melted butter forms the base of the roux that thickens the sauce. All‑purpose flour is also double‑duty; it builds structure in the crust and then thickens the filling, ensuring a silky mouthfeel. Heavy cream adds luxurious richness, and frozen peas pop with a sweet burst of color that lifts the overall heaviness.
The Unexpected Star
Granulated sugar may seem out of place in a savory dish, but a tablespoon or two in the crust encourages a caramelized edge that adds a whisper of sweetness, making the crust taste like a buttery biscuit rather than a plain pastry. The buttermilk’s acidity tenderizes the dough, giving it a tender crumb while also reacting with the baking powder (if you choose to add a pinch) to give the crust a subtle rise.
The Final Flourish
Fresh herbs — minced thyme and Italian parsley — are the finishing touches that brighten the dish. Thyme’s piney aroma cuts through the richness, while parsley adds a fresh, slightly peppery note that lifts the entire pie. Ground black pepper adds a mild heat, and a pinch of salt amplifies every flavor, ensuring nothing feels flat. If you’re out of fresh herbs, dried thyme works (use one‑third the amount) and a sprinkle of dried parsley, though the flavor won’t be as vibrant.
Everything's prepped? Good. Let's get into the real action...
The Method — Step by Step
Start by gathering all your crust ingredients: all‑purpose flour, granulated sugar, salt, cold unsalted butter, and buttermilk. In a large bowl, whisk together the flour, sugar, and salt. Toss in the cold butter cubes and, using a pastry cutter or your fingertips, rub the butter into the flour until the mixture resembles coarse crumbs with pea‑size pieces. Power transition: This is the moment where the crust starts to take shape.
Create a well in the center of the dry ingredients and pour in the buttermilk. Gently stir with a fork until the dough just comes together; it should be slightly shaggy, not overly wet.
Shape the dough into a disk, wrap in plastic, and chill for at least 30 minutes.Kitchen Hack: If the dough feels dry, add a splash of cold water, one tablespoon at a time, until it binds.While the dough chills, melt 3 tablespoons of unsalted butter in a large skillet over medium heat. Add the diced onion, sliced carrots, and sliced celery, sautéing until the vegetables are just tender and the onion turns translucent, about 5‑7 minutes. The kitchen will fill with a sweet, aromatic perfume that signals you’re on the right track.
Watch Out: When you add the minced garlic, watch the clock. Garlic burns in under 30 seconds, turning bitter. Stir it in, let it sizzle for just 20 seconds, then immediately move to the next step.
Sprinkle 3 tablespoons of all‑purpose flour over the sautéed vegetables, stirring constantly for 2 minutes to cook out the raw flour taste. This forms a roux that will thicken the sauce later. Slowly pour in 2 cups of chicken broth, whisking continuously to avoid lumps. As the mixture simmers, it will thicken into a velvety base.
Reduce the heat to low and stir in ½ cup heavy cream, 1 tsp minced thyme, 2 tbsp minced parsley, and ½ tsp ground black pepper. Add the shredded cooked chicken (or turkey) and 1 cup frozen peas. Let the filling bubble gently for another 3‑4 minutes, allowing the flavors to meld. Taste and adjust salt if needed — remember, the crust will also carry some salt.
Preheat your oven to 425°F (220°C). On a lightly floured surface, roll out the chilled dough into a circle about 2 inches larger than your pie dish. Gently lift the dough and lay it over the filled dish, pressing the edges to seal. Trim any excess dough, then crimp the rim with a fork or your fingers for a decorative finish.
Brush the top of the crust with a beaten egg (the egg wash) to achieve a glossy, golden finish. Use a sharp knife to cut a few steam vents in the center — this prevents the filling from bubbling over.
Slide the pie onto the middle rack and bake for 20‑25 minutes, or until the crust is deep golden brown and the filling is bubbling around the edges. The aroma will be so intoxicating that you’ll want to peek every few minutes, but resist the urge — the crust needs uninterrupted heat to rise properly.
Remove the pie from the oven and let it rest for 10 minutes before slicing. This rest period allows the filling to set, making for cleaner slices. And now the fun part: Serve hot, watch the steam rise, and enjoy the chorus of “Mmm” from everyone at the table.
That's it — you did it. But hold on, I've got a few more tricks that'll take this to another level...
Insider Tricks for Flawless Results
The Temperature Rule Nobody Follows
Never let your butter melt before it meets the flour. Keep everything ice‑cold, even the mixing bowl. When the butter stays solid, it creates steam pockets as it melts in the oven, giving you that coveted flaky texture. I once tried a room‑temperature dough and ended up with a dense, biscuit‑like crust — a lesson learned the hard way.
Why Your Nose Knows Best
Your sense of smell is a better indicator than a timer when the crust is ready. When the edges start to smell nutty and slightly caramelized, you’re on the brink of perfection. Trust that nose; it will save you from an over‑browned disaster.
The 5‑Minute Rest That Changes Everything
Letting the pie rest after baking isn’t just about cooling; it allows the gelatin in the broth to re‑absorb the cream, thickening the filling without extra flour. Those five minutes make slicing cleaner and keep the crust from getting soggy from steam.
The Egg Wash Secret
A simple egg wash isn’t just for shine. Adding a splash of milk or cream to the beaten egg creates a richer, deeper color. Brush gently, and you’ll get a glossy, bakery‑level finish every time.
Freezer‑Friendly Fillings
If you prep the filling ahead, let it cool completely before freezing in airtight containers. When you’re ready to bake, simply thaw, add a splash of broth if it looks thick, and proceed. This trick turned my pot pie into a make‑ahead dinner for busy weeks.
Creative Twists and Variations
This recipe is a playground. Here are some of my favorite ways to switch things up:
Mushroom Medley
Swap half of the chicken for a mix of sautéed cremini, shiitake, and oyster mushrooms. The earthy umami adds depth, and the texture contrast is delightful for vegetarians who still crave that comforting richness.
Spicy Southwest
Add a teaspoon of chipotle in adobo, a handful of corn kernels, and a dash of cumin to the filling. Top with a sprinkle of shredded cheddar before baking for a southwestern twist that’ll have your friends reaching for more.
Herb‑Infused Cheddar Crust
Mix ½ cup grated sharp cheddar into the crust dough. The cheese melts into the butter, creating a slightly tangy, golden crust that pairs beautifully with the creamy filling.
Sweet Potato Surprise
Dice a medium sweet potato and add it to the vegetable mix. Its natural sweetness balances the savory broth, and the orange hue adds a festive pop of color.
Mini Hand‑Pies
Roll the dough thin, cut into circles, and fill with a spoonful of the mixture before sealing. Bake on a sheet pan for 15‑18 minutes. Perfect for parties, potlucks, or a cute lunchbox surprise.
Storing and Bringing It Back to Life
Fridge Storage
Cool the pie completely, then cover loosely with foil and store in the refrigerator for up to 3 days. The crust may soften slightly, but reheating will revive its crispness.
Freezer Friendly
Wrap the cooled pie tightly in plastic wrap, then a layer of aluminum foil. It freezes beautifully for up to 2 months. When ready, thaw overnight in the fridge, brush with a fresh egg wash, and bake at 375°F for 20‑25 minutes.
Best Reheating Method
Place a slice on a baking sheet, add a tiny splash of water or broth around the edges, and reheat in a 350°F oven for 10‑12 minutes. The added moisture steams the filling back to silky perfection while the crust regains its crunch.