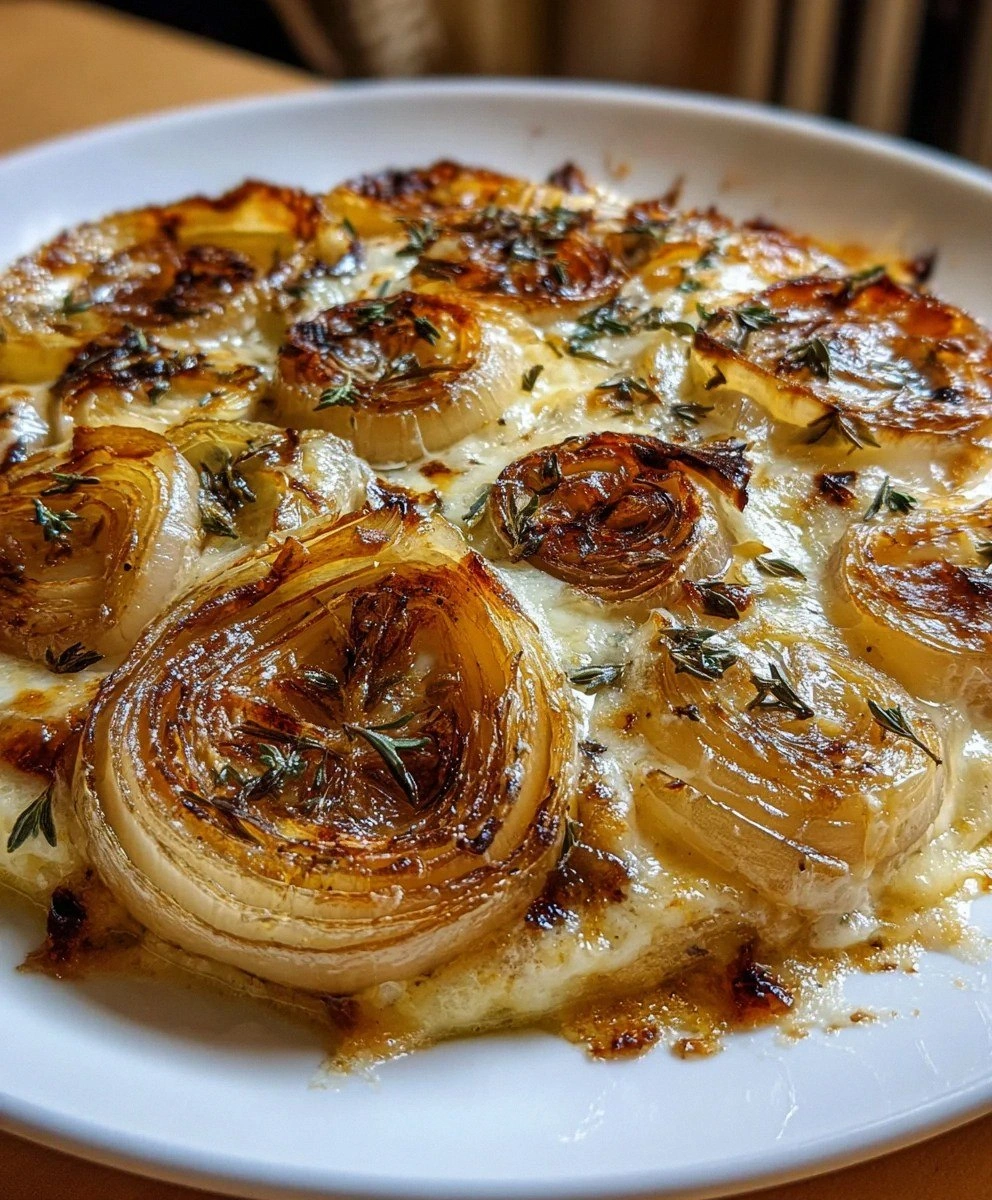
I still remember the first time I made these Asiago Roasted Onions. It was one of those chaotic Sunday evenings when the fridge looked like a tornado had swept through, leaving behind nothing but a sad bag of yellow onions, a nub of Asiago, and some cream that was dangerously close to expiring. My dinner guests were arriving in an hour, and I was this close to ordering pizza and pretending I had planned a casual takeout night all along.
But something magical happened when I started slicing those onions. The smell hit me first — that sharp, almost sweet aroma that makes you think of cozy kitchens and grandmother's cooking. As they started roasting in the oven, the whole house began to smell like a fancy Italian restaurant, and I could practically hear my guests' stomachs rumbling from the driveway. The transformation from humble pantry staples to something that looked like it belonged on a Michelin-starred menu happened right before my eyes, and I knew I had stumbled onto something special.
Here's the thing about this recipe — it takes everything you think you know about side dishes and flips it on its head. Most recipes treat onions like background players, chopping them up to disappear into sauces or soups. But this dish? It puts them front and center, letting their natural sweetness shine while wrapping them in a blanket of creamy, cheesy decadence that'll make even onion skeptics convert on the spot. The edges get caramelized and crispy while the centers stay tender and sweet, all swimming in this incredible sauce that you'll want to drink straight from the pan.
What really sets this apart from any other roasted vegetable dish is the combination of textures and flavors. You've got the deep, almost jammy sweetness from the roasted onions, the nutty sharpness of the Asiago, the luxurious creaminess from the sauce, and just enough tang from the Dijon to keep everything balanced. It's the kind of dish that makes people close their eyes when they take the first bite, and trust me, you'll be fighting for the crispy edges that stick to the pan. Let me walk you through every single step — by the end, you'll wonder how you ever made it any other way.
What Makes This Version Stand Out
Caramelization Magic: The secret lies in roasting the onions at a higher temperature than most recipes dare to try. This creates those gorgeous golden-brown edges that taste like candy, while the insides stay buttery soft. Most recipes play it safe with moderate heat, but we're going bold here, and the results will blow your mind.
Cheese Strategy: Instead of just sprinkling cheese on top like an afterthought, we create a proper sauce that gets absorbed into every layer of onion. The Asiago melts into the cream and mustard, creating this incredible coating that clings to each onion wedge like velvet. You'll taste cheese in every single bite, not just on the surface.
Texture Play: This isn't just soft onions swimming in sauce. We get multiple textures happening — crispy edges from direct contact with the hot pan, tender centers from the gentle steaming inside the foil, and that gorgeous golden crust on top where the cheese meets the heat. It's like a symphony of textures in your mouth.
Simplicity Factor: Despite tasting like something from a fancy restaurant, this recipe uses ingredients you probably already have in your kitchen right now. No specialty shopping trips required, no obscure herbs you'll never use again. Just honest, everyday ingredients transformed into something extraordinary.
Make-Ahead Marvel: Here's something most recipes won't tell you — this dish actually tastes better when made ahead. The flavors have time to meld and deepen, making it perfect for dinner parties or holiday meals when you don't want to be stuck in the kitchen while everyone's socializing.
Crowd Psychology: I've served this to people who claimed they "hate onions" and watched them go back for thirds. There's something about the combination of sweet, caramelized onions with rich cheese that bypasses all the usual vegetable resistance. Even kids who normally pick onions out of everything will devour this.
Leftover Gold: The few times I've had leftovers, they became the star of next-day meals. Chop them up and toss with pasta, spread on toast for the best bruschetta ever, or serve alongside scrambled eggs for a breakfast that'll make you late for work because you can't stop eating.
Alright, let's break down exactly what goes into this masterpiece...
Inside the Ingredient List
The Flavor Foundation
Yellow onions are the unsung heroes of this dish, and choosing the right ones makes all the difference between good and absolutely phenomenal. You want onions that feel heavy for their size with dry, papery skins and no soft spots or green shoots. The yellow variety works best here because they have the perfect balance of sweetness and sharpness — sweet enough to caramelize beautifully, but with enough bite to stand up to the bold Asiago flavor. When you slice them, they should make your eyes water just a little bit — that's how you know they're fresh and full of flavor compounds that will transform under heat.
Olive oil does more than just keep things from sticking to the pan. It carries flavors, helps with browning, and creates those gorgeous crispy edges we all fight over. Use a good quality extra virgin oil if you have it — the fruitiness pairs beautifully with the onions and cheese. Don't be stingy here; the oil helps conduct heat evenly and ensures every surface of the onion gets properly caramelized. You'll know you used enough when the onions start to sizzle gently as soon as they hit the hot pan.
The Aromatic Enhancers
Thyme brings this beautiful earthy note that grounds all the richness and makes the dish taste more complex than it actually is. Fresh thyme is incredible if you have it — just strip the tiny leaves off the stems and sprinkle them over. But honestly? Dried thyme works great too, and most of us always have it in the spice cabinet. The key is to crush it between your fingers before adding it — this releases the essential oils and wakes up all those sleepy flavor compounds. If thyme isn't your thing, rosemary would be amazing here too, or even a pinch of herbes de Provence for a different flavor direction.
Salt and pepper seem basic, but they're absolutely crucial for making all the other flavors pop. Salt draws moisture out of the onions at first, helping them soften and start to caramelize, then later it enhances all the sweet, nutty flavors that develop. Use kosher salt if you have it — the larger crystals are easier to control, and they dissolve evenly. Fresh cracked black pepper adds just enough heat and complexity to keep the dish from being one-note. Season in layers — a little when you first add the onions to the pan, then adjust at the end.
The Creamy Dream Team
Heavy cream transforms this from a simple roasted vegetable dish into something truly luxurious and indulgent. It mellows out the sharpness of the Asiago while creating this silky sauce that seems to defy logic — rich but not heavy, creamy but not cloying. The fat content is key here — lower fat alternatives will separate or curdle under high heat, leaving you with a broken, greasy mess. If you absolutely must lighten it up, half-and-half will work, but save this substitution for when you're not trying to impress anyone. The cream should bubble and thicken slightly when it hits the hot pan, creating the perfect base for the cheese.
Dijon mustard is our secret weapon — just enough to add brightness and cut through all that richness without making the dish taste like mustard. It provides this subtle tang that makes people ask "what's in this?" in the best way possible. The vinegar in the mustard also helps balance all the dairy and brings out the natural sweetness in the onions even more. Don't skip it or substitute with yellow mustard — they're completely different beasts. A good quality Dijon will have visible mustard seeds and a complex flavor that adds depth rather than just heat.
The Finishing Touch
Asiago cheese is what takes this dish from delicious to absolutely unforgettable. This Italian treasure brings a nutty, slightly sharp flavor that's more interesting than Parmesan but not as aggressive as an aged cheddar. When it melts into the cream, it creates this incredible sauce that coats every surface with umami-packed deliciousness. Buy a wedge and grate it yourself — pre-grated cheese has anti-caking agents that prevent it from melting smoothly. If you can't find Asiago, Gruyère will give you a similar nuttiness, or even a good quality Parmesan in a pinch, but Asiago really is worth hunting down.
Everything's prepped? Good. Let's get into the real action...
The Method — Step by Step
- Preheat your oven to 425°F (220°C) — yes, that's hotter than most recipes dare to go, but this is where the magic happens. While it's heating, grab a 9x13 inch baking dish and drizzle in about 3 tablespoons of olive oil. Tilt the pan around to coat the bottom evenly — this is crucial for preventing sticking and ensuring those gorgeous crispy edges. Save the remaining tablespoon of oil for later; we're going to layer our flavors like a pro.
- Slice your onions into thick wedges, about 3/4 inch wide at the thickest part. Don't get fancy with perfect cuts — rustic wedges work best here because they give us plenty of surface area for caramelization while keeping the pieces large enough to stay tender inside. Keep the root end intact on each wedge if possible — this helps them hold together during roasting. You should get about 6-8 wedges per onion, depending on size. Toss them gently in a large bowl with salt, pepper, and half the thyme until every surface is seasoned.
- Arrange the onion wedges in your prepared baking dish, cut side down whenever possible. This maximizes contact with the hot oil and pan, creating those incredible caramelized surfaces. They should fit snugly but not be crammed together — think cozy, not crowded. Drizzle the remaining olive oil over the top and slide the pan into your screaming hot oven. Set a timer for 20 minutes, but don't walk away — you want to peek at the 15-minute mark to make sure they're not browning too quickly.
- While the onions work their magic, whisk together the cream, Dijon mustard, and a generous amount of fresh cracked pepper in a small bowl. The mixture should be smooth and slightly thickened from the mustard. Grate your Asiago now if you haven't already — you want about 1 1/2 cups total, divided. This is also the perfect time to prep any other dishes you're serving, because once these go back in the oven with the sauce, you're in the home stretch.
- After 20 minutes, your onions should be starting to brown at the edges and smell absolutely incredible. Pull the pan out and flip each wedge with tongs — this is where we get that gorgeous caramelization on both sides. Don't worry if some pieces break apart; those bits will become deliciously crispy and are often the first to disappear. The bottom of the pan should have some lovely browned bits — that's pure flavor gold.
- Pour the cream mixture evenly over the onions — it should sizzle happily as it hits the hot pan. The cream will pool around the onions initially, but don't panic. Tilt the pan gently to distribute the sauce, making sure it reaches all the corners. Sprinkle half the grated Asiago over everything, letting it fall between the onion wedges. The heat from the pan and onions will start melting the cheese immediately, creating little pockets of cheesy goodness throughout.
- Return the pan to the oven for another 10 minutes, but lower the temperature to 400°F (200°C). This gentler heat lets the cream reduce and thicken without curdling, while giving the cheese time to melt into the sauce. The top should start developing golden spots, and the sauce will bubble lazily around the edges. This is the moment of truth — when your kitchen starts smelling like the best Italian restaurant you've ever visited.
- Pull the pan out and sprinkle the remaining Asiago over the top. Switch your oven to broil and position a rack about 6 inches from the heating element. Slide the pan under the broiler for 2-3 minutes, watching like a hawk. You want the cheese to melt and develop those gorgeous golden-brown spots, but it can go from perfect to burnt in seconds. When you see the cheese starting to bubble and brown, pull it out immediately — better slightly under than over.
- Let the dish rest for 5 minutes before serving — this is crucial and most people skip it. The sauce will thicken slightly as it cools, and the cheese will set just enough to create that perfect texture. Sprinkle with the remaining fresh thyme and an extra crack of black pepper. Serve directly from the baking dish for maximum rustic appeal, or transfer to a serving platter if you're feeling fancy. Either way, prepare for people to lose their minds over roasted onions.
That's it — you did it. But hold on, I've got a few more tricks that'll take this to another level...
Insider Tricks for Flawless Results
The Temperature Rule Nobody Follows
Here's where most home cooks go wrong — they crank up the heat and wonder why their onions burn before they caramelize. The secret is starting hot (425°F) to get that initial sear, then dropping down (400°F) once we add the cream. This two-temperature method gives you the best of both worlds: gorgeous caramelization without scorched edges or curdled sauce. A friend tried doing the whole thing at high heat once — let's just say we had blackened onion chips swimming in broken cream sauce. Not the dinner party conversation starter you're looking for.
Why Your Nose Knows Best
Your sense of smell is actually the most reliable indicator of doneness here. When the onions are perfectly roasted, your kitchen will smell like French onion soup mixed with the nutty aroma of melting cheese. If you smell burning or acrid smoke, you're about 30 seconds away from disaster. Trust your nose and check the oven immediately. On the flip side, when you smell that incredible sweetness, give it another minute or two — that's when the Maillard reaction is working its magic and creating those complex, nutty flavors that make this dish unforgettable.
The 5-Minute Rest That Changes Everything
I know it's torture when something smells this good, but those 5 minutes of resting time aren't just for show. The sauce needs time to thicken and the flavors to meld — cutting into it too soon means watery sauce that runs all over your plate. Plus, the cheese needs a moment to settle from its molten state to that perfect, spoon-coating consistency. Use this time to finish your other dishes or pour yourself a glass of wine. When you come back, you'll have restaurant-quality results instead of a hot mess that burns the roof of your mouth.
Cheese Selection Secrets
Not all Asiago is created equal, and knowing what to look for will elevate your dish from great to legendary. Aged Asiago (look for "Asiago d'allevo") has those nutty, sharp notes that can stand up to the sweet onions without getting lost. Fresh Asiago melts beautifully but lacks the punch we need here. Give your cheese the sniff test — it should smell nutty and slightly sharp, never sour or ammonia-like. And here's a pro tip: if you can only find pre-grated Asiago, look for the freshest package possible and give it a quick rinse under cold water to remove some of the anti-caking agents before using.
Make-Ahead Magic
This dish is actually better when made ahead — the flavors have time to develop and deepen in ways that just don't happen in the rush of getting dinner on the table. Roast your onions up to the point of adding the final cheese topping, then cool, cover, and refrigerate. When you're ready to serve, bring to room temperature while your oven preheats to 375°F, add the final cheese, and bake for 15-20 minutes until hot and bubbly. The onions absorb some of the sauce during the rest, creating an even more luxurious texture that'll have everyone asking for your secret.
Creative Twists and Variations
This recipe is a playground. Here are some of my favorite ways to switch things up:
Mediterranean Escape
Swap the thyme for oregano and add a handful of halved cherry tomatoes during the last 10 minutes of roasting. The tomatoes burst and create little pockets of sweet acidity that cut through the richness beautifully. Finish with a sprinkle of lemon zest and some chopped fresh parsley. This version pairs perfectly with grilled fish or chicken, and the colors are absolutely stunning. You might never go back to the original once you try this bright, fresh take.
Smoky Bacon Bliss
Everything's better with bacon, right? Cook 4 slices of bacon until crispy, crumble it up, and sprinkle it over during the last 5 minutes of cooking. Use the bacon fat instead of olive oil to roast the onions — trust me on this one. The smoky, salty bacon plays beautifully with the sweet onions and nutty Asiago. I dare you to taste this and not go back for seconds. Actually, I dare you to have any leftovers at all.
Spicy Southwestern
Add a teaspoon of smoked paprika and a pinch of cayenne to the cream mixture for a version with a gentle kick. Replace the thyme with cilantro (add fresh at the end), and use pepper jack instead of Asiago for the final cheese topping. Serve alongside grilled steak or as a decadent filling for tacos. The sweet-spicy-smoky combination is addictive, and the cream helps tame the heat so even spice-wimps can enjoy it.
Autumn Harvest
Mix in cubes of butternut squash or sweet potato with your onions — they roast at the same rate and add beautiful color and extra sweetness. Use sage instead of thyme for that cozy autumn flavor, and add a handful of toasted pecans on top for crunch. This version screams holiday side dish and will convert even the most devoted green bean casserole fans. It's like autumn on a plate, and your house will smell like Thanksgiving morning.
French Onion Soup Inspired
Add a splash of dry sherry to the cream mixture and use Gruyère instead of Asiago for the ultimate French onion soup experience without the soup. Top with buttered toast points during the last few minutes of broiling for that classic soup topping vibe. This version is dangerously good — rich, complex, and utterly satisfying. Serve it in shallow bowls with plenty of crusty bread for sopping up every last bit of sauce.
Light and Bright
For a lighter version that doesn't sacrifice flavor, replace half the cream with good quality chicken or vegetable stock. Use half-and-half for the remaining dairy, and add a handful of fresh spinach during the last 5 minutes. The spinach wilts into the sauce and adds beautiful color and nutrition. This version feels almost virtuous but still delivers that creamy, cheesy satisfaction we all crave. Perfect for those January "eating better" resolutions that need a little help.
Storing and Bringing It Back to Life
Fridge Storage
Leftovers (if you're lucky enough to have any) will keep beautifully in an airtight container in the refrigerator for up to 4 days. The key is to cool it completely before storing — warm onions in a sealed container create condensation that leads to soggy, sad results. I actually prefer using a glass container because it doesn't absorb the onion smell, and you can reheat directly in it. The flavors continue to develop and meld, making day-two leftovers arguably even better than fresh from the oven. Just make sure to bring it to room temperature before reheating for the best texture restoration.
Freezer Friendly
Here's something most creamy vegetable dishes can't handle, but this one absolutely can — freezing! Portion into freezer-safe containers, leaving about an inch of headspace for expansion, and freeze for up to 3 months. The cream sauce might separate slightly upon thawing, but a gentle reheating with a splash of cream or milk brings it right back together. Thaw overnight in the refrigerator, then reheat covered in a 350°F oven for about 20 minutes. The onions maintain their texture surprisingly well, and you've got an instant fancy side dish for busy weeknights or unexpected guests.
Best Reheating Method
The microwave works in a pinch, but for restaurant-quality results, use your oven every time. Preheat to 375°F, add a tiny splash of cream or milk to restore the sauce's consistency, cover with foil, and heat for 15-20 minutes. The foil prevents the top from over-browning while everything heats through evenly. For that freshly-made appeal, remove the foil for the last 5 minutes and switch to broil for 1-2 minutes to re-crisp the cheese top. Add a fresh crack of pepper and maybe a sprinkle of fresh herbs, and nobody will know these aren't straight from your oven the first time.