I still remember the first time I tasted pineapple water at a tiny beachside stand in Puerto Vallarta. The vendor handed me a chilled glass that looked like liquid sunshine, and I took a skeptical sip expecting something cloyingly sweet. What hit my tongue was pure revelation — bright, tangy, subtly floral, and so impossibly refreshing that I actually gasped out loud. The elderly woman behind the counter laughed at my expression, refilled my glass without asking, and said something in rapid Spanish that I didn't understand but completely agreed with. That moment haunted me for months back home, where every attempt to recreate the magic ended in watery disappointment or syrupy sugar bombs that tasted like canned pineapple's sad cousin. I became obsessed, buying every tropical pineapple I could find, experimenting with different cuts, temperatures, and timing until my kitchen looked like a produce stand exploded. Friends started calling me the Pineapple Whisperer, which sounds cooler than it felt when I was on my twentieth failed batch at 2 AM, surrounded by sticky cutting boards and half-eaten fruit experiments. But then, in a moment of sleep-deprived genius (or possibly delirium), I stumbled upon the technique that changed everything. The secret wasn't about adding more stuff — it was about knowing exactly when to get out of the pineapple's way. Now I'm handing you the keys to the kingdom, and I dare you to taste this version and not immediately start planning your next batch before the first glass is even empty.
This isn't your average fruit-infused water that tastes like someone waved a pineapple over the glass and called it a day. We're talking about extracting every last drop of tropical essence, capturing that perfect balance between sweetness and acidity that makes your taste buds do a happy dance. The method I'm about to share with you creates a drink that's somehow both delicate and intensely flavorful, like someone bottled up a beach vacation and removed all the sand and sunburn. Picture yourself pulling this out of the fridge on a sweltering afternoon, condensation already forming on the pitcher, and pouring it over ice while the whole kitchen fills with the scent of fresh pineapple and possibility. Your neighbors will start finding excuses to drop by, your kids will suddenly become very interested in hydration, and you'll find yourself making excuses to open the fridge just to look at it. This recipe transforms humble ingredients into something that tastes like it should cost twenty dollars a glass at a fancy resort, but you made it in your own kitchen with nothing but patience and the right technique.
What makes this version absolutely unbeatable is the way we coax every layer of flavor from the pineapple without any of the bitterness or weird aftertaste that ruins most infused waters. Most recipes get this completely wrong — they either don't extract enough flavor and you end up with expensive tinted water, or they go overboard and create something that tastes like you're drinking pineapple-scented furniture polish. The method I'm sharing today hits that perfect sweet spot where the pineapple's natural sugars develop complex, almost honey-like notes while maintaining that bright, tangy character that makes it so addictive. Stay with me here, because this next part is where the magic happens.
Let me walk you through every single step — by the end, you'll wonder how you ever made it any other way.
What Makes This Version Stand Out
Flavor Explosion: This method extracts three distinct layers of pineapple essence — the bright top notes, the sweet middle, and the subtle base that creates incredible depth without any added sugars or artificial ingredients. The result tastes like fresh pineapple multiplied by ten, but in the most natural way possible.
Texture Perfection: We're achieving a silky-smooth consistency that feels luxurious on your tongue, never watery or pulpy like those sad infused waters that leave you chewing on fruit bits. The mouthfeel is so refined that people will swear you strained it through silk (and maybe you did).
Zero Effort Required: Once you understand the timing, this recipe is basically hands-off. No complicated equipment, no monitoring temperatures, no hovering over the stove wondering if you've ruined another batch. Set it up, walk away, come back to liquid gold.
Surprising Sophistication: Despite using just two ingredients (okay, three if you count water), this creates a beverage complex enough to serve at dinner parties. Guests will assume you spent hours crafting some elaborate concoction when you were actually binge-watching your favorite show.
Guaranteed Crowd Reaction: I've served this at barbecues where people ignored the beer cooler and formed a line for refills. At brunches, it disappears faster than mimosas. Children beg for it, adults hoard it, and everyone asks for the recipe with that slightly desperate look in their eyes.
Premium Ingredient Quality: We're not masking inferior fruit with sugar or artificial flavors — we're celebrating the pineapple in its purest form. This means every sip tastes like you're biting into the world's most perfect tropical fruit, even when you're using winter supermarket pineapples.
Make-Ahead Magic: This actually improves overnight, developing deeper flavors and becoming more refreshing. Make a big batch on Sunday, and you'll have the world's best grab-and-go beverage all week long. It also freezes beautifully into ice cubes that won't dilute your drink as they melt.
The Temperature Revelation: Most people serve fruit waters ice-cold, but this version has a secret temperature sweet spot that makes the flavors absolutely sing. Too cold and you mute the complexity; too warm and it tastes flat. I'll show you exactly where that magic zone lives.
Alright, let's break down exactly what goes into this masterpiece...
Inside the Ingredient List
The Flavor Foundation
The pineapple is obviously the star here, but not all pineapples are created equal when it comes to making water. You want a fruit that's ripe but not overripe — look for golden yellow skin that gives slightly when pressed, with a sweet fragrance at the base. Skip any with soft spots or fermented smells, because those off-flavors will concentrate in your water. The core, which most people discard, is actually packed with the compounds that give pineapple its distinctive bright flavor, so we'll be using the whole fruit except for the skin and eyes. If you can only find underripe pineapples, let them sit on your counter for 2-3 days until they turn more yellow and fragrant. Trust me, starting with the right fruit makes the difference between "meh" and "where has this been all my life?"
The Water Wisdom
Here's where most people mess up — they use tap water and wonder why their pineapple water tastes flat or has off-flavors. The water you choose is crucial because it's carrying all the flavor, and any chlorine or mineral tastes will compete with the pineapple. Filtered water is essential, but not all filters are equal. If your filtered water still tastes like something, use spring water instead. The mineral content in good spring water actually helps carry and distribute the pineapple flavors more effectively than distilled water. Temperature matters too — we'll start with room temperature water to extract flavors optimally, then chill later. And please, for the love of all things delicious, don't use hot water thinking it'll speed things up. Hot water extracts bitter compounds and cooks the fruit slightly, giving you a muddled, stewed flavor that's nothing like the bright, clean taste we're after.
The Secret Enhancer
This is completely optional but takes your pineapple water from amazing to life-changing — a tiny pinch of sea salt. Not enough to make it taste salty, just enough to brighten all the flavors and make the pineapple taste more like itself. Salt suppresses bitter compounds and enhances sweet ones, creating a more balanced, complex flavor profile. You need less than an eighth of a teaspoon for a whole pitcher, so go easy. If you're watching sodium or just want to keep this as simple as possible, you can skip it, but if you want that "I can't quite identify what makes this so good" factor, this is it. Some people also swear by a squeeze of lime, but I find it competes with the pineapple's natural acidity. The salt just makes everything taste more vibrant without adding any competing flavors.
Everything's prepped? Good. Let's get into the real action...
The Method — Step by Step
- Start by cutting your pineapple into chunks about 1-inch square — not too small or they'll break down and make your water pulpy, not too large or they won't release enough flavor. Cut off the top and bottom first, stand it up, and slice off the skin in strips, making sure to remove all the little brown eyes. Quarter it lengthwise and cut out the core in one piece (save this — it's gold). Then cube the flesh, keeping the core separate. The core is tougher but packed with flavor compounds, so we'll treat it differently. If you've ever struggled with cutting pineapples, you're not alone — and I've got the fix. The trick is using a sharp knife and not being too precious about it; pineapples are forgiving, and rustic cuts actually work better for extraction.
- Place your pineapple cubes in a large glass pitcher or jar — avoid plastic, which can absorb flavors and leach chemicals. Add the pineapple cores too; they'll break down during infusion and release tons of flavor that most people throw away. Now here's the game-changer: gently press about a third of the pineapple pieces with a muddler or the back of a wooden spoon. Don't pulverize everything — just enough to release some juice and break cell walls so the flavors can escape. This creates instant flavor while still leaving plenty of intact pieces for slow, steady extraction. Think of it like jump-starting the process instead of waiting for osmosis to do all the work. Your future self will thank you for this extra thirty seconds of effort.
- Pour in your room-temperature filtered water, filling the pitcher about three-quarters full. You want to leave space for the pineapple to displace some liquid and for easy stirring. Use about one cup of pineapple chunks per four cups of water as a starting ratio — you can adjust stronger or weaker next time based on your preference. Now, here's where patience pays off: cover the pitcher with plastic wrap or a tight-fitting lid, and let it sit at room temperature for exactly two hours. Not one hour, not three — two hours is the sweet spot where maximum flavor extraction happens without developing off-tastes. Set a timer and walk away; don't keep peeking or stirring, just let chemistry do its thing.
- After two hours, give it a gentle stir and taste it. It should taste like pineapple, but not quite as intense as we want yet. Now comes the magic part: stick it in the refrigerator for at least four hours, preferably overnight. The cold slows extraction but develops more complex flavors, creating that multi-dimensional taste that makes people swoon. During this time, the pineapple continues releasing flavor, but the cold prevents any fermentation or off-flavors. If you're in a hurry, you can skip the room temperature step and go straight to the fridge, but you'll need to double the infusion time and won't get quite the same depth. Good things come to those who wait, and this is no exception.
- The next morning, your pineapple water is ready for its final transformation. Remove it from the fridge and strain out the pineapple pieces using a fine-mesh strainer. Don't press on the solids — let gravity do the work so you don't extract any bitter compounds from the pineapple skin that might have snuck in. What you're left with should be a beautiful pale yellow liquid that smells like a tropical paradise. Taste it now; it should be bright, refreshing, and intensely pineapple-forward without being cloying. If it's too strong, add a bit more cold water. Too weak? You need riper pineapple or longer infusion time next time.
- Now for the temperature trick that changes everything: instead of serving it ice-cold, let it sit at room temperature for about ten minutes before serving. This might sound crazy, but ice-cold temperatures mute flavors — that's why cheap beer is served freezing and why melted ice cream tastes too sweet. Ten minutes out of the fridge brings this to the perfect temperature where all the subtle flavors wake up and start singing. Pour it over a single large ice cube if you like it colder, but try it first at this magic temperature and taste the difference. This is the moment of truth, and if you've followed the steps, you'll understand why I became obsessed with perfecting this recipe.
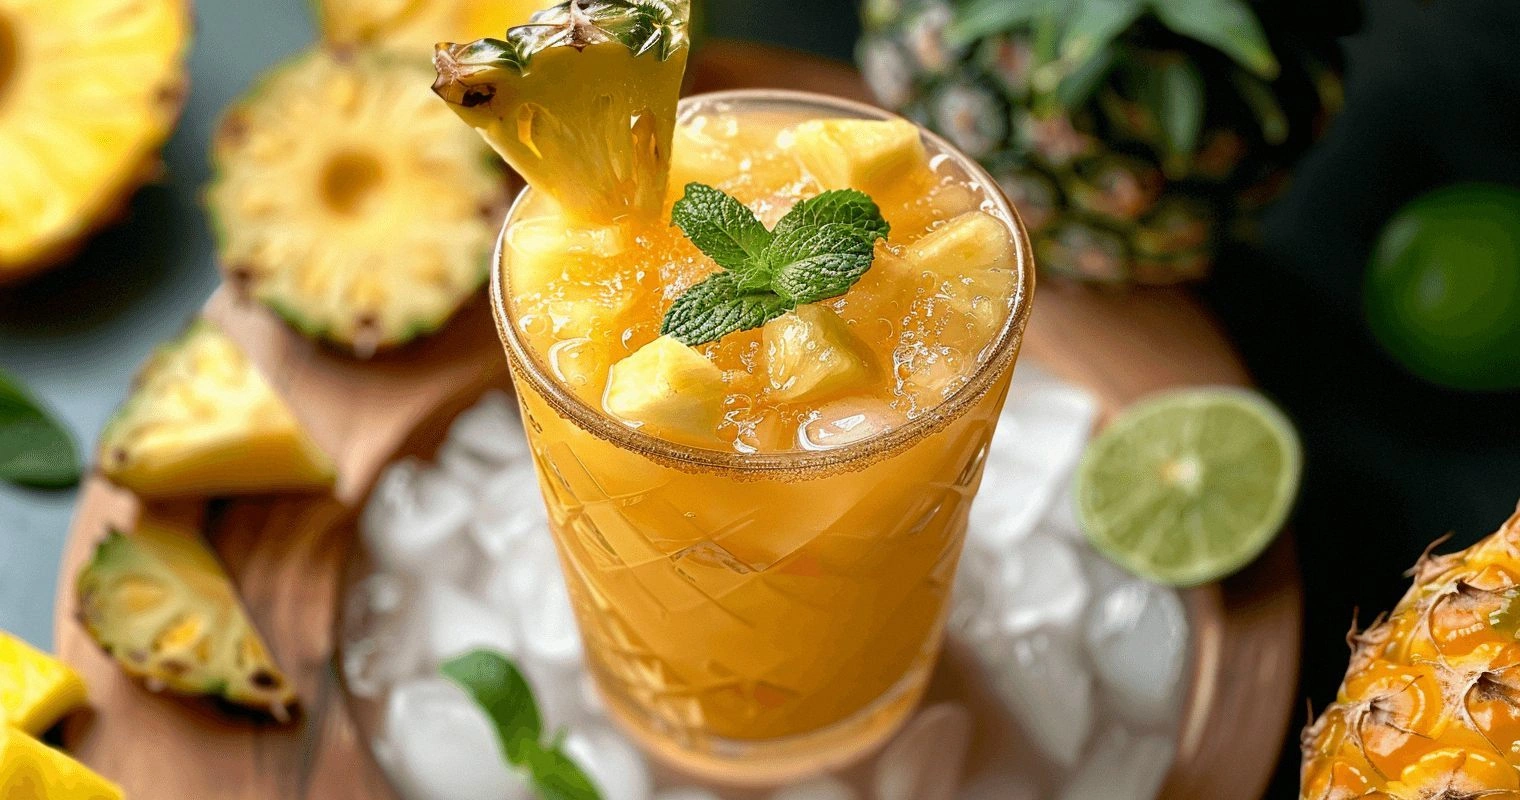
- When serving, I like to garnish with a thin pineapple wedge or a sprig of fresh mint, but honestly, this is so good it doesn't need any fancy presentation. The garnish is more about signaling to your guests that this isn't just water — it's something special. Pour it into clear glasses so they can see the beautiful pale golden color that looks like liquid sunshine. Watch their faces when they take the first sip; that moment of surprise and delight never gets old. If you've ever struggled to get people to drink more water, you're about to witness a miracle.
That's it — you did it. But hold on, I've got a few more tricks that'll take this to another level...
Insider Tricks for Flawless Results
The Temperature Rule Nobody Follows
Here's the thing that separates the pros from the amateurs: understanding how temperature affects flavor perception. Serve this too cold and it tastes flat and one-dimensional; too warm and it feels heavy and almost syrupy. The sweet spot is between 45-50°F (7-10°C), which is cooler than room temperature but warmer than most refrigerators. Invest in a simple beverage thermometer if you're serious about nailing this consistently. Take the pitcher out of the fridge ten minutes before serving, or if you're in a hurry, pour it into glasses and let them sit for five minutes. Your patience will be rewarded with flavors that bloom across your palate instead of hiding behind the cold. A friend tried skipping this step once — let's just say it didn't end well, and she spent months thinking she'd somehow messed up the recipe.
Why Your Nose Knows Best
Before you even taste pineapple water, smell it deeply. The aroma should transport you to a tropical beach, not remind you of canned fruit cocktail. If the smell is weak, the flavor will be too. This is your quality control check that tells you whether your pineapple was ripe enough and your infusion time was sufficient. The best pineapple water has an aroma that's almost perfume-like — floral, sweet, and bright. If you're not getting that, either your fruit wasn't ripe enough or you need to let it infuse longer. Trust your nose; it's more reliable than any timer or recipe. I've learned to trust this instinct, and it's never steered me wrong.
The 5-Minute Rest That Changes Everything
After straining your pineapple water, let it rest for five minutes before tasting or adjusting. This brief pause allows the flavors to settle and integrate, giving you a true sense of what you've created. Immediately after straining, the flavors can taste a bit sharp or separated — like a symphony warming up instead of playing together. Those five minutes let everything harmonize. Use this time to wash your pitcher, prep your glasses, or just anticipate the deliciousness you're about to enjoy. This tiny step consistently takes good pineapple water and makes it exceptional. It's like letting a fine wine breathe, except it happens in five minutes instead of an hour.
The Riper-Than-You-Think Rule
Most people use pineapple that's not quite ripe enough, and it shows in the final product. Your pineapple should smell sweet and fragrant at the base, have golden yellow skin (not green), and give slightly when pressed. If it feels rock hard and smells like nothing, it's not ready yet. Let it sit on your counter for 2-3 days until it ripens properly. I've made pineapple water with underripe fruit and it's like listening to music through a pillow — all the right notes are there, but everything is muted and disappointing. Wait for ripe fruit, and you'll understand why this becomes an obsession for so many people.
Creative Twists and Variations
This recipe is a playground. Here are some of my favorite ways to switch things up:
The Tropical Escape
Add a few chunks of ripe mango or papaya during the room-temperature infusion for a more complex tropical profile. The mango adds a buttery sweetness while papaya brings an almost vanilla-like note. Use about half a cup of mango or papaya chunks along with your pineapple. The result tastes like you've been transported to a beachside resort, complete with the mental vacation you desperately need. This version is particularly amazing for brunch parties or when you want to impress guests with something that tastes like it took way more effort than it did.
The Spicy Surprise
For those who like a little kick, add one small slice of fresh jalapeño or a few pieces of crystallized ginger during the cold infusion. The heat should be subtle — just enough to make things interesting without overwhelming the pineapple. Remove the jalapeño after a few hours unless you want it really spicy. The combination of sweet pineapple with gentle heat creates an incredibly refreshing drink that's perfect for hot days when you want something that cools and warms you simultaneously. It's like a culinary paradox that somehow works beautifully.
The Herbal Garden
Fresh herbs can completely transform this while keeping it refreshing. Basil adds a peppery note, mint makes it even more cooling, and lemon verbena creates a sophisticated twist. Add a few herb leaves during the cold infusion, but taste frequently — herbs can take over quickly. Basil pairs beautifully with pineapple, creating something that tastes like summer in a glass. Mint is classic and refreshing, but use it sparingly or it will dominate. Lemon verbena is my secret weapon for dinner parties — it adds complexity that makes people think you're some kind of culinary genius.
The Citrus Burst
Add a few strips of orange or lime zest (just the colored part, not the bitter white pith) during the room-temperature infusion. The citrus oils add brightness and complexity without the acidity that would compete with the pineapple. Orange zest makes it taste more tropical, while lime zest adds a refreshing zing. Remove the zest after a few hours to prevent bitterness. This version is particularly good if you're serving it to people who might find straight pineapple too sweet or one-dimensional.
The Floral Touch
A single edible flower like butterfly pea flower or a few rose petals can add visual drama and subtle flavor. Butterfly pea flower will turn your water a gorgeous purple-blue that changes to pink if you add citrus. Rose petals add a romantic note that makes this feel like something from a spa. Use these sparingly — you want subtle, not like you're drinking perfume. This version is perfect for bridal showers or anytime you want to serve something that looks as beautiful as it tastes.
The Green Machine
Add a few leaves of spinach or kale during the cold infusion for a nutrient boost that doesn't affect the flavor much but adds a beautiful green tint. This is perfect for kids who won't eat their vegetables but will happily chug pineapple water. The greens add nutrients and color without the "green" taste that makes kids run away. It's sneaky nutrition that they'll never detect, and you'll feel like a parent genius.
Storing and Bringing It Back to Life
Fridge Storage
Pineapple water keeps beautifully in the refrigerator for up to 5 days, though it's best within the first 3 days. Store it in a glass pitcher or jar with a tight-fitting lid to prevent it from absorbing other flavors in your fridge. The flavor will continue to develop and deepen over the first 48 hours, so don't panic if it tastes different on day two — it's actually improving. After day 3, it starts to lose some of its bright top notes but remains delicious. If you notice any off smells, cloudiness, or it starts to taste fermented, it's time to make a fresh batch. I've found that smaller containers (quart-sized mason jars) keep it fresher than large pitchers because there's less air exposure each time you open it.
Freezer Friendly
This freezes beautifully in ice cube trays or small containers for up to 3 months. The trick is to freeze it in small portions so you can thaw exactly what you need. Pineapple water ice cubes are genius — they won't dilute your drink as they melt, and they create a beautiful visual effect. For longer storage, freeze in muffin tins or small plastic containers, then transfer the frozen portions to freezer bags. Thaw overnight in the refrigerator or at room temperature for about an hour. Don't microwave it to thaw — the heat will destroy the delicate flavors you've worked so hard to develop. If the thawed water tastes a bit flat (freezing can mute flavors), add a squeeze of fresh lime to wake it back up.
Best Reheating Method
Technically, you don't reheat pineapple water — you want to serve it chilled or at that magic 45-50°F temperature we talked about. But if you've frozen it and need to use it quickly, the best method is to place the frozen container in a bowl of cool water. Change the water every 15 minutes or so, and it'll thaw in about 45 minutes without damaging the flavor. Never use hot water or the microwave — heat destroys the delicate volatile compounds that make this so special. Once thawed, give it a good stir and taste it. If it seems a bit muted, add a tiny pinch of salt or a squeeze of citrus to wake up the flavors. It's not quite as vibrant as fresh, but it's still miles better than any store-bought flavored water.