I was standing in my kitchen, staring at a pile of overcooked, bland vegetables that had somehow survived the last grocery trip, when a sudden craving hit me like a thunderclap. I wanted something warm, comforting, and utterly wholesome—yet I didn’t want to spend hours chopping, sautéing, or waiting for a pot to boil. That moment, that electric spark, led me to discover the ultimate Instant Pot vegetable and quinoa soup that can turn any weekday mess into a gourmet feast in under an hour. It’s a dish that feels like a hug from the inside, with a bright, citrusy finish that lifts the whole bowl. Let me walk you through every single step — by the end, you’ll wonder how you ever made it any other way.
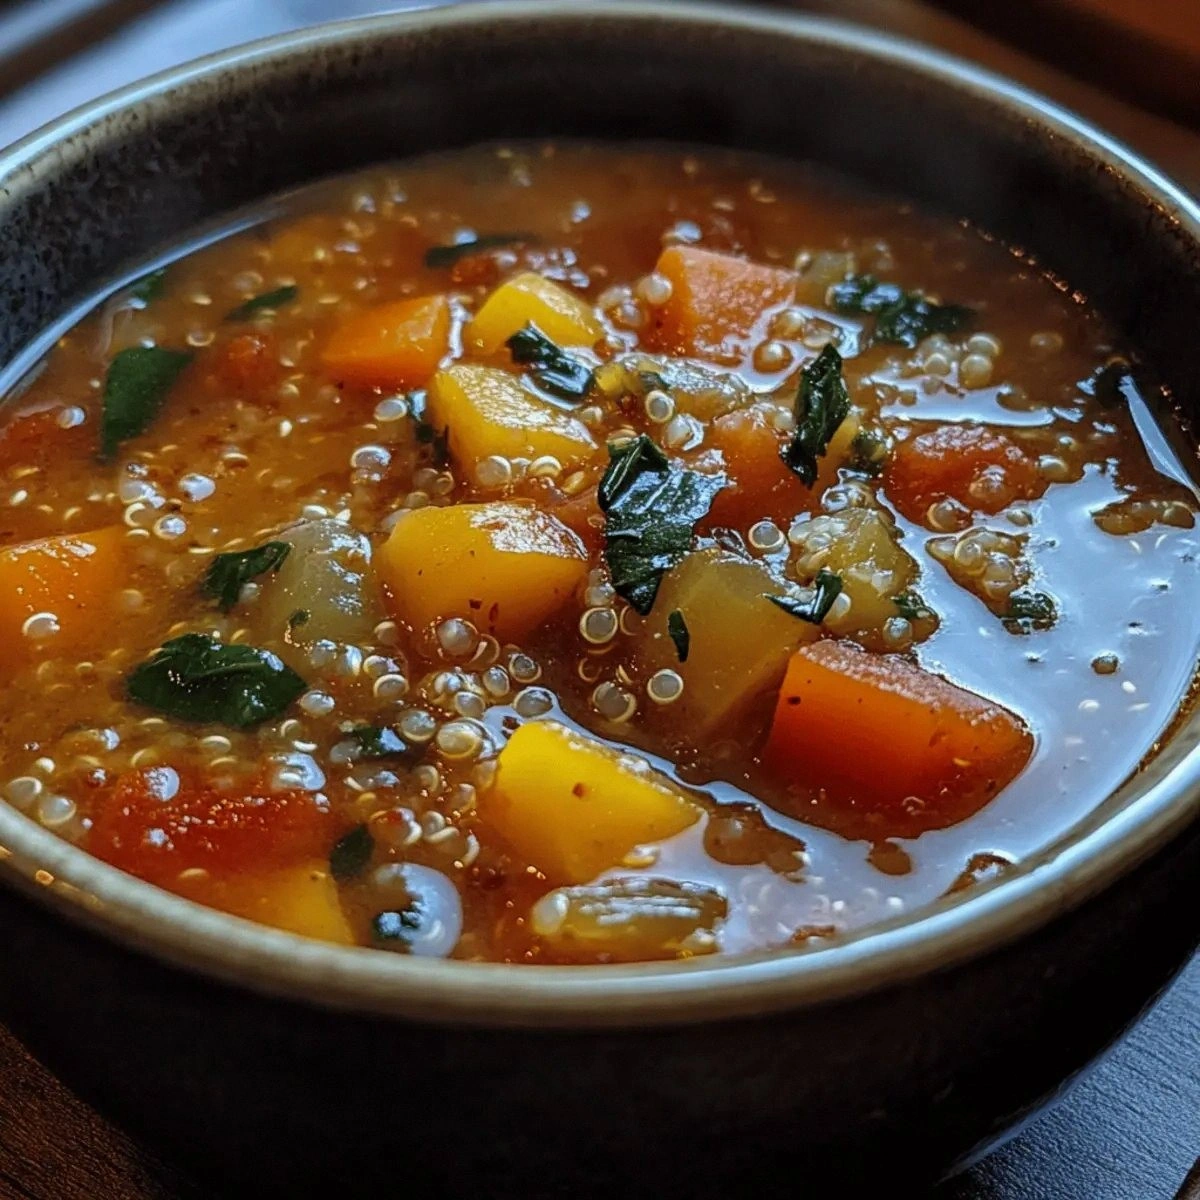
Picture this: the aroma of caramelized onions mingles with the sharp scent of fresh garlic, while the gentle hiss of the Instant Pot releases a subtle steam that tickles your senses. The sound of vegetables simmering is a comforting lullaby, and the sight of bright green spinach and ruby cherry tomatoes glistening in a golden broth is a feast for the eyes. When you take that first spoonful, the silky quinoa provides a gentle bite, the vegetables offer a satisfying crunch, and the lemony tang bursts like sunshine on a cloudy day. Every bite feels like a tiny celebration, a reminder that simple ingredients can create extraordinary flavor. I dare you to taste this and not go back for seconds—trust me, you’ll be craving more.
What sets this version apart from the countless other soups out there is the strategic use of the Instant Pot, which locks in flavors while drastically cutting down prep time. The recipe balances hearty protein from quinoa with a rainbow of vegetables, ensuring that every mouthful is packed with nutrients and texture. The addition of dried thyme and a bay leaf gives the broth a subtle depth that would otherwise require a slow-cook simmer. The bright finish from fresh lemon juice lifts the dish, creating a harmonious balance between savory and citrusy notes. And the best part? It’s so easy that even a kitchen novice can master it, yet it’s sophisticated enough to impress your guests.
Most recipes get this completely wrong by overcooking the quinoa or using too much broth, resulting in a soggy mess. Here, the Instant Pot’s pressure cooking mode guarantees fluffy quinoa and perfectly tender vegetables without the risk of mush. I’ll be honest—I ate half the batch before anyone else got to try it, and the leftovers were still just as delicious the next day. This recipe is hands down the best version you’ll ever make at home, and it’s built to scale, so you can easily adjust servings for a crowd or a solo dinner. The secret? A few small tweaks that make a world of difference, and they’re all explained right here.
What Makes This Version Stand Out
- Flavor: The combination of sautéed aromatics and a touch of dried thyme creates a savory base that’s richer than a classic vegetable stock. The lemon juice adds a bright, almost tangy counterpoint that keeps the soup from feeling heavy.
- Texture: Pressure cooking ensures the quinoa stays fluffy while the carrots and celery remain crisp-tender, giving each bite a satisfying bite.
- Speed: From prep to finish, the entire process takes less than 45 minutes—perfect for a busy weekday or an unexpected dinner guest.
- Health: Packed with fiber, vitamins, and plant protein, this soup is a balanced meal that satisfies both body and soul.
- Versatility: Swap out zucchini for butternut squash or add a splash of coconut milk for a different flavor profile.
- Make‑ahead: The soup keeps well in the fridge for up to 4 days and freezes beautifully, making it a reliable meal prep option.
Alright, let’s break down exactly what goes into this masterpiece…
Inside the Ingredient List
The Flavor Base
Olive oil and onions are the first to meet the heat. Sautéing the onions until they’re translucent and slightly caramelized releases natural sugars that form the soup’s sweet backbone. The garlic cloves, minced finely, infuse the oil with a punch of sharpness that lingers through each spoonful. If you skip this step, the soup will feel flat and lack depth. For an extra layer of umami, sprinkle a pinch of nutritional yeast after sautéing.
The Texture Crew
Carrots and celery bring crunch and color. Cut them into bite‑sized pieces so they cook evenly under pressure. Zucchini, sliced into half‑moon shapes, adds a subtle sweetness that balances the earthiness of the root vegetables. Quinoa, rinsed to remove its natural saponin coating, provides a chewy, nutty texture that makes the soup filling without being heavy. If you’re short on time, use pre‑rinsed quinoa; just be sure to rinse it before adding to the pot.
The Unexpected Star
Cherry tomatoes burst with juiciness when cooked, releasing a natural sweetness that brightens the broth. They also add a pop of color that makes the soup look as good as it tastes. If you prefer a different flavor profile, try using sun‑dried tomatoes for a chewy, concentrated burst of umami. Keep in mind that sun‑dried tomatoes are saltier, so adjust the seasoning accordingly.
The Final Flourish
Spinach or kale is added at the very end of the cooking cycle, just enough to wilt into the soup without losing its vibrant green hue. The dried thyme and bay leaf infuse the broth with herbal undertones that echo Mediterranean kitchens. A splash of fresh lemon juice at the end provides a bright, acidic lift that cuts through the richness. Salt and pepper are added to taste, but be mindful that the broth can become salty if you over‑season the vegetables.
Everything’s prepped? Good. Let’s get into the real action…
The Method — Step by Step
- Prep the aromatics: Dice the onion, mince the garlic, and slice the carrots, celery, and zucchini into uniform pieces. This ensures even cooking and a consistent texture throughout the soup. The sautéing stage is where the flavor foundation is built, so take your time to get the pieces just right. I’m talking about a quick 1–2 minutes of sauté until the onions turn translucent.
- Sauté the base: Turn the Instant Pot to the “Sauté” mode, add the olive oil, and let it heat until shimmering. Toss in the onions and garlic, stirring constantly to prevent burning. Once the onions are soft, add the carrots and celery; let them get a light sear for about 2 minutes. This caramelization step adds a depth of flavor that’s impossible to replicate with a quick boil.
- Add the veggies and broth: Pour in the vegetable broth, then add the zucchini, cherry tomatoes, dried thyme, and bay leaf. Stir to combine, making sure the vegetables are submerged. The liquid should cover all the solids; if it’s too thick, add a splash of water or more broth.
- Seal the pot: Place the lid on the Instant Pot, set the valve to “Sealing,” and select the “Manual” or “Pressure Cook” setting for 5 minutes at high pressure. The quick pressure build‑up ensures the quinoa cooks evenly and the vegetables stay bright.
- Quick release: Once the cooking cycle completes, perform a quick release by carefully turning the valve to “Venting.” This stops the cooking process abruptly, preserving the texture of the quinoa and vegetables. The steam will hiss like a gentle applause, signaling that the soup is almost ready.
- Finish with greens: Open the lid and stir in the spinach or kale. The residual heat will wilt the greens in just a minute or two. Add the fresh lemon juice, then season with salt and pepper to taste. If the soup feels a bit thick, add a splash of water or broth to reach your desired consistency.
- Serve: Ladle the soup into bowls, and garnish with a sprinkle of fresh herbs or a drizzle of olive oil if desired. The bright green garnish adds a pop of color that makes the dish look as good as it tastes.
- Optional boost: For a creamy twist, swirl in a spoonful of Greek yogurt or coconut milk just before serving. The dairy adds a velvety texture, while coconut milk gives a subtle tropical undertone.
That’s it — you did it. But hold on, I’ve got a few more tricks that’ll take this to another level. Let’s dive into insider tips that’ll elevate every spoonful.
Insider Tricks for Flawless Results
The Temperature Rule Nobody Follows
Many people set the Instant Pot to “Manual” for too long, causing the quinoa to become mushy. The trick is to cook on high pressure for just 5 minutes. That short burst of pressure is enough to soften the quinoa while keeping the vegetables crisp. If you’re making a larger batch, keep the same ratio; the Instant Pot scales well.
Why Your Nose Knows Best
Before you season the soup, give it a quick sniff. If it smells too “brothy,” add more lemon or a pinch of salt. Your nose can detect when the flavors are imbalanced, and adjusting at this stage saves you from over‑seasoning later.
The 5‑Minute Rest That Changes Everything
After the quick release, let the soup sit in the pot for an additional 5 minutes before opening the lid. This allows the flavors to meld and the quinoa to finish absorbing the broth. It also gives the vegetables a chance to settle, preventing a splashy mess when you ladle.
Stirring Like a Pro
Stir the soup gently after the pressure release. This redistributes the heat and ensures the greens don’t clump together. A quick stir also helps release any trapped steam, preventing the soup from boiling over when you open the lid.
The Lemon Finish
Add the lemon juice after the pressure release to preserve its bright acidity. If you add it before, the lemon can lose its zing through prolonged heat. A squeeze of lemon right before serving gives a fresh burst that cuts through the richness.
Creative Twists and Variations
This recipe is a playground. Here are some of my favorite ways to switch things up:
Butternut Squash Delight
Replace zucchini with diced butternut squash for a sweeter, caramelized flavor. The squash adds a subtle nutty taste that pairs beautifully with the thyme. It’s perfect for a cozy fall dinner.
Creamy Coconut Twist
Stir in a splash of coconut milk at the end for a silky, tropical finish. The coconut balances the lemony brightness and adds a hint of sweetness. Pair it with a sprinkle of toasted coconut flakes for extra texture.
Protein Power-Up
Add a handful of chickpeas or edamame for an extra protein boost. The beans soak up the broth and add a pleasant chewiness that complements the quinoa. This variation is great for a vegetarian main course.
Herb Garden Explosion
Swap the dried thyme for fresh rosemary or sage. The fresh herbs bring a fragrant, aromatic quality that elevates the broth. Use a small pinch of dried oregano for a Mediterranean touch.
Spicy Kick
Add a pinch of crushed red pepper flakes or a dash of hot sauce. The heat cuts through the richness and adds a lively zing. This version is ideal for those who love a bit of spice.
Sausage Boost
Sauté sliced Italian sausage with the onions for a meaty, savory twist. The sausage infuses the broth with smoky depth. Remove the sausage before serving if you prefer a lighter version.
Storing and Bringing It Back to Life
Fridge Storage
Cool the soup completely, then transfer to an airtight container. Store in the refrigerator for up to 4 days. The quinoa will maintain its texture, and the flavors will deepen over time.
Freezer Friendly
Pack the soup in freezer‑safe bags or containers, leaving a little headspace for expansion. Freeze for up to 3 months. Thaw overnight in the fridge before reheating.
Best Reheating Method
Reheat on the stovetop over low heat, stirring occasionally. Add a tiny splash of water or broth to restore moisture. Once it reaches the desired temperature, give it a final stir and taste before serving.