I was halfway through a boring Tuesday night when my roommate dared me to turn a bag of frozen nachos into something that would make the whole building jealous. I grabbed the nearest egg roll wrappers, tossed a handful of shredded cheese, and threw in whatever protein I had left in the fridge. The result? A crunchy, cheesy, spicy pocket that practically sang “¡Viva México!” with every bite. I swear, that first bite was louder than my neighbor’s late‑night karaoke, and I knew I had stumbled onto something legendary.
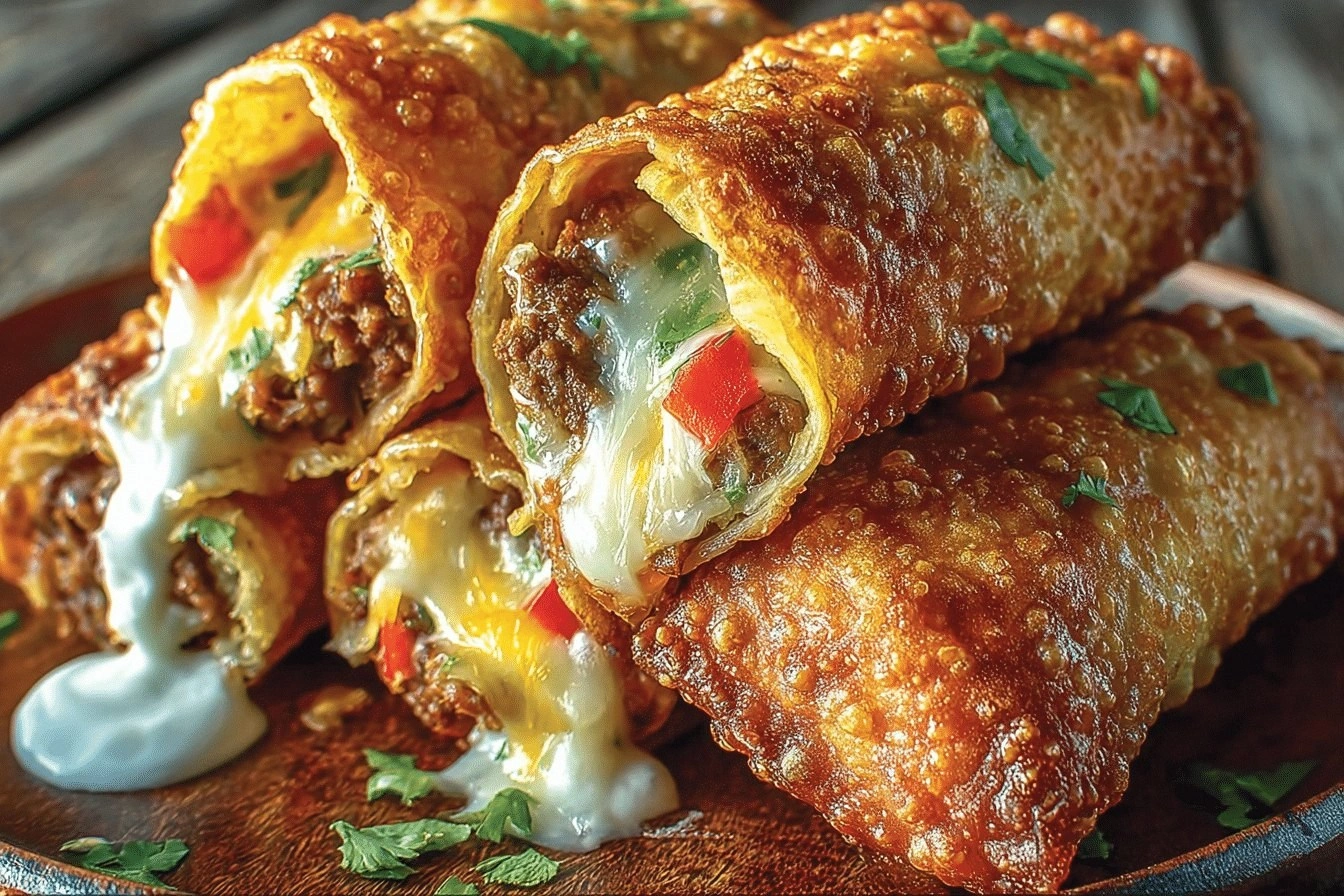
Picture this: the sizzling sound of oil bubbling like a tiny jacuzzi, the golden‑brown edges of the rolls popping up as they rise, and the intoxicating aroma of cumin, paprika, and melted cheese mingling with a faint hint of jalapeño heat. The kitchen feels like a fiesta, the countertop a dance floor, and you’re the DJ spinning the perfect blend of textures. You can almost hear the crunch echoing in the hallway as you pull the tray out, and the steam that escapes is a warm, cheesy cloud that makes your eyes water with anticipation.
Most nacho‑egg‑roll attempts end up soggy, bland, or just plain confusing. I’ve tried versions that were more “wet‑taco‑in‑a‑wrapper” than “crunch‑fest,” and let’s be honest, nobody wants a soggy wrapper that collapses like a sad house of cards. This recipe flips the script by marrying the classic taco seasoning profile with a deep‑fried shell that stays crisp for minutes, even after you’ve let it sit on a plate. The secret? A quick fry at the right temperature, a strategic layering of cheese and beans, and a dash of confidence.
I’m about to walk you through every single step — from selecting the perfect egg roll wrapper to mastering the oil temperature — and by the end, you’ll wonder how you ever settled for ordinary nachos. I dare you to taste this and not go back for seconds. Okay, ready for the game‑changer?
What Makes This Version Stand Out
- Texture: The wrapper stays crisp like a fresh tortilla chip, while the interior stays gooey and melty, creating a contrast that shatters like thin ice with each bite.
- Flavor Fusion: Taco seasoning meets Asian‑style frying, delivering a flavor explosion that feels both familiar and daringly new.
- Ingredient Simplicity: Only seven core ingredients, all pantry‑friendly, mean you can whip this up without a trip to the specialty store.
- Protein Power: Ground beef or turkey gives it heartiness, making it a satisfying snack or a full‑on appetizer for a crowd.
- Crowd Reaction: These rolls have the uncanny ability to clear a room in seconds; expect applause, high‑fives, and maybe a few jealous glances.
- Make‑Ahead Magic: You can prep the filling and roll them up a day ahead, then fry them fresh when guests arrive.
- Versatile Pairings: Serve with salsa, guacamole, or a cool ranch dip, and you’ve got a trio of sauces that elevate the experience.
- Budget Friendly: The cost per roll is under $1, making it perfect for game nights, potlucks, or any occasion where you need to feed a crowd without breaking the bank.
Inside the Ingredient List
The Flavor Base
The Spices—whether you use a store‑bought taco seasoning or a custom blend of cumin, paprika, garlic powder, and a pinch of cayenne—are the heart of this dish. They coat the ground meat and beans with a smoky, slightly sweet, and subtly hot profile that makes every bite sing. Skipping them would be like serving a karaoke night without music: you’d have the ingredients, but the party would fall flat. If you’re out of taco seasoning, mix 1 tsp cumin, 1 tsp smoked paprika, ½ tsp garlic powder, and a dash of chili powder for a DIY version.
The Texture Crew
Egg Roll Wrappers are the unsung heroes here. Their thin, wheat‑based skin crisps up fast, forming a shell that’s sturdy enough to hold the filling yet delicate enough to break with a satisfying snap. Look for wrappers that are still pliable; if they’re brittle, give them a quick steam over a pot of boiling water for 10 seconds. The Shredded Cheese, a blend of cheddar and Monterey Jack, melts into a stretchy, gooey layer that binds the beans and meat together, preventing dry pockets. If you’re dairy‑free, try a sharp vegan cheddar that melts well.
The Unexpected Star
Black Beans bring a subtle earthiness and a dose of fiber that balances the richness of the meat and cheese. They also add a lovely speckled appearance that makes the rolls look as good as they taste. Rinse canned beans thoroughly to remove excess sodium; if you’re using dried beans, soak them overnight and cook until tender. Jalapeños add that kick you crave—just remember, the heat lives in the membranes, so slice them thin and remove seeds for a milder bite.
The Final Flourish
Vegetable Oil is the medium that turns this dish from a soggy nightmare into a crisp masterpiece. Choose an oil with a high smoke point—canola, peanut, or sunflower are ideal. The oil should be heated to 350°F (175°C); any lower and the wrapper soaks up oil, any higher and it burns before the interior cooks. A simple thermometer can save you from a batch of greasy, limp rolls. Finally, a sprinkle of fresh cilantro or a squeeze of lime right before serving adds a bright, fresh contrast that lifts the whole flavor profile.
Everything's prepped? Good. Let's get into the real action...
The Method — Step by Step
Start by heating a deep, heavy‑bottomed pot or Dutch oven with enough vegetable oil to submerge the rolls—about 2 inches deep. Use a thermometer and bring the oil to a steady 350°F (175°C). You’ll know it’s ready when a tiny breadcrumb sizzles and turns golden within 15 seconds. Watch the temperature closely; if it drops too low, the wrappers will soak up oil and become soggy.
While the oil heats, cook the ground beef or turkey in a skillet over medium heat. Break it up with a spatula, and season generously with the taco seasoning (or your homemade blend). Cook until the meat is browned and crumbly, about 7‑8 minutes. Drain any excess fat, then stir in the black beans and chopped jalapeños, letting the mixture simmer for another 2 minutes so the flavors meld.
Now, assemble the filling: combine the cooked meat mixture with the shredded cheese in a large bowl. The cheese should be slightly warm so it starts to melt, binding the beans and meat together. Taste and adjust seasoning if needed—this is the moment you can add a pinch more cumin or a dash of salt.
Lay out an egg roll wrapper on a clean surface with one corner pointing toward you (like a diamond). Spoon about 2‑3 tablespoons of the filling onto the center, making sure not to overfill. Kitchen Hack: Lightly brush the edges of the wrapper with water using a pastry brush; this creates a seal that prevents the oil from slipping in during frying.
Fold the bottom corner over the filling, then fold the two side corners toward the center, creating a tight envelope. Roll the wrapper up toward the top corner, sealing it with a final dab of water. The roll should be snug but not compressed; you want air pockets that will puff up slightly as they fry.
Carefully lower 2‑3 rolls into the hot oil, using tongs to avoid splatter. Do not overcrowd the pot; each roll needs space to float and crisp evenly. Fry for 3‑4 minutes, turning once, until the wrapper is a deep golden‑brown and the cheese inside is bubbling.
Watch Out: If the oil temperature drops below 320°F, the rolls will absorb oil and become greasy. Keep the thermometer in the pot and adjust the heat as needed to maintain a steady temperature.
Using a slotted spoon, lift the rolls onto a paper‑towel‑lined plate to drain excess oil. Let them rest for a minute—this short pause allows the interior steam to settle, keeping the crust crisp. Serve immediately with your favorite dipping sauces; the contrast between the hot, crunchy exterior and the melty interior is pure bliss.
That's it — you did it. But hold on, I've got a few more tricks that'll take this to another level. Trust me, these final touches will make your friends swear you’ve hired a professional chef.
Insider Tricks for Flawless Results
The Temperature Rule Nobody Follows
Most home cooks set the oil to “medium‑high” and hope for the best. The truth is, you need a precise 350°F (175°C) to achieve that perfect crunch without greasiness. Use an instant‑read thermometer, and if you notice the temperature dropping after adding rolls, crank the heat up just a notch. A steady temperature means each roll cooks uniformly, giving you that even golden color and consistent interior melt.
Why Your Nose Knows Best
Before you even peek at the timer, trust your sense of smell. When the oil starts to emit a faint, nutty aroma, it’s signaling that the fats are breaking down just right. If you smell a burnt scent, the oil is too hot—remove the pot from the burner for a moment and let it cool.
The 5‑Minute Rest That Changes Everything
After frying, let the rolls sit on a cooling rack for five minutes instead of a paper towel. This allows steam to escape without the rolls sitting in their own moisture, preserving the crunch. I tried the paper towel method once and ended up with soggy edges—lesson learned.
Seal the Deal with Water
Kitchen Hack: Dabbing a tiny amount of water on the wrapper’s edge before sealing creates a natural glue. It’s a trick borrowed from dumpling making, and it prevents the dreaded “leak” that can ruin a batch. The water evaporates instantly when the roll hits the oil, leaving a seamless seal.
Double‑Dip for Extra Crunch
If you love an ultra‑crunchy exterior, give the rolls a quick double‑dip. After the first fry, let them cool for a minute, then dip them again in a thin layer of beaten egg mixed with a splash of water, and fry for another 30 seconds. The extra coating creates a lattice‑like crust that shatters delightfully.
Season While Hot
Right after you lift the rolls from the oil, sprinkle a light dusting of smoked paprika or chili powder. The heat helps the spices adhere, and you get an extra flavor pop that makes each bite even more dynamic.
Creative Twists and Variations
This recipe is a playground. Here are some of my favorite ways to switch things up:
Southwest Veggie Delight
Swap the ground meat for roasted corn, diced zucchini, and a handful of chopped cilantro. Use pepper jack cheese for extra heat, and finish with a drizzle of chipotle mayo. Perfect for vegetarians who still crave that crunchy bite.
BBQ Pulled Pork Explosion
Replace the taco‑seasoned beef with slow‑cooked pulled pork tossed in smoky BBQ sauce. Add coleslaw inside the roll for a tangy crunch, and use a blend of cheddar and smoked gouda. This version feels like a backyard cookout in every bite.
Breakfast Nacho Rolls
Mix scrambled eggs, crumbled breakfast sausage, and a pinch of hot sauce into the filling. Top with shredded Monterey Jack and a dash of salsa verde after frying. Serve with a side of avocado for a brunch that will have everyone asking for seconds.
Spicy Sweet Chili Fusion
Add a spoonful of sweet chili sauce to the meat mixture and sprinkle toasted sesame seeds on the wrapper before frying. The result is a sweet‑heat combo that reminds you of a Thai street‑food stall.
Cheesy Spinach Power
Stir in a cup of wilted spinach and a generous handful of feta cheese into the filling, then top with mozzarella before sealing. The feta adds a salty bite while the mozzarella melts into a luscious stretch.
Storing and Bringing It Back to Life
Fridge Storage
Place cooled rolls in an airtight container lined with a paper towel to absorb excess oil. They’ll stay crisp for up to 3 days. Reheat in a preheated 375°F oven for 8‑10 minutes, and they’ll regain that fresh‑out‑of‑the‑fryer crunch.
Freezer Friendly
Arrange the unfried rolls on a parchment‑lined tray and freeze until solid (about 2 hours). Transfer them to a zip‑top bag; they’ll keep for up to 2 months. When you’re ready, fry straight from frozen—just add an extra minute to the cooking time.
Best Reheating Method
To revive leftovers, preheat a skillet with a thin layer of oil over medium heat. Add a splash of water (about a teaspoon) and cover for 2 minutes; the steam will melt the cheese while the oil restores the crisp. Avoid microwaving—it makes the wrapper rubbery.