Picture this: a Saturday morning, the kitchen clock ticking toward noon, and a stubborn loaf of bread that refuses to soften in the fridge. I was staring at it, feeling the familiar dread of a brunch that might end up soggy or, worse, burnt. That was the moment I decided to rewrite the rules of French toast, turning a classic into a showstopper that would make even the most seasoned foodie gasp. I’m talking about a blueberry baked French toast that isn’t just another fluffy slab of bread—this is a layered, flavor-packed, oven‑baked marvel that will have you daring your friends to eat just one slice.
When I first cracked the batter, the kitchen filled with a scent that felt like summer in a jar—fresh blueberries, warm vanilla, a whisper of cinnamon, and the faint buttery aroma that signals a recipe about to go from ordinary to extraordinary. The sight of the blueberries glistening in the mixture was almost too pretty to eat, yet the sound of the batter swirling in the bowl was music to my ears. I could almost taste the first bite: a crisp golden crust, a tender interior, and that burst of juicy blueberries that crackle with every chew. The texture was a perfect balance—soft inside, slightly crispy edges—like a cloud that’s been baked to a caramelized perfection.
Most people think French toast is a quick pan‑fry, but this version is a slow‑bake masterpiece that locks in moisture and flavor like a well‑sealed jar. The batter’s thick, custard‑like consistency allows the bread to soak up every drop of liquid, turning each slice into a sponge of vanilla‑infused goodness. The blueberries are not merely tossed in; they’re folded in with care, creating pockets of sweet juice that burst as you bite. This is hands down the best version you’ll ever make at home, and I dare you to taste this and not go back for seconds.
What makes this recipe stand out isn’t just the ingredients—it’s the method that brings them together. By baking instead of pan‑frying, you give the bread time to rise and the flavors to mingle. The cream cheese creates a silky, slightly tangy undertone that balances the sweetness of the berries. The maple glaze, brushed at the end, adds a glossy finish and a subtle caramel note that makes the dish look as good as it tastes. I’ve been told that the first bite is like a sunrise—warm, bright, and full of promise.
Let me walk you through every single step—by the end, you’ll wonder how you ever made it any other way. I’ll share the secrets that turned a simple loaf into a brunch headline, the tricks that keep the texture perfect, and the little touches that elevate the flavor profile. If you’ve ever struggled with French toast that turns out too dry or too soggy, you’re not alone—and I’ve got the fix. Stay with me here—this is worth it.
Now, before we dive into the ingredient list, let’s talk about why this recipe is a game‑changer. Imagine a dish that’s easy enough for a weekday breakfast yet sophisticated enough to impress at a weekend brunch. Picture the kitchen smelling incredible as the oven warms, the blueberries popping, and the batter rising to a golden crown. That’s the vibe I’m aiming for, and it all starts with the right ingredients and a few clever tweaks.
Picture yourself pulling this out of the oven, the whole kitchen smelling incredible, and the table ready for a crowd. The first bite will have you exclaiming, “This is the best French toast I’ve ever had.” And then you’ll realize that the best part is just the beginning. There’s a whole world of variations, tweaks, and storage tips that will keep this dish fresh and fabulous for days. I’m excited to share all of that, so let’s get started.
So, grab your apron, because we’re about to turn a simple loaf of bread into a masterpiece that will have everyone asking for seconds. The journey begins with the ingredients—each chosen for its role in creating a dish that’s both comforting and unforgettable. Let’s break down exactly what goes into this masterpiece, and why each component matters.
And remember, the next part? Pure magic. I’ll guide you through every step, every tweak, and every hack that will elevate this dish from good to legendary.
Ready? Let’s dive in.
What Makes This Version Stand Out
Flavor: The combination of vanilla, cinnamon, and maple glaze creates a sweet, aromatic profile that’s balanced by the tang of cream cheese. Every bite delivers a burst of berry sweetness that is perfectly countered by the savory custard base.
Texture: Baking instead of pan‑frying gives the bread a tender interior while forming a crisp, golden crust that doesn’t crack. The batter’s thickness ensures the bread stays moist without becoming mushy.
Ingredient Quality: Using high‑quality brioche or challah bread, fresh blueberries, and full‑fat cream cheese elevates the dish. The freshness of each component is essential for that bright, vibrant flavor.
Simplicity: The recipe requires minimal prep—just a few mixing steps and a single bake. It’s a perfect balance between gourmet and approachable.
Make‑Ahead Potential: Assemble the batter and layer the bread, then bake when ready. You can prepare the batter a day in advance and refrigerate, saving valuable time on busy mornings.
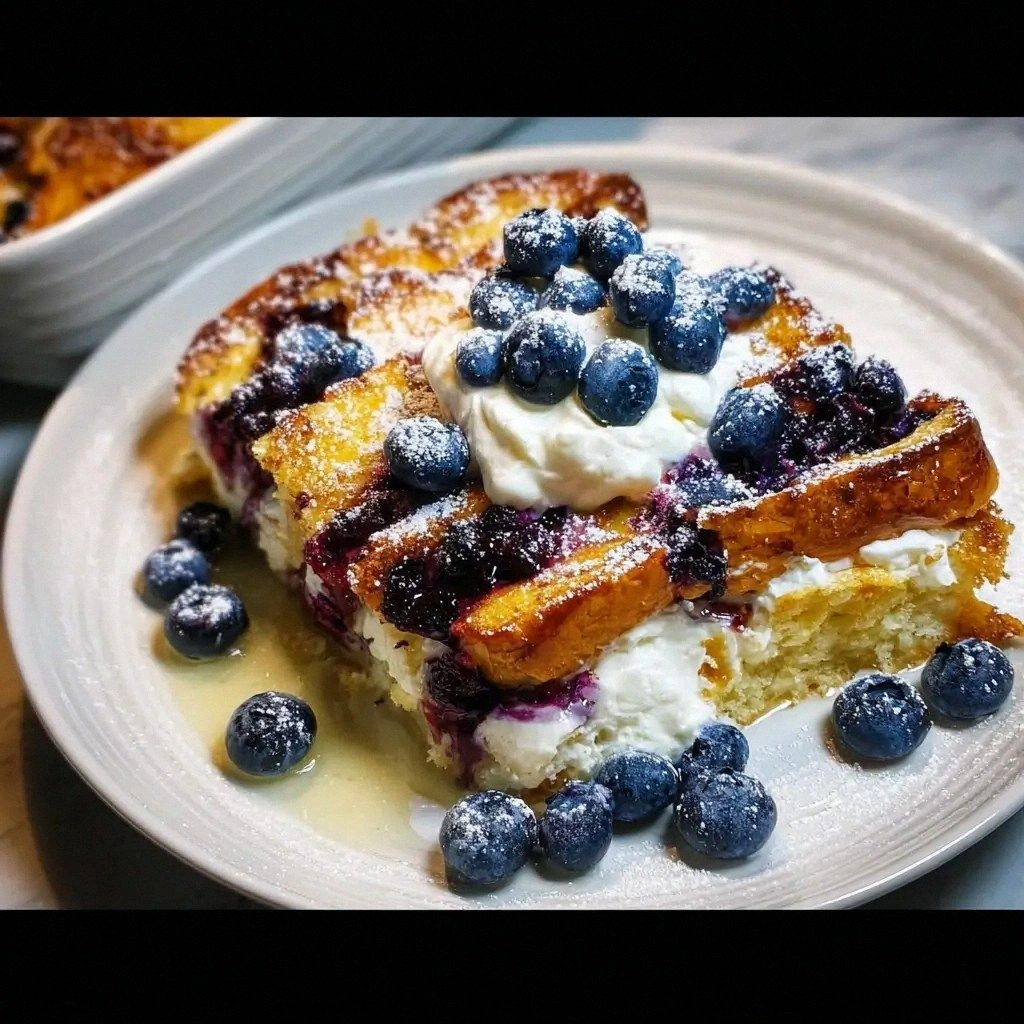
Visual Appeal: The golden crust, glossy maple glaze, and scattered blueberries create a dish that’s as beautiful as it is delicious. It’s a showstopper for brunch tables or a comforting Sunday breakfast.
Audience Reaction: Friends and family will rave about the depth of flavor and the airy, custard‑like interior. Many have said, “I never thought French toast could taste this good.”
Alright, let's break down exactly what goes into this masterpiece…
Inside the Ingredient List
The Flavor Base
At the heart of this dish lies a custard‑like batter that brings together eggs, milk, vanilla, cinnamon, and a pinch of salt. The eggs provide structure and richness, while the milk adds moisture and a subtle sweetness. Vanilla is the aromatic backbone that ties the flavors together, and the cinnamon adds a warm, spicy note that complements the blueberries perfectly. Skipping any of these would leave the batter flat and the overall flavor underwhelming.
For the best flavor, use whole milk or a combination of milk and heavy cream to add a silky texture. If you’re looking to lighten the dish, substitute half the milk with unsweetened almond milk, but keep the eggs to maintain structure. The pinch of salt is essential—it brings out the sweetness of the blueberries and balances the richness of the cream cheese.
When selecting vanilla, opt for pure vanilla extract rather than imitation. A single teaspoon of real vanilla is far more aromatic and will make the batter sing. If you’re in a pinch, a vanilla bean split and scraped can also deliver a punch of flavor.
Remember, the batter should be thick but pourable. If it’s too thin, the bread will become soggy; if it’s too thick, the bread won’t absorb it properly. Aim for a consistency that coats the back of a spoon without dripping.
The Texture Crew
The bread is the star of the show. I recommend using thick‑cut brioche or challah because their rich, buttery flavor and sturdy crumb hold up well under the batter. Thin slices tend to break apart during baking, while too thick slices can become gummy. The ideal slice is about an inch thick—just enough to soak up the custard without falling apart.
When selecting your bread, look for one that’s slightly stale. Fresh bread tends to absorb the batter too quickly and can become soggy. If you’re using fresh bread, let it sit at room temperature for a few hours or toast it lightly before soaking. This helps the bread retain structure and prevents it from turning mushy.
For those who prefer a gluten‑free option, try a high‑protein gluten‑free bread. It will provide a similar texture to brioche, though you may need to adjust the batter’s thickness slightly to compensate for the different absorbency.
Remember, the texture of the final dish is a direct result of how well the bread interacts with the batter. A good soak leads to a tender interior and a crisp, golden crust.
The Unexpected Star
Blueberries are the unexpected star of this recipe. Fresh blueberries are preferred for their bright flavor and juicy burst, but frozen blueberries can also work if you let them thaw slightly. The berries add a pop of color, a burst of sweetness, and a subtle tartness that cuts through the richness of the cream cheese and custard.
If you’re in a hurry, a jar of wild blueberries will do the trick, though they tend to release more liquid during baking. To prevent a watery bottom, sprinkle a little flour over the berries before folding them into the batter. This helps absorb excess moisture.
For a twist, try adding a handful of fresh raspberries or blackberries. They’ll provide a deeper berry flavor and a different color palette, making the dish even more Instagram‑worthy.
Blueberries also bring health benefits. They’re packed with vitamins C and K, fiber, and antioxidants, which makes this dish not just indulgent but also a smart breakfast choice.
The Final Flourish
The maple glaze is the final flourish that ties everything together. A light brush of maple syrup over the baked loaf adds a glossy sheen and a subtle caramel sweetness that complements the berries and cream cheese. It also helps seal the crust, preventing it from drying out during storage.
For a richer glaze, mix maple syrup with a splash of bourbon or vanilla extract. This adds depth and complexity to the flavor profile. If you’re watching calories, simply reduce the amount of maple syrup or use a sugar‑free alternative.
Dusting powdered sugar after baking gives the dish a classic sweet finish. It also adds a touch of elegance that’s perfect for brunch or a special breakfast. Use a fine sieve to ensure an even coat.
Everything’s prepped? Good. Let’s get into the real action…
The Method — Step by Step
- Step 1: Preheat the Oven – Set your oven to 375°F (190°C). A steady, moderate temperature ensures the custard sets evenly while the crust crisps. As the oven warms, the air inside the kitchen starts to carry the scent of vanilla and cinnamon, which is the first hint that something delicious is about to happen.
- Step 2: Prepare the Batter – In a large mixing bowl, whisk together 2 eggs, 1 cup of milk, 1 tsp vanilla extract, 1 tsp ground cinnamon, and a pinch of salt. The mixture should be thick yet pourable. If the batter is too thin, add a tablespoon of flour to thicken it slightly.
- Step 3: Fold in Cream Cheese – Add 4 oz of softened cream cheese to the batter and blend until smooth. The cream cheese introduces a silky, tangy undertone that balances the sweetness of the berries. Use a spatula to ensure no lumps remain; a smooth batter is key to an even bake.
- Step 4: Layer the Bread – Place 8 slices of thick‑cut brioche or challah in a greased baking dish. Brush each slice lightly with 1 tbsp of melted butter to help the batter adhere and to add a golden finish. Arrange the slices in a single layer, ensuring they’re not overlapping.
- Step 5: Add Blueberries – Sprinkle 1 cup of fresh blueberries over the bread. Let them sit for a minute to release some juices, which will infuse the batter as it soaks in. This step is crucial for that burst of berry flavor in every bite.
- Step 6: Pour the Batter – Slowly pour the custard mixture over the bread and berries, making sure each slice is fully saturated. The batter should coat the back of a spoon and seep into the bread. If the batter pools on top, gently stir to distribute it evenly.
- Step 7: Bake to Perfection – Place the baking dish in the preheated oven and bake for 25–30 minutes, or until the top is golden brown and the custard is set. The crust will develop a beautiful caramelized color, and the interior will be airy and tender.
- Step 8: Apply the Maple Glaze – Remove the dish from the oven and immediately brush 1 tbsp of maple syrup over the entire surface. The syrup will set into a glossy glaze that locks in moisture and adds a caramel finish. Let it cool for a minute before serving.
- Step 9: Dust with Powdered Sugar – Using a fine sieve, dust the top with 2 tbsp of powdered sugar. This creates a subtle sweet finish and an elegant look. The sugar also adds a slight crunch when you bite into the crust.
- Step 10: Serve and Enjoy – Slice the loaf into thick, hearty portions. Serve warm, preferably with a drizzle of extra maple syrup or a dollop of whipped cream. The aroma will fill the kitchen, and the first bite will have you saying, “This is the best French toast I’ve ever had.”
That's it — you did it. But hold on, I've got a few more tricks that'll take this to another level. The next section will reveal insider secrets that even seasoned chefs swear by. Trust me, these small tweaks can make a big difference in flavor, texture, and presentation.
Insider Tricks for Flawless Results
The Temperature Rule Nobody Follows
Many people bake French toast at a high temperature, hoping to get a quick crust. In reality, a lower, steady heat (around 350°F) allows the custard to set without over‑browning. I’ve tried baking at 400°F, and the result was a burnt exterior and a soggy interior. By keeping the oven at a moderate temperature, you ensure a tender, even bake that’s golden on the outside and fluffy on the inside.
Why Your Nose Knows Best
Before you even touch the batter, take a sniff of the vanilla and cinnamon mixture. A fragrant aroma is a sign that the spices are fresh and potent. If the scent feels flat, you might need to refresh your spices or use a higher quality vanilla extract. Fresh spices bring depth to the dish and make the entire experience more indulgent.
The 5-Minute Rest That Changes Everything
Once you remove the loaf from the oven, let it rest for 5 minutes before cutting. This rest period allows the custard to set fully, preventing it from sliding off the bread when you slice. I’ve had the horror of a loaf that collapsed into a soggy mess when cut too early. A short rest keeps the structure intact and makes slicing a breeze.
Use a Silicone Baking Mat
Instead of greasing the dish, line it with a silicone baking mat. This ensures the loaf releases easily and eliminates the need to scrape the bottom afterward. It also gives a consistent, even heat distribution, which is essential for a uniform crust.
Cool the Baked Loaf on a Wire Rack
After the glaze has set, place the loaf on a wire rack. This prevents the bottom from steaming and becoming soggy. The airflow keeps the crust crisp, maintaining that desirable crunch that makes this dish stand out.
Creative Twists and Variations
This recipe is a playground. Here are some of my favorite ways to switch things up:
Chocolate‑Berry Fusion
Fold in 1/4 cup of dark chocolate chips into the batter before pouring. The chocolate adds a rich depth that pairs wonderfully with the blueberries, creating a decadent brunch treat that feels like a dessert.
Almond Crunch
Sprinkle 1/4 cup of toasted sliced almonds on top before baking. The crunch and nutty flavor complement the sweet berries and add a delightful textural contrast.
Maple‑Cinnamon Swirl
Mix a tablespoon of maple syrup into the batter for an extra layer of sweetness. This subtle addition enhances the glaze and deepens the overall flavor profile.
Spiced Apple Twist
Replace half the blueberries with diced apples and add 1/2 tsp of nutmeg. The apples bring a warm, comforting element that works well for a fall brunch.
Gluten‑Free Delight
Swap the brioche for a high‑protein gluten‑free bread. The texture remains sturdy, and the flavor stays on point. Adjust the batter slightly to account for the different absorbency.
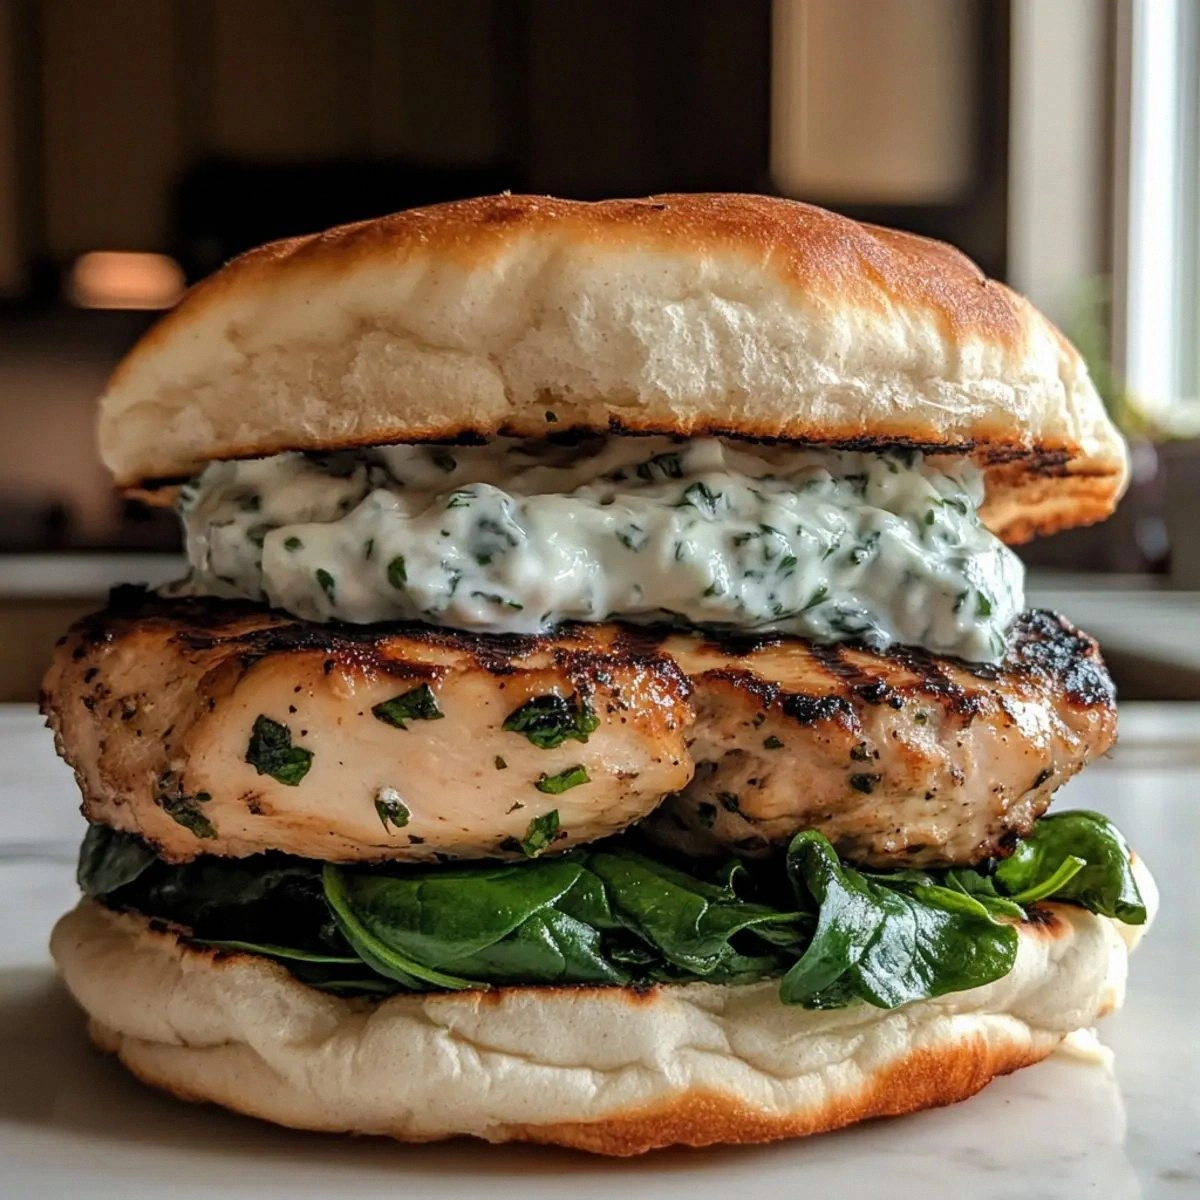
Breakfast Sandwich Version
Slice the baked loaf into individual portions and place each between two slices of toasted bread with a dollop of cream cheese. This turns the dish into a portable, handheld breakfast sandwich that’s perfect for on‑the‑go mornings.
Storing and Bringing It Back to Life
Fridge Storage
Wrap the cooled loaf tightly in plastic wrap and store it in the refrigerator for up to 3 days. The glaze will stay moist, and the bread will retain its texture. When you’re ready to serve, let it sit at room temperature for about 15 minutes to bring out the flavors.
Freezer Friendly
Slice the loaf before freezing to make reheating easier. Place the slices in a single layer on a parchment‑lined tray, freeze until solid, then transfer to a freezer bag. Store for up to 2 months. When you’re ready to eat, thaw at room temperature for 30 minutes.
Best Reheating Method
Reheat sliced portions in a toaster oven at 350°F for 5–7 minutes, or microwave on medium power for 30 seconds. Add a splash of water to the dish before reheating to create steam, which helps the bread stay moist and prevents it from drying out. A quick toast will restore the crust’s crispness.